
Camping Crafts Preschoolers Can Build, Paint and Pretend With
Choose from 10 preschool camping crafts, including a paper campsite, lantern, map and nature prints, with adaptations and safety checks.
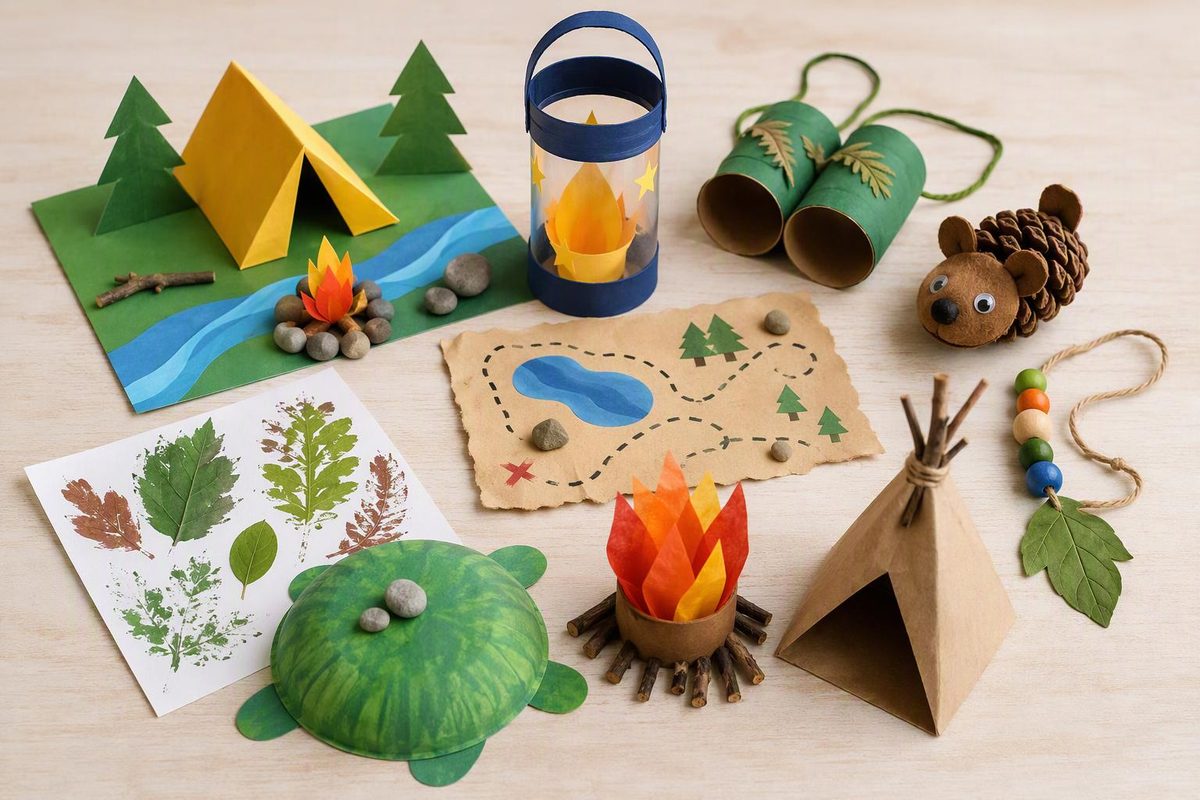
Camping crafts can turn paper, paint and recycled cardboard into a tent, trail map or pretend campfire. The strongest choices leave room for children to decide what their campsite looks like rather than asking everyone to copy one adult-made model.
That approach fits NAEYC’s guidance on process-focused art: children explore tools and materials without one right result while using planning, problem-solving and small-motor movements. NAEYC also recommends noticing and commenting on what children do rather than correcting their work. Read its guidance on process-focused art.
Choose a craft for the time and materials you have
| Camping craft | Main materials | Adult prep | Relative mess | Play or learning opportunity |
|---|---|---|---|---|
| Campsite collage | Paper, glue, paper shapes | Low | Low | Position words, storytelling |
| Paper campfire | Cardboard, tissue paper | Low | Low | Color, tearing, pretend play |
| Cardboard lantern | Cardboard tube, paper | Medium | Low | Design, dramatic play |
| Trail map | Paper, crayons, stickers | Low | Low | Symbols, routes, spatial language |
| Pretend binoculars | Two cardboard tubes, tape | Medium | Low | Observation, descriptive language |
| Nature texture prints | Leaves, paper, crayons | Low | Low | Texture and comparison |
| Painted tent | Sponge shapes, paint | Medium | Medium | Shape composition, printing |
| Sleeping-bag portrait | Paper, crayons, fabric scraps | Low | Low | Self-expression, body vocabulary |
| Animal-track stamps | Sponges, washable paint | Medium | Medium | Patterning and comparison |
| Camp sign studio | Cardboard, markers | Low | Low | Meaningful marks and early writing |
1. Build a paper campsite collage
This is a flexible place to begin because one set of materials can become a tent, trees, a trail and anything else a child imagines.
Materials
- Large sheet of construction paper or lightweight cardboard
- Large paper triangles, rectangles and strips
- Washable glue stick or school glue
- Crayons or washable markers
- Optional: tissue paper, fabric pieces and child-safe scissors
Set up: Put the shapes in shallow trays. If children need help understanding the invitation, briefly arrange a few shapes into a campsite, then mix them up again so the example does not become a model everyone is expected to copy.
Make it: Invite each child to arrange the pieces before gluing. A triangle might become a tent, mountain or tree. Ask, “Where could the path go?” or “What would you bring to this campsite?” Children can add people, animals or weather with crayons once the pieces are in place.
Skill opportunity: Picking up, turning and gluing pieces invites hand control. Arranging objects above, beside or inside a tent introduces spatial language. Talking about the picture supports storytelling.
Simplify: Offer three large shapes and a glue stick. An adult can hold the base paper steady.
Extend: Let children dictate labels for a shared campsite map or add a route from the tent to the water, trees or picnic area.
2. Tear and layer a paper campfire
Cut a brown cardboard circle for the base. Children glue on wide brown paper strips as logs, then tear red, orange and yellow tissue paper for flames. Scrunching, tearing and layering are the child’s work; the flames do not need to form a neat pattern.
Use the finished fire for songs or storytelling, but keep it clearly pretend. Do not add a candle, match or other real flame.
Simplify: Pre-tear large tissue pieces.
Extend: Count paper logs or compare which flames are short, tall, wide or narrow.
3. Make a cardboard camping lantern
Tape a paper handle securely to a sturdy cardboard tube. Children can cover the tube with foil, paper, paint or camping pictures. Tape translucent yellow tissue paper over one end if desired.
Keep this a simple pretend-play prop without bulbs, wires or batteries. Children can carry it on an imaginary nighttime walk around a well-lit room.
Simplify: Prepare the tube and handle, then offer large stickers or paper pieces for decorating.
Extend: Dim the room slightly and invite children to describe what they pretend to notice, while keeping the space bright enough for everyone to move safely.
4. Draw a trail map
Place a toy tent, tree and animal on the table as possible landmarks. Children draw a route on a large sheet of paper using lines, dots, arrows or invented symbols. Their marks do not need to resemble a conventional map.
Ask each mapmaker to guide a finger or toy figure along the trail. Useful prompts include, “Where do we begin?” and “What comes after the bridge?”
Simplify: Draw one wide path for the child to trace, or provide two picture landmarks to connect.
Extend: Add a map key with child-created symbols for a tent, water, trees and the trail.
5. Make pretend binoculars
Place two short cardboard tubes side by side and have an adult secure them with wide tape. Children decorate the outside, then use the binoculars for an indoor picture hunt or supervised outdoor observation.
Do not attach a cord that could go around a child’s neck. The tubes work without one.
Simplify: Use one wide tube as a pretend telescope.
Extend: Ask children to draw one thing they noticed, then compare near, far, high and low observations.
6. Create nature texture prints
Collect broad, dry leaves with an adult, or use leaves that have already been inspected. Put a leaf vein-side up beneath thin paper and rub the side of an unwrapped crayon across the page. Children can overlap several rubbings to make a forest floor.
For a painted version, brush a thin layer of washable paint onto a leaf and press it onto paper. Start with only a few choices. Head Start recommends introducing open-ended loose parts gradually and checking them for mouthing risks, choking hazards and rough edges. It also suggests using trays to contain materials and sorting parts by features such as shape or size. See Head Start’s loose-parts guidance.
Simplify: Tape the paper in place and offer chunky crayons.
Extend: Sort leaves by edge, size or texture before printing.
7. Print a shape tent
An adult cuts large triangular and rectangular printing tools from clean kitchen sponges. Children dip them lightly in washable paint and combine the prints to invent tents, cabins or mountains. Add crayon details after the paint dries.
Simplify: Offer one sponge shape and one paint color.
Extend: Invite children to use both a triangle and a rectangle, then explain how the shapes fit into their picture.
8. Design a sleeping-bag portrait
Fold a large sheet of paper in half like a sleeping bag. Children draw a face near the top and decorate the cover with stripes, dots, camping pictures or glued fabric scraps. Open the fold to add pajamas, a favorite stuffed animal or something the camper might dream about.
Simplify: Provide a face-sized paper circle to glue above a decorated rectangle.
Extend: Invite the child to dictate a bedtime sentence: “In my tent, I would hear …”
9. Stamp an animal-track trail
An adult cuts simple paw, hoof or bird-track shapes from sponges. Children stamp washable paint across long strips of paper, making trails that curve, cross or stop at a pretend campsite.
Avoid turning the activity into a test of exact wildlife identification. Instead, compare the marks: Which are close together? Which trail changes direction? What animal could have made an imaginary track?
Simplify: Use one large stamp and a shallow paint tray.
Extend: Make an AB pattern with two tracks or measure a trail with blocks.
10. Open a camp sign studio
Offer pieces of cardboard with blunt corners, broad markers and tape. Children can create signs for a tent, picnic table, trail, quiet area or imaginary campground. Accept drawings, letter-like forms and dictated words as meaningful communication.
Tape the signs around a block-built campsite or dramatic-play area. This gives the craft a purpose beyond display and lets children return to it during play.
Simplify: Let a child choose between two picture symbols to attach to a sign.
Extend: Compare signs from familiar places and ask what colors, pictures or marks help people understand them.
Safety and setup checks
- Choose washable art materials labeled for children, read the directions and clean skin, tools and work surfaces after use. Keep products in their original containers, and do not eat or drink at the craft table. Poison Control identifies products with the ACMI AP seal as the best ACMI-certified choice for young children. Review its art-material safety guidance.
- Match every loose part to the children participating. Remove small items when a child mouths materials or when younger siblings share the space. The CPSC defines a small part as an object that fits completely inside its small-parts cylinder; the federal small-parts ban is intended to protect children under three. For preschoolers, individual behavior and close supervision still matter. Read the CPSC small-parts explanation.
- Inspect cardboard for hidden staples and sharp edges. Check natural materials for splinters, mold, insects and animal droppings. Leave mushrooms, berries and plants an adult cannot identify outdoors.
- If children gather materials outside, plan for the weather, sun and insects. The CDC advises early-childhood programs to watch for ticks around tall grass and brush and to check clothing and gear frequently. See the CDC’s outdoor-play safety guidance.
- Offer a paper-only route for children who do not want to touch leaves, paint or glue. Tools, gloves and trays can make the same invitation easier to join.
For a longer camping theme, combine one craft with pretend tent play, songs or a nature walk. These flexible summer camp activities for preschoolers include more options for children who prefer observing to touching or making.