
Hands-On Ways to Explore F Through Art, Sound, and Play
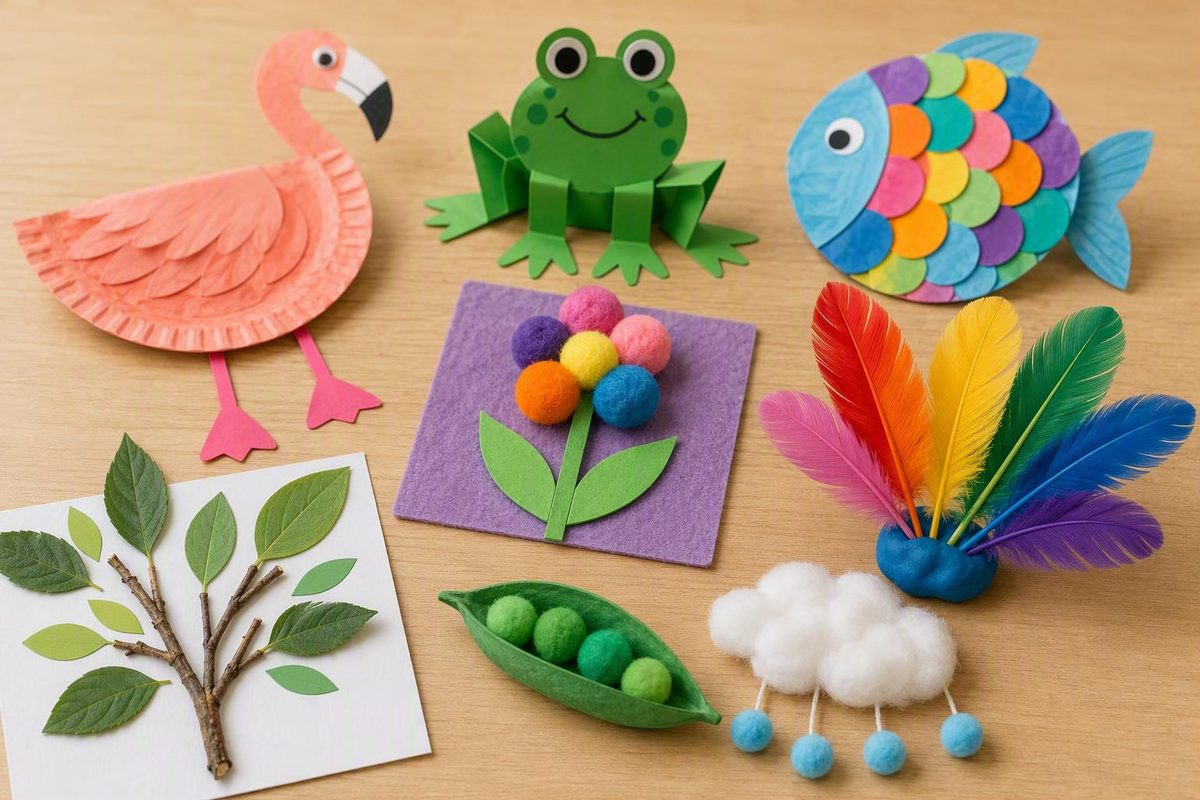
Letter F projects for preschoolers are most useful when children do meaningful work and adults keep the literacy connection clear. The goal is not merely to make a fish, frog, or flower. It is to help children notice uppercase F, lowercase f, and the initial /f/ sound while they stamp, arrange, paint, build, sort, or pretend.
The 14 printer-optional ideas below include direct letter projects, recognition games, sound sorting, themed art, and pretend play. Crafts can reinforce an introduction to the letter name, form, and sound, but they should not be treated as a proven replacement for direct teaching—or as proof that a child has mastered F.
Jump to: project guide · letter-shaped projects · recognition and sound activities · themed art and play · adaptations · safety checklist · five-day plan · FAQ
Editorial method: These projects were synthesized from the supplied activity sources and revised to emphasize child participation, explicit letter-and-sound prompts, practical substitutions, and conservative material handling. They are not represented here as a tested curriculum or as projects tested with every child or classroom setting.
Choose a Letter F Project That Fits Your Setting
Use this table to match an activity to your supplies and immediate learning goal. “Adult setup” means that cutting, drawing, sorting materials, or preparing a stamp may need to happen before the child begins.
| Project | Main literacy purpose | Printer required? | Paint? | Drying? | Small pieces in the core activity? | Reused or reusable material | Adult cutting or setup? |
|---|---|---|---|---|---|---|---|
| 1. Fork-stamped F | Displays uppercase F; connects fork with /f/ | No—draw F | Yes | Yes | No | None required | Draw F; set out paint |
| 2. Foil F | Constructs uppercase F; connects foil with /f/ | No—cut or build F | No | No | No—use broad foil sections | Reused cardboard | Adult cuts F and prepares foil |
| 3. Torn-paper fire F | Decorates uppercase F; connects fire with /f/ | No—draw F | No | Glue-dependent | No—use broad paper pieces | Scrap paper | Draw F; optionally prepare paper |
| 4. Feather F | Decorates uppercase F; connects feather with /f/ | No—draw or cut F | No | Glue-dependent | No—use large feathers or paper shapes | Cardboard base | Cut base or paper feathers |
| 5. Felt flamingo F | Keeps uppercase F visible; connects felt and flamingo with /f/ | No—draw F | No | Glue-dependent | No—use large pre-cut shapes | Felt can be arranged before gluing | Detailed adult cutting |
| 6. Hidden-F watercolor | Recognizes uppercase F and lowercase f | No—handwrite both | Yes | Yes | No | White crayon is reusable | Write hidden letters |
| 7. Dough F formation | Forms uppercase F and lowercase f | No—handwrite models | No | No | No—use one manageable dough portion | Dough may be reusable if stored as directed | Prepare models and dough |
| 8. Find-and-cover F | Distinguishes F and f from other letters | No—handwrite field | No | No | No—use large paper squares | Paper covers or whiteboard can be reused | Write target and distractor letters |
| 9. F-word picture collage | Practices listening for initial /f/ | No—draw pictures | No | Glue-dependent | No—prepare large picture pieces | Magazines or scrap paper | Select and cut pictures |
| 10. Flower printing | F-themed art; connects flower with /f/ | No | Yes | Yes | No | Cardboard roll | Adult prepares stamp |
| 11. Fingerprint fish | F-themed art; connects fish with /f/ | No | Yes | Yes | No | Scrap-paper or cardboard base | Draw or cut fish |
| 12. Frog paper-bag puppet | Connects frog with /f/ through oral play | No | Optional | Glue-dependent | No—use broad facial features | Paper bag | Cut large features |
| 13. Family-features portrait | Connects family and features with /f/ | No | Optional | Paint-dependent | No | Scrap drawing paper | Prepare optional photo or mirror |
| 14. Recycled-cardboard fish | F-themed art with an F/f display | No | Optional | Paint- or glue-dependent | No unless optional decorations are added | Recycled cardboard | Adult cuts fish |
Printer-free standouts: Fork-stamped F, torn-paper fire F, hidden-F watercolor, dough formation, find-and-cover F, family portraits, and recycled-cardboard fish can all begin with a hand-drawn letter or shape. No commercial template is necessary.
Fish, fire, flowers, frogs, feathers, foil, family, and flamingos recur across the reviewed preschool activity collections. That repetition shows that the themes are commonly used and straightforward to connect with F; it does not establish that one teaches the letter better than another. ABCmouse’s collection illustrates the mix of letter-shaped crafts and projects based on F words.
For direct attention to written forms, choose projects 1–8. For listening to the beginning sound, choose project 9 or add the three-part literacy prompt below to projects 10–14. For creative art or pretend play, select from the final five projects, but display F f so the alphabet purpose remains visible.
Teach the Letter and Sound Before the Craft Starts
Introduce the literacy target before distributing paint, foil, feathers, or glue. This is a practical sequencing choice: it ensures children hear the letter prompt before the materials become the focus of the activity.
Show a large uppercase F and lowercase f. Name the letter, then model its common initial sound: /f/. Use a few familiar examples—fish, fire, foot, frog, feather, and flower—without asking children to memorize a long vocabulary list.
Use the same three-part prompt throughout every project:
- Point to or form F.
- Say /f/.
- Name the project’s F word.
For example: “This is uppercase F. F says /f/ at the beginning of fish. Can you point to F and say fish with me?”
There is an important difference between constructing or decorating the written letter and making a picture whose name begins with F. A foil-covered F keeps the letter form visible throughout the work. A fish picture does not. It becomes explicit alphabet practice when an adult places F f beside it, models the first sound in fish, and invites the child to identify or repeat that sound.
Treat art as reinforcement alongside direct teaching rather than as a substitute for naming, displaying, and discussing the letter. Reach All Readers similarly presents craft as an opportunity for language and early-literacy experiences while stating the publisher’s preference for direct instruction in letter names and sounds. The supplied article does not identify the underlying study evidence for that position, so it should be read as the publisher’s stated teaching approach rather than as proof about these specific projects. Read its letter F overview.
Corrections can be brief and neutral. If a child points to another letter, say, “This is F,” show the model again, and trace its vertical and horizontal lines in the air. Then invite another try. If the child’s dough letter or collage does not match the model precisely, keep the artwork intact; the literacy prompt does not require uniform finished products.
Five Projects Built Directly on the Shape of F
These projects keep a large written F at the center of the activity. Include a lowercase f model beside the workspace even when the main craft uses uppercase F.
The project boundaries below apply Health Canada’s general advice to select products labeled for children’s use, follow label instructions, keep an attentive adult present, and account for cutting tools, mouthing, skin or eye contact, and cleanup.1
1. Fork-Stamped F
Materials: Sturdy paper, thick crayon or marker, shallow paint tray, washable paint labeled for children’s use, disposable fork, and uppercase and lowercase letter models.
Adult preparation: Draw a large uppercase F. Pour a limited amount of paint into the tray and designate the fork as an art tool.
Child-led steps:
- Point to the large F and follow its lines with a finger in the air above the page.
- Dip the fork lightly into paint.
- Stamp inside the F or along its lines.
- Add more prints until the child decides the letter is finished.
Literacy prompt: “Find F. Say /f/. Fork begins with /f/. What sound do you hear first in fork?”
Printer-free option: Hand-draw the F with a wide marker or make a bubble outline from straight lines.
Substitution: Use the flat edge of a broad cardboard strip as a stamp.
Project boundary: An adult remains beside the child, keeps the fork on the work surface, and puts it away when stamping ends. Follow the paint label and wash hands after the activity.1
2. Foil F
Materials: Corrugated cardboard, marker, aluminum foil, and glue labeled for children’s use if needed.
Adult preparation: Draw and cut a sturdy uppercase F. Prepare broad foil sections that are flat or lightly crumpled. As a conservative setup precaution, remove any torn section with an edge you do not want children handling.
Child-led steps:
- Point to the cardboard F and compare it with a lowercase f model.
- Place, wrap, or press foil over each part of the letter.
- Smooth the foil with the palm or fingertips.
- Decide whether to leave the surface smooth or add gentle texture.
Literacy prompt: “This is F. F says /f/. Foil begins with /f/. Can you say foil slowly with me?”
Printer-free option: Build the F from one long and two short cardboard rectangles instead of cutting a single template.
Substitution: Use silver-colored paper or broad pieces of reused gift wrap.
Project boundary: The adult handles the cardboard and foil cutting, inspects the prepared materials, and removes damaged pieces during the activity.1
3. Torn-Paper Fire F
Materials: Paper, marker or white crayon, red, orange, and yellow paper, and glue labeled for children’s use.
Adult preparation: Draw a large bubble F. Set out scrap paper in flame colors. If tearing is a barrier, prepare broad pieces in advance.
Child-led steps:
- Find the F outline.
- Tear or select paper pieces.
- Arrange them on the F before gluing.
- Attach the pieces as imaginary flames, leaving enough of the outline visible to identify the letter.
Literacy prompt: “Point to F. Say /f/. Fire begins with /f/. Can you hear /f/ at the start of fire?”
Printer-free option: Draw the bubble letter directly on dark paper.
Substitution: Use broad tissue-paper pieces, crayon strokes, or strips cut by an adult.
Project boundary: Provide only the amount of glue needed for the page, keep the container with the adult when it is not in use, and follow its label instructions.1
4. Feather F
Materials: Cardboard or construction paper, large craft feathers or paper feather shapes, crayons, and glue labeled for children’s use.
Adult preparation: Cut a large F if a sturdy base is wanted. Prepare oversized paper feathers as the main material or as an alternative to craft feathers.
Child-led steps:
- Locate the F and say its name.
- Choose feather colors or decorate paper feather shapes.
- Arrange the feathers over the letter.
- Attach them while keeping part of the F outline visible.
Literacy prompt: “F says /f/. Feather begins with /f/. Point to the F under the feathers.”
Printer-free option: Draw F on paper and invite the child to add hand-drawn feather lines instead of attaching pieces.
Substitution: Use large paper leaves, wide paper strips, or crayon textures. Paper feathers provide another texture and remove the need for loose craft feathers.
Project boundary: Use large materials that suit the children in the group. If a child mouths objects, use drawn details or broad paper shapes instead of loose feathers.1
5. Felt Flamingo F
Materials: Paper, marker, large pre-cut felt shapes, glue labeled for children’s use, and crayons.
Adult preparation: Draw a large uppercase F. Cut a broad curved head-and-neck shape, a wing, a beak, and long leg shapes. Detailed felt cutting remains an adult-prepared step.
Child-led steps:
- Identify the large F.
- Use the upright stroke of the F as part of the flamingo’s body or neck.
- Place the curved head near the top, the broad wing across the middle, and the leg shapes below the letter.
- Move the pieces until the child likes the arrangement.
- Glue the pieces down, then draw any omitted details.
This placement is only a starting point. The child may change the arrangement or produce a less literal bird while keeping the F visible.
Literacy prompt: “This letter is F. Felt and flamingo both begin with /f/. Can you point to F and say one of those words?”
Printer-free option: Draw the F and flamingo pieces freehand. Precision is unnecessary.
Substitution: Replace felt with large colored-paper shapes, or let the child color the F pink and draw the bird’s details.
Project boundary: Keep adult scissors and small offcuts out of the work area. Use broad shapes and drawn details rather than tiny detachable decorations.1
Four Projects for Finding, Forming, and Hearing F
These activities shift attention from decorating one uppercase letter to recognizing F and f, building both forms, and listening for /f/. Each ends with a brief observation that can guide the next practice—not a standardized assessment or declaration of mastery.
6. Hidden-F Watercolor
Materials: White paper, white crayon, watercolor, brush, and water.
Adult preparation: Write several uppercase Fs and lowercase fs in white crayon. Add a few non-letter lines if desired, but leave enough space to distinguish each symbol.
Child-led steps:
- Brush watercolor across the paper.
- Pause whenever a hidden form appears.
- Name it as uppercase F or lowercase f with adult support.
- Continue until the page is revealed.
Literacy prompt: “You found lowercase f. Both F and f are the same letter, and the letter can represent /f/ at the start of fish.”
Printer-free option: The hand-drawn crayon marks are the activity; no worksheet is needed. ABCDee Learning also describes revealing white-crayon Fs with watercolor.
Substitution: If watercolor is not suitable, write letters on cards and hide them beneath broad paper flaps.
Project boundary: Use paint labeled for children, set out a small amount of water in a stable container, supervise throughout, and follow label and cleanup directions.1
Observable check: Place one F, one f, and one other letter in view. Ask, “Can you point to an F?” Note what the child noticed so you know what to show again later.
7. Dough F Formation
Materials: Dough and clear uppercase F and lowercase f models.
Adult preparation: Handwrite both models on sturdy cards. Prepare a manageable portion of dough.
Child-led steps:
- Roll dough into long and short pieces.
- Place one long vertical piece and two shorter horizontal pieces to make F.
- Use another set of pieces to follow the lowercase f model.
- Compare the two forms without requiring handwriting.
Literacy prompt: “You formed uppercase F and lowercase f. They look different, but both are called F. Say /f/ and name an F word.”
Printer-free option: Write both models on index cards or scrap cardboard.
Substitution: Form the letters with thick yarn, broad paper strips, or large reusable craft sticks placed flat on a table.
Project boundary: Select and use dough according to its label, keep an adult present, and do not treat the craft material as food. Consider the listed ingredients when choosing a product for the group.1
Observable check: Mix the F and f model cards with one or two other letters. Ask the child to hand you either form of F.
8. Find-and-Cover F
Materials: Paper, marker, and large paper squares or other appropriately sized covers.
Adult preparation: Write a mixed field containing several uppercase Fs, lowercase fs, and a few visually different distractors. Avoid overcrowding the page.
Child-led steps:
- Look at the F and f models.
- Scan one row or area at a time.
- Place a paper square over each F or f.
- Remove the squares and repeat with another direction, such as “Cover only lowercase f.”
Literacy prompt: “Find F or f. Say the letter name, then say /f/.”
Printer-free option: Handwrite the entire field. A whiteboard can make the activity reusable.
Substitution: Circle letters with a thick crayon, point to them with a broad craft stick, or place large reusable paper flaps over them.
Project boundary: Use covers that are large enough for the children and setting. For children who mouth materials, use drawn circles or attached paper flaps rather than loose counters, buttons, or tokens.1
Observable check: Ask the child to distinguish F from one or two other letters. If the child guesses, reduce the field and model once more.
9. F-Word Picture Collage
Materials: A large paper F, drawn or magazine-cut pictures representing F and non-F words, glue, and crayons.
Adult preparation: Select pictures with familiar, easily named subjects. Include examples such as fish, foot, frog, feather, and flower, along with a few non-F pictures. Say the intended names yourself first because a picture may have more than one reasonable label.
Child-led steps:
- Choose a picture and name it with adult support.
- Listen to the first sound as the adult repeats the word slowly.
- Place pictures beginning with /f/ around the large F.
- Leave the non-F pictures off the collage.
Keep the task oral and visual. It does not depend on independent reading.
Literacy prompt: “Point to F. Say /f/. Does frog begin with /f/? Where should its picture go?”
Printer-free option: Draw simple picture cards. Alternatively, an adult can select suitable household objects, place them beside the F, and conduct the oral sort without glue.
Substitution: Use photographs from packaging or let children draw one F word instead of sorting multiple cards.
Project boundary: The adult cuts magazine pictures, removes staples or damaged paper, and provides broad pieces rather than small scraps.1
Observable check: Present one familiar F picture and one non-F picture. Name both and ask which begins with /f/. Use the response only to decide whether the child needs another model, fewer choices, or more practice.
Five F-Themed Art and Pretend-Play Projects
These projects depict words beginning with F, but they are not automatically letter lessons. To make the alphabet connection explicit, display F f, say /f/, and name the project word before, during, and after the art.
10. Flower Printing
Materials: Celery stalk base or cardboard roll, washable paint labeled for children’s use, paper, marker, and crayons.
Adult preparation: Use an appropriate cutting tool to prepare the celery base. For a cardboard-roll stamp, make short cuts in one end and bend the sections outward to suggest petals. The adult handles the cutting and initial stamp preparation.
Meaningful child contribution: The child chooses colors, makes the prints, decides where they go, and draws stems or leaves.
Steps:
- Display F and f.
- Dip the prepared stamp lightly into paint.
- Press flower prints across the paper.
- Draw stems and any additional details.
Literacy prompt: “Flower starts with /f/. Point to F or f, then say flower.”
Printer-free option: Write F and f beside the art by hand.
Substitution: Draw flowers with crayons or use an uncut cardboard tube to print circles, then add petals and stems with a crayon.
Project boundary: The adult controls the cutting tool. If celery is used for printing, designate it as an art material, keep it separate from food, and do not serve or eat it after paint contact.1
11. Fingerprint Fish
Materials: Large paper fish, washable paint labeled for children’s use, marker, and cleanup supplies.
Adult preparation: Draw or cut a broad fish shape and write F f beside it.
Meaningful child contribution: The child chooses paint colors and places fingerprint scales, fins, bubbles, or water marks.
Steps:
- Point to F and f.
- Say fish, emphasizing /f/.
- Add fingerprint scales across the fish.
- Wash and dry hands when the painting is complete.
Literacy prompt: “What sound starts fish? Can you find the F beside your fish?”
Printer-free option: Draw a large oval, tail, and fins freehand.
Substitution: Use a cotton swab, a sponge held in a clip, or crayon circles for a child who does not want paint on their fingers.
Project boundary: Follow the paint label, keep the amount of paint limited, pause for cleanup before the child touches their face or other materials, and wash hands afterward.1
12. Frog Paper-Bag Puppet
Materials: Paper bag, large paper facial features, crayons, glue, and marker.
Adult preparation: Cut large eyes, legs, or a tongue if the child is not doing the cutting. Small decorations are unnecessary.
Meaningful child contribution: The child colors the bag, places the facial features, draws details, and directs the puppet’s pretend play.
Steps:
- Display F and f and say frog.
- Color the bag.
- Arrange and attach broad paper features.
- Once the attached pieces are secure, use the puppet for a short F-word game.
The frog might say, “I found a feather,” or ask, “Does fish start like frog?” It can also find handwritten F cards placed around the room.
Literacy prompt: “Frog starts with /f/. Can your frog say an F word?”
Printer-free option: Draw all features directly on the bag.
Substitution: Use a folded sheet of paper as a simple hand puppet or draw a frog on cardboard.
Project boundary: Use drawn eyes or broad attached paper features instead of small plastic decorations. Check attached pieces before the puppet moves into pretend play.1
13. Family-Features Portrait
Materials: Paper, crayons or markers, optional paint labeled for children’s use, and an optional family photo or mirror.
Adult preparation: Invite the child to choose a photo, think of people important to them, or use a live model. Do not prescribe who belongs in a family or what a family should look like.
Meaningful child contribution: The child chooses whom to include and decides each person’s colors, features, clothing, position, and details.
Steps:
- Show F and f.
- Introduce family and features as words beginning with /f/.
- Draw one or more family members.
- Talk about visible features without evaluating whether the portrait is realistic.
Literacy prompt: “Family and features begin with /f/. Can you point to f and repeat one of those words?”
Printer-free option: This activity requires only blank paper.
Substitution: Draw a self-portrait, a person important to the child, or an imagined character if the child does not want to discuss family.
Project boundary: If using a mirror, choose one intended for the setting rather than bringing breakable glass into the workspace. Keep photographs away from paint and return them when the activity ends.1
14. Recycled-Cardboard Fish
Materials: Clean reused cardboard, crayons, chalk, washable paint labeled for children’s use, broad tissue-paper pieces, glue, and marker.
Adult preparation: Inspect the cardboard, remove tape or staples, draw a simple fish, and cut it out.
Meaningful child contribution: The child chooses the decorating medium, adds scales or patterns, draws facial details, and decides where the finished fish will be displayed.
Steps:
- Place an F and f model beside the fish.
- Decorate the cardboard with one or two chosen materials.
- Draw an eye and mouth rather than attaching tiny parts.
- Add uppercase F and lowercase f to the finished display.
Literacy prompt: “This is a fish. Fish begins with /f/. Show me F or f.”
Printer-free option: The adult draws directly on reused cardboard; no template is needed.
Substitution: Use a paper grocery-bag panel, cereal-box cardboard, or heavy scrap paper.
Project boundary: The adult handles thick-cardboard cutting and checks the prepared shape for staples, peeling coatings, or points that should be trimmed before it reaches the worktable.1
Small decorations are not needed in any of these five projects. Replace googly eyes, beans, buttons, sequins, or pom-poms with drawn details, large paper shapes, broad tissue-paper pieces, or no extra decoration. This guide also leaves food projects out of the core collection because the supplied activity sources do not provide consistent guidance on allergies, choking, hygiene, or utensil use.
Adapt the Projects Without Taking Over
Adapt according to the support a child needs in the moment rather than assigning a project to an unverified age band. The aim is access without turning the child’s artwork into adult assembly.
For cutting support: Pre-cut the letter base, fish, flamingo pieces, or puppet features. Leave meaningful choices and actions—tearing, arranging, coloring, stamping, placing, or gluing—to the child. If the child uses preschool scissors, offer broad strips or simple straight cuts rather than making the entire project depend on detailed cutting.
For glue control: Pour a small amount into a shallow container and offer a brush. An adult can also apply spaced glue marks while the child chooses and places every component. Use glue dots only when their size, package directions, and the child’s mouthing behavior make them suitable; otherwise use brushed or adult-applied liquid glue.1
For limited grasp or motor control: Enlarge the F, offer thicker crayons, use broad paper pieces, stabilize the page, and reduce the number of components. A child can place dough pieces over a model instead of drawing the letter.
For sensory preferences: Offer paper feathers instead of craft feathers, crayons instead of paint, a tool instead of finger painting, and dry arrangement instead of wet glue. A child may observe, stop, or choose another F project. Participation does not have to involve touching every material.
For children who mouth objects: Remove loose small components. Draw eyes and buttons, use broad paper pieces, and avoid beans, sequins, pom-poms, and similar decorations.1
To preserve choice: Let the child select colors, arrange pieces, decide whether to add details, or choose between two suitable materials. An accessible version should still include a meaningful decision or action owned by the child.
These are practical modifications, not clinically validated accommodations, and they will not fit every child. Families, educators, and specialists who know the child can help determine what additional support is appropriate.
Set Up a Safer Preschool Craft Space
Craft materials can present risks if swallowed or inhaled and may irritate skin or eyes. Young children may also put materials in their mouths. Health Canada advises adults to choose products labeled for children’s use, follow label directions, provide good air circulation, keep craft materials separate from food and drinks, supervise attentively, and wash hands afterward.1
Apply those general precautions to these projects:
- Sharp preparation tools: Adults handle utility knives, sturdy scissors, and tools used to cut thick cardboard, felt, celery, or cardboard-roll stamps.
- Preschool scissors: Monitor their use and store them when cutting ends.
- Foil: Prepare broad sections and remove damaged pieces as a conservative cut-prevention measure.
- Paint and glue: Offer limited quantities and follow the exact directions for each product.
- Loose objects: For children who mouth materials, replace loose small pieces with drawn details or broad paper forms.
- Labels and containers: Keep supplies in original containers when possible so directions and emergency information remain available.
- Adult-only products: Keep inadequately labeled paint, craft dyes, ceramic glazes, solvents, paint strippers, powdered paints or clays, and similar products out of children’s sight and reach.
- “Nontoxic” or child-labeled products: Use these labels to guide selection, but continue to follow the product directions. The label does not mean the product is harmless under every condition.
This guide excludes hot glue because the projects can be completed with glue intended for children’s crafts. It also excludes straw blow-painting because blowing liquid paint is unnecessary for exploring F and adds a material-handling variable that the featured projects do not require.
Before children begin, check:
- [ ] The work surface is protected and stable.
- [ ] Materials are labeled for children’s use and directions have been read.
- [ ] Air circulates through the room.
- [ ] Water, wipes, or other cleanup supplies are ready.
- [ ] Adult cutting tools and unused materials are out of reach.
- [ ] Loose components suit the children using the space.
- [ ] Food and drinks are stored away from craft materials.
- [ ] An attentive adult will remain in the room.
- [ ] Hands will be washed after the activity.
Turn the Projects Into a Five-Day Letter F Plan
This schedule is a flexible editorial example, not a tested or universally appropriate curriculum. It deliberately includes days without a major craft and favors short review over trying to complete all 14 ideas.
Day 1: Meet the letter
Display uppercase F and lowercase f. Name the letter and model /f/ with a few familiar words. Invite children to suggest words, accepting approximations while clearly repeating the intended initial sound. Complete one letter-shaped project, such as fork-stamped F.
End with: “Point to F. Say /f/. What did we use that begins with /f/?” The answer may be fork.
Day 2: Reveal and find
Use hidden-F watercolor to reveal several uppercase Fs and lowercase fs. Name each form as it appears. After cleanup, conduct a brief find-and-cover review with a small field of letters.
If a child searches randomly, reduce the number of distractors and place the F/f models directly beside the field.
Day 3: Listen for the first sound
Complete the F-word picture collage orally. Name every picture together, emphasize its first sound, and sort only the F words around the letter.
Then take a movement break based on an F word: children might pretend to jump like a frog. Keep the sound connection audible: “Frog begins with /f/.”
Day 4: Choose art or pretend play
Offer a choice between two suitable F-themed projects, such as flower printing and a frog puppet. Repeat the same prompt regardless of the choice: point to or form F, say /f/, and name the project word.
Choice does not require placing every material on the table. Present two prepared options that fit the available supervision, space, material labels, and cleanup plan.
Day 5: Revisit and review
Display completed work. Invite children to find F or f on the projects, then ask each child to name or repeat one F word. Demonstrate again when needed rather than turning the review into a performance.
Record three brief planning observations:
- Did the child notice or point to F when prompted?
- Did the child distinguish uppercase F from lowercase f when asked?
- Did the child produce or repeat /f/ or an F word?
These observations can identify the next useful demonstration. They do not justify labeling a child as having mastered F after one week, one craft, or one informal check.
Frequently Asked Questions
What are the simplest printer-free letter F projects?
A hand-drawn fork-stamped F, torn-paper fire F, hidden-F watercolor page, dough F, or find-and-cover sheet requires no printer. Draw a large F with a marker or crayon, or build it from one long and two short cardboard strips. For themed art, draw a fish on reused cardboard and add F f beside it.
Choose according to the materials and supervision already available. A crayon version removes paint. A paper-strip version can remove liquid glue if children arrange the pieces without attaching them.
How can I practice uppercase F and lowercase f in the same activity?
Display both forms side by side and name each one. Hide both in the watercolor reveal, build both from dough, or mix both into a find-and-cover field. During a craft centered on uppercase F, place a lowercase f card beside the workspace and ask the child to point to each form.
Do not assume that familiarity with one form transfers immediately to the other. Keep prompts brief: “Show me uppercase F. Now show me lowercase f. They have the same letter name.”
Are letter F crafts enough to teach the letter and its sound?
No. A craft can reinforce explicit instruction, but completing artwork does not show that a child recognizes F or connects it with /f/. Introduce the written forms, name the letter, model the sound, and revisit both during and after the project.
A fish or flower craft remains themed art unless the adult intentionally displays F f, emphasizes the first sound, and invites the child to respond. Use crafts alongside short recognition, formation, listening, conversation, songs, books, and repeated review.
What can replace googly eyes, beans, buttons, sequins, or other small craft pieces?
Draw the details with crayons or markers. You can also use large paper circles, broad tissue-paper pieces, oversized pre-cut felt shapes, or painted marks. Decorative components can simply be omitted.
For children who mouth materials, remove loose small pieces rather than relying on repeated reminders.1 Choose alternatives that still let the child make meaningful decisions, such as where to draw an eye or which broad paper shape to place.
How can I tell whether a child recognizes the letter F after an activity?
Place F or f beside one or two different letters and ask the child to point to F. You can also ask the child to find F in the finished artwork, match uppercase F to a model, distinguish F from f, repeat /f/, or choose which of two pictured words begins with /f/.
Treat the response as planning information. If the child is uncertain, show the model, name it neutrally, reduce the number of choices, and try again during another short practice. One correct response—or one completed project—is not proof of mastery.
Choose one project that fits your setting, keep F and f visible, repeat /f/ naturally, and let the child complete the meaningful parts. Revisit F through brief recognition and sound checks rather than treating a finished craft as the end of learning.