
Festive Art Young Children Can Make Their Own
Compare fork and sponge printing, contact-paper tissue art, sticker gingerbread and fingerprint lights by likely mess, small parts, adult prep and child readiness.
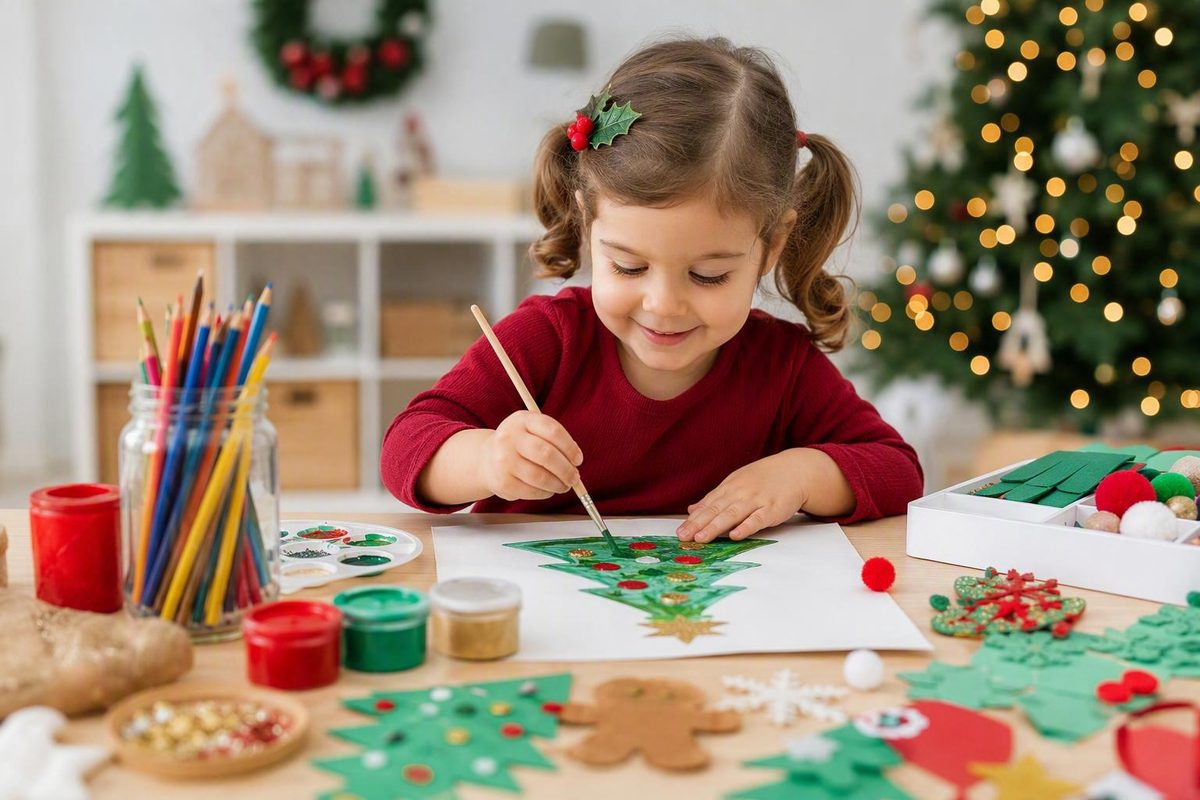
Christmas art activities for preschoolers work best when children make the interesting decisions and adults handle preparation or hazards they cannot yet manage. A recognizable tree, ornament, wreath, or gingerbread shape can provide a starting point without dictating every color, mark, or decoration.
The 15 ideas below use familiar materials such as paper, cardboard, washable paint, glue, tissue paper, stickers, yarn, contact paper, and recycled materials. Some emphasize experimentation, some produce a recognizable object, and some focus on actions such as wrapping or threading. None requires every finished piece to look alike.
Editorial note: This guide draws on preschool teaching experience, but it is not individualized medical, occupational-therapy, or product-safety advice. Follow product labels, setting policies, and your knowledge of the individual child.
How to choose a Christmas art activity for ages three to five
Start with the material and action the child is ready to manage. A child who enjoys stamping but avoids sticky glue might prefer potato printing. Someone who wants a recognizable object to take home might choose an ornament. A group with mixed scissor experience may be better served by a shared tree and large, pre-cut collage pieces.
| # | Activity and format | Main materials | Likely mess | Small parts? | Adult preparation or assistance | Possible use |
|---|---|---|---|---|---|---|
| 1 | Fork-printed tree — process art | Paper, washable paint, fork | Wet paint | No | Draw an optional tree outline; set out paint | Card, display, wrapping paper |
| 2 | Tape-resist tree — process art | Paper, removable tape, washable paint | Wet paint | No | Place or remove tape when needed | Card, display, wrapping paper |
| 3 | Potato prints — process art | Potato, washable paint, paper | Paint and food material | No loose craft parts | Cut and prepare the stamp | Cards, tags, wrapping paper |
| 4 | Sponge-painted trees or stars — process art | Sponge, washable paint, paper | Wet paint | No if the sponge is large | Cut sponge shapes if desired | Cards, mural, wrapping paper |
| 5 | Fingerprint lights — directed craft | Paper base, washable paint | Finger paint | No | Prepare a tree, antlers, or line base | Card, keepsake, display |
| 6 | Torn-paper tree or wreath — process art | Paper scraps, base, glue | Scraps and glue | No if pieces are large | Cut the base if needed | Card, keepsake, display |
| 7 | Contact-paper window tree — process art | Contact paper, tissue paper | Sticky surface and scraps | No if pieces are large | Cut and secure the sticky shape | Window display |
| 8 | Painted tissue-paper collage — process art | Heavy paper, paint, glue, tissue | Paint and liquid glue | No if pieces are large | Portion materials; provide a tray | Display, gift-wrap panel |
| 9 | Gingerbread sticker collage — directed craft | Paper shape, stickers, scraps, markers | Backings and optional glue | Depends on sticker size | Cut the gingerbread base | Card, display, bag decoration |
| 10 | Crumpled-paper picture — fine-motor invitation | Tissue or crepe paper, glue, base image | Glue and scraps | No if pieces are large | Prepare a simple base image | Card, display |
| 11 | Foil-painted ornament — process art | Paper frame, foil, tempera paint, cotton swabs | Wet paint | No loose decorations required | Cut and assemble frame; add hanger | Ornament, gift, keepsake |
| 12 | Yarn-wrapped pine cone — fine-motor invitation | Pine cone, thick yarn | Natural debris | No added decorations required | Inspect cone; secure yarn and hanger | Ornament |
| 13 | Paper-plate threading tree — fine-motor invitation | Paper plate, thick yarn | Minimal | No added decorations required | Cut triangle and punch holes | Ornament, display |
| 14 | Small-parts-free paper ornament — directed craft | Sturdy paper, paint, tissue, broad stickers or markers | Paint or glue | No | Cut shape and add hanger | Ornament, gift, keepsake |
| 15 | Child-decorated gift set — directed craft | Cards, paper bags, tags, stamps, stickers, markers | Ink, paint, scraps | String only if used | Fold cards; cut or punch tags | Card, bag, tag, wrapping paper |
These labels describe the structure of an activity, not its quality:
- Process art emphasizes experimentation with color, texture, placement, tools, and technique rather than copying a model.
- Directed craft begins with a recognizable destination, such as an ornament or gingerbread figure, while still leaving meaningful choices to the child.
- Fine-motor invitation centers on an observable action such as wrapping, crumpling, or threading. It should not be presented as therapy or a guaranteed route to a developmental result.
- Collaborative display combines several children’s contributions without requiring identical pieces.
Process and product are not complete opposites. Some preschool process-art projects retain a predetermined shape or end use while leaving the painting and arrangement open to the child. Fun-A-Day’s Christmas process-art overview similarly notes that some process-focused projects have an end goal. The useful question is how much control the child retains, not whether an adult cut the initial shape.
Age is only one consideration. Also think about scissor experience, mouthing behavior, attention, sensory preferences, familiarity with the materials, and available adult support. A one-to-one activity can include more assistance than a project offered to a busy group.
Low preparation does not necessarily mean low mess. Contact paper can produce many tissue scraps, liquid glue can soak thin paper, and painting may demand more drying space than working time. Choose according to the supervision, cleanup, and storage your setting can realistically provide.
Christmas tree painting and printmaking
Children can overlap prints, work beyond an outline, mix colors, or leave open space without needing to “correct” the picture.
1. Fork-printed tree
Materials
- Heavy paper or lightweight cardboard
- Pencil
- Washable green paint
- Shallow paint tray
- Sturdy fork
- Optional large paper decorations, broad stickers, or additional washable paint
Adult preparation
Draw a broad triangle, loose tree outline, or simple trunk-and-branches shape. Add a thin layer of paint to the tray and cover the work surface.
Child-led steps
- Touch the fork to the paint.
- Stamp, drag, or rock it on the paper.
- Continue within, across, or around the outline.
- Decide whether the tree will be dense, lightly printed, monochrome, or multicolored.
A published version of this activity uses a penciled tree outline and washable green paint. The outline can establish the theme without becoming a boundary the child must obey. See the documented fork-printing method.
Drying and cleanup
Keep the page flat. After it dries, offer torn paper, broad stickers, or more paint for optional decorations. Move the fork and paint tray directly to the cleanup area before introducing loose paper pieces.
2. Tape-resist tree
Materials
- Heavy paper
- Removable tape
- Washable paint
- Brushes, rollers, or large sponge pieces
Adult preparation
Use tape to form a large triangle, intersecting tree lines, a star, or another simple design. Test the tape on delicate paper before beginning.
Child-led steps
Let the child choose the colors, tools, stroke direction, and amount of coverage. Painting beyond the taped shape is part of the process rather than an error.
Allow the paint to settle before lifting the tape slowly. An adult can start or complete the removal if the paper begins to tear. The finished piece can become a folded card, display panel, or wrapping-paper section.
For a tradition-neutral variation, make a winter tree, stars, lights, or intersecting lines.
3. Potato-print cards or wrapping paper
Materials
- Firm potato
- Knife and cutting board for adult use
- Washable paint
- Shallow tray
- Kraft paper, plain paper, folded cards, or sturdy tags
Adult preparation
Confirm that using a food item complies with the setting’s allergy and food-use policies. An adult cuts the potato and creates a simple flat printing surface. A circle, triangle, square, rough star, or unshaped half potato is enough.
Child-led steps
- Brush paint onto the potato or press it into a shallow paint layer.
- Make one print to examine the mark.
- Repeat it in rows, clusters, overlaps, or scattered arrangements.
- Change colors if desired.
The Artful Age includes those applications.
Set the prints flat to dry. Clean the potato, knife, cutting board, and work surface according to the applicable food-use and classroom procedures.
4. Sponge-painted trees or star printing
Use a large household sponge as it is, or have an adult cut it into a triangle or star. Set out washable paint and a generous sheet of paper.
Children can press, twist, slide, or overlap the sponge marks. If conversation is welcome, use descriptive prompts such as, “What happened where those prints crossed?” or “Which color would you like next?” Avoid turning every mark into an instruction.
For a group variation, secure a long sheet of paper to a stable surface. Children can contribute individually or in a small group, choosing their own colors and placements. The result might become a tree mural, field of stars, or patterned wrapping paper.
5. Fingerprint-light picture
Prepare one of these bases:
- A painted or paper Christmas tree
- A large reindeer head with broad antlers
- A looping line across a page
- A house or window outline
- A tradition-neutral string of lights
Offer small portions of washable paint. The child chooses the colors, spacing, and arrangement of the lights. Some children will create a sequence; others will cluster or overlap the marks.
A child who does not want paint on their fingers can make similar marks with a sponge dabber, cork, or another broad stamping tool. Repeated marks are the invitation; direct finger contact is not a requirement.
Tearing, sticking, and Christmas collage
Collage lets children test arrangements before attaching them. It also accommodates different cutting experience because paper can be torn, crumpled, folded, or supplied in large pre-cut pieces.
Make a no-glitter collage the default. Contrasting paper, metallic-colored paper, washable paint, or glitter glue can provide visual variety. The documented collage method below treats loose glitter as optional and calls for close supervision if it is used. Stay At Home Educator describes the materials and contained-tray setup.
6. Torn-paper tree or wreath
Materials
- Large paper or cardboard base
- Colored paper scraps
- Glue stick or child-appropriate liquid glue
- Optional broad markers
Adult preparation
Cut a tree, wreath, star, or winter-tree base if the child does not want to draw one. Put scraps in a shallow basket and reduce the selection if too many choices are distracting.
Child decisions
The child tears pieces, tests arrangements, overlaps colors, and decides where to attach them. Ornaments, berries, branches, and stars are optional. Avoid repositioning pieces to make the design symmetrical.
For a wreath, use a broad cardboard ring with ample gluing space. A solid circle is a simpler alternative when working around an opening would distract from the collage.
7. Contact-paper window tree
Materials
- Clear contact paper
- Removable tape
- Large tissue-paper pieces
- Optional paper border
Adult preparation
Cut a generous tree, star, ornament, or window shape from contact paper. Secure it sticky-side out to a window or place it flat on a table, then remove the backing.
Child decisions
Children choose the colors, overlap, spacing, and coverage. They can fill the shape, leave transparent gaps, or let paper extend beyond the edge. An adult may cover the collage with a second contact-paper layer or trim and border it.
This method avoids liquid glue, but the sticky surface will not suit every child. Keep a dry paper-collage alternative available.
8. Painted tissue-paper collage
Place heavy paper on a tray and offer washable tempera paint, brushes, tissue paper, and child-appropriate liquid glue.
The sequence remains open:
- Paint some or all of the background.
- Add dots or short lines of glue.
- Tear, crumple, fold, or leave the tissue flat.
- Arrange and attach the pieces.
- Stop when the child considers the work complete.
Model a gentle squeeze before handing over the glue bottle, or place a small amount of glue in a cup for brush application. The published preschool collage method combines tempera paint, liquid glue, and tissue that children may tear, crumple, or leave flat.
Heavy paper and a tray help contain this wet project. If paint and glue begin pooling, pause before adding more materials and leave the work flat to dry.
9. Gingerbread sticker collage
Cut a large gingerbread person or house from sturdy brown paper or cardboard. A printable is unnecessary. Offer broad stickers, paper scraps, glue sticks, and washable markers.
The adult establishes the base; the child decides whether it has a face, clothing, patterns, paper “buttons,” or abstract decoration. For a version without tiny loose materials, use large stickers and paper shapes instead of gems, sequins, or buttons.
If peeling is frustrating, lift one edge of each sticker before offering it. A marker-only version removes the peeling challenge and loose backings.
10. Crumpled-paper Christmas picture
Prepare a large tree, wreath, gift, star, light, or another simple image on sturdy paper. Set out larger pieces of tissue or crepe paper.
The child may:
- Crumple the paper loosely
- Fold it
- Twist it
- Leave it flat
- Combine several treatments
Apply glue to one section at a time if the base is thin. Keep the picture on a tray or flat board until the glue has set enough for the pieces to stay in place.
This is best described as a paper-manipulation invitation. It offers opportunities to grasp, press, arrange, and release materials, but it should not be presented as proven therapy or a guaranteed way to improve a particular skill.
Ornaments that preserve the child’s artwork
An ornament can be child-made even when an adult prepares its structure. The child’s marks, paths, colors, and arrangements should remain visible rather than being covered by adult finishing.
If a child does not want to make something that hangs, use the same artwork as a card front, gift tag, or display panel.
11. Foil-painted ornament
Materials
- Construction paper or lightweight cardstock
- Pencil
- Scissors
- Aluminum foil
- Tape
- Tempera paint
- Cotton swabs
- Hole punch
- Ribbon or thick yarn
Adult preparation
- Fold the paper in half.
- Draw half of a broad ornament, tree, bell, snowman, or gift shape along the fold.
- Cut around the outer line.
- Cut out a large center opening, leaving a sturdy frame.
- Unfold the frame.
- Cut foil slightly larger than the opening and tape it securely behind the paper.
The fold-and-cut method produces a symmetrical frame. An adult can mention that the sides match without turning symmetry into a required lesson.
Child-led steps
Provide small portions of tempera paint and cotton swabs. The child can dot, swirl, drag, blend, or layer colors on the foil. If colors meet, describe what happens without requiring a color-mixing exercise.
This sequence—folded frame, foil insert, tempera paint, cotton swabs, hole punch, and ribbon—comes from a documented tinfoil process-art ornament method.
Finishing
Keep the ornament flat while it dries. An adult then punches the hole and adds ribbon or yarn. Write the child’s name and date on the back edge of the paper frame or on a separate tag, not over the painted foil.
12. Yarn-wrapped pine-cone ornament
Choose a clean, dry pine cone and have an adult inspect it before use. Offer thick yarn in one or more colors.
An adult may tie or tuck the beginning of the yarn around the base. The child wraps it around, across, or between the scales, choosing the direction and amount of coverage. The adult secures the loose end and adds a yarn hanger.
Yarn-wrapped pine-cone ornaments appear among preschool and kindergarten holiday craft suggestions. Early Learning Ideas includes the wrapping method.
Work over a tray to contain natural debris. If pine cones do not suit the setting, use a broad cardboard triangle with shallow notches around the edges.
13. Paper-plate threading tree
Materials
- Plain paper plate
- Scissors
- Hole punch
- Thick yarn
- Removable tape
- Optional washable paint or broad markers
Adult preparation
Cut a broad triangle from the plate and punch widely spaced holes away from the edges. Cut a manageable yarn length, wrap tape around the working end to create a firmer tip, and secure the opposite end loosely to the back.
Child-led steps
The child chooses the route. Yarn can cross the front, travel around an edge, skip openings, or return through the same hole. Avoid undoing the path merely to make it look more orderly.
If threading is frustrating, shorten the yarn, enlarge the holes, or reduce their number. The adult ties the ends and adds a hanger when the child is finished. The core method—cutting a paper-plate triangle, punching holes, and threading yarn—is documented in a preschool Christmas craft collection.
14. Small-parts-free paper ornament
Cut a large circle, star, bell, tree, light, or freeform shape from sturdy paper. Let the child decorate it with any combination of:
- Sponge prints
- Broad marker lines
- Torn tissue paper
- Large paper shapes
- Wide stickers
- Washable paint
- Paper tape
This version replaces beads, buttons, bells, pom-poms, and sequins with paper and printed marks. Once dry, reinforce the hanging area from behind if needed. An adult can punch the hole and add thick yarn.
Date the back edge or attach a label to the hanger. If both sides contain artwork, place the information on a separate tag.
For this collection, hot glue and complicated cutting are unnecessary. Adults should retain control of any cutting or hole punching that the individual child cannot manage safely.
Child-made cards, gift bags, and wrapping paper
Useful art does not have to look polished or uniform. Scattered sponge marks can become wrapping paper, one potato print can become a gift tag, and a painted page can be cut into card panels after drying.
15. Child-decorated gift set
Prepare one or more surfaces:
- A folded card
- A kraft lunch bag
- A sturdy paper gift tag
- A sheet of plain wrapping paper
Offer potato stamps, sponge prints, fingerprints, broad stickers, large paper shapes, or washable markers. Previously painted paper can also be mounted on cards, wrapped around a small box, or cut into tags after it dries.
Decorate a paper bag while it is still flat. Adults can reinforce the upper edge or add handles when needed. Use modest amounts of liquid glue on thin bags.
Make tags from sturdy paper large enough to handle comfortably. Assign cutting according to the child’s experience. An adult can operate a difficult hole punch and add string when the tag is complete. Because some preschool gift-tag and collage suggestions involve very small objects, material size and mouthing behavior should be considered before supplies reach the table. OT Mom Learning Activities includes an explicit choking-hazard caution.
Inside a card, invite the child to:
- Dictate a message for an adult to write
- Write their name
- Add letter-like marks
- Draw a picture
- Leave the inside blank
Christmas process-art collections also suggest that children can write or dictate family messages inside homemade cards. The important element is the child’s communication, not adult-style handwriting or design.
Cards, bags, tags, and wrapping paper are practical alternatives for children who do not want to make hanging keepsakes. For tradition-neutral projects, use stars, winter trees, gifts, lights, snow, colorful patterns, or abstract prints. Ask families or children which symbols they use rather than assuming one version of Christmas is shared by everyone.
A collaborative Christmas tree display
This group extension is separate from the 15 individual activities. It combines several of their methods rather than adding another numbered craft.
Cut a large tree from cardboard or heavy paper. Secure it where children can comfortably reach it, or place it flat on a table or floor work area. Children can contribute individually or in small groups using:
- Fork or sponge prints
- Torn-paper collage
- Pieces of child-painted paper
- Large tissue-paper pieces
- Broad stickers
- Washable marker lines
Preserve authorship by letting each child choose both the material and its placement. Instead of assigning everyone an identical red circle, ask, “Would you like to print, draw, or add paper?”
Divide the project across sessions:
- Background session: Paint, print, or draw directly on the tree.
- Drying stage: Leave the tree flat or protected.
- Collage session: Add torn paper, tissue, or pieces of earlier paintings.
- Final drawing session: Offer markers or broad stickers after the wet materials have dried.
For mixed-readiness groups, begin with washable materials and large collage pieces.
If documentation suits the setting, record brief child comments beside the display: “Maya chose two greens,” or “Jon said his lines are lights.” Ask before attributing a comment and avoid replacing the child’s description with an adult interpretation.
The same collaborative method can produce a winter tree, star mural, night-sky panel, gift pattern, or string-of-lights display.
Simplify or extend the art without taking it over
Adaptation should improve access without erasing the child’s role. An adult may cut a base, stabilize the page, or narrow the material selection while the child retains control of color, placement, texture, and when to stop.
To simplify participation:
- Pre-cut large bases.
- Offer larger tissue and paper pieces.
- Use thick yarn rather than thin string.
- Punch fewer, widely spaced holes.
- Present two paint colors instead of a crowded palette.
- Use glue sticks or brush-applied glue if squeezing a bottle is frustrating.
- Offer broad tools that are easier for the child to control.
- Present one stage at a time.
To add complexity when the child wants it:
- Offer independent cutting of strips or simple shapes.
- Add folding for cards or symmetrical frames.
- Invite repeating colors or print patterns.
- Add name writing or a dictated message.
- Provide colors that can be mixed.
- Punch additional lacing holes.
- Let the child plan a threading route.
- Invite the child to design a stamp or base shape.
For children who mouth materials, replace beads, bells, buttons, pasta, sequins, pom-poms, bottle caps, and similarly small items with large paper shapes, tissue, broad stickers, or printed marks. Preschool activity guidance specifically warns adults to watch for small parts and mouthing and recommends supervision. Growing Hands-On Kids states that limitation.
For a child who has difficulty controlling the page or tool, an adult can stabilize the paper, hold the glue container, reduce the number of materials, or offer a broader implement. Direct physical assistance should be limited to help the child accepts and needs.
Respect sensory preferences. A child who avoids finger paint can stamp with a sponge. Someone who dislikes liquid glue can use a glue stick, stickers, or a dry collage. Contact paper is not automatically a suitable substitute if the sticky surface is itself unpleasant.
These projects provide opportunities to tear, stamp, squeeze, arrange, wrap, and thread. Occupational-therapy-oriented activity guides organize Christmas crafts around such movements, but the supplied activity descriptions do not establish that one craft will improve a specific ability for every child. A seasonal project should not be presented as treatment or a substitute for individualized professional guidance.
Praise decisions and experimentation: “You overlapped the colors,” “You found a way to pull the yarn through,” or “You chose to leave that area open.” If an adult needs a polished sample, the adult should make a separate one rather than revising the child’s work.
Safety, setup, drying, and cleanup
Suitability depends on the individual child, the setting, the product instructions, and available supervision.
Pre-activity checklist
- Does any child currently mouth materials?
- If food materials are involved, do they comply with allergy and food-use policies?
- Is each child ready for the scissors or hole punch being offered?
- Should any loose pieces be replaced with larger paper alternatives?
- Are knives, adult scissors, and preparation tools out of children’s reach?
- Can breakable containers be replaced with paper, cardboard, or sturdy trays?
- Do paints, markers, and adhesives match the manufacturer’s intended use and age guidance?
- Is enough adult supervision available?
- Is the work surface covered or contained?
- Is flat drying space available?
- Can wet artwork remain in place instead of being transported immediately?
For these activities, default to washable paint, paper or cardboard structures, large decorations, and child-appropriate glue. Treat hot glue, ovens, spray sealers, glass, complicated cutting, and permanent products as adult-controlled elements or omit them when they are unnecessary. Holiday craft roundups include projects using sharp tools, hot glue, glass, acrylic paint, ovens, and small decorations, but often provide limited safety guidance; those inclusions should not be interpreted as universal suitability.
Small objects such as beads, bells, buttons, sequins, pasta, pom-poms, gems, and bottle caps may not suit children who mouth materials and require careful storage and supervision when used. An occupational-therapy activity resource explicitly cautions that some preschool suggestions contain very small objects that may present choking hazards.
Put out only what the current activity needs. A tray with one tool, one paint color, and one sheet of paper may be more manageable than an overflowing craft table. Add choices when the child is ready for them.
Troubleshooting common problems
Too much glue: Set the bottle aside and offer a brush or spreader. Leave the artwork on its tray rather than lifting saturated paper.
Curling or soggy paper: Keep the current piece flat and use heavier paper or less wet media next time.
Weak ornament attachment: Reinforce the hanging area from behind before punching it, or attach the hanger to a sturdy frame instead of thin artwork.
Difficult threading: Shorten the yarn, tape the working end, enlarge the holes, or reduce their number. Do not complete the route unless the child asks for that help.
Paint beneath the tape: Treat the seepage as part of the image. On another attempt, use less paint or heavier paper.
Wet artwork must travel: Keep it flat on a rigid, protected surface rather than folding or stacking it. When immediate transport would damage the work, arrange for it to be collected after drying if the setting permits.
Tissue will not stay attached: Add a small amount of glue beneath the loose edge and press it with a tool or dry paper scrap rather than pouring glue over the whole collage.
Frequently asked questions
What Christmas art can a three-year-old do with minimal help?
Depending on the individual child, suitable choices may include sponge or fork printing, placing large tissue pieces on contact paper, decorating a large gingerbread shape with broad stickers, adding fingerprint lights to a prepared base, or tearing and placing paper on a glue-covered area.
“Minimal help” should describe the child rather than all three-year-olds. An adult may still need to prepare the base, portion paint, stabilize the page, manage drying, and remain nearby. Begin with large materials and one-step actions, then add choices if the child wants to continue.
What is the difference between Christmas process art and a Christmas craft?
Christmas process art emphasizes decisions made during creation: which colors to use, how to move a tool, where to place materials, and when to stop. Results can vary widely even when children receive the same supplies.
A Christmas craft is usually organized around a recognizable object such as a tree, gingerbread figure, or ornament. It can still preserve substantial child choice. A foil ornament, for example, combines an adult-prepared frame with the child’s open-ended painting.
Which Christmas art activities avoid small parts and glitter?
Options include fork-printed trees, tape-resist painting, potato printing, sponge prints, fingerprint lights, torn-paper collage, contact-paper trees with large tissue pieces, painted tissue collage, crumpled-paper pictures, and paper ornaments decorated with broad markers or large paper shapes.
Use printed marks, contrasting paint, tissue, or metallic-colored paper instead of loose glitter. Avoid adding beads, bells, buttons, sequins, pasta, pom-poms, gems, or bottle caps merely to make a project appear more festive.
How can preschool Christmas art be adapted for a classroom with varied family traditions?
Offer symbols that do not assume one family practice: stars, lights, gifts, colorful patterns, winter trees, snow, night skies, or abstract prints. Provide several base shapes rather than requiring every child to make Santa, a reindeer, a nativity scene, or another specific image.
Use language such as “seasonal display,” “December art,” or “a card for someone you care about” when that better reflects the group. Children who celebrate Christmas can still choose Christmas-specific imagery, while others use the same techniques with winter or tradition-neutral themes.
Do Christmas crafts improve fine-motor skills?
Christmas crafts can involve observable hand actions such as tearing, stamping, peeling, squeezing, wrapping, cutting, and threading. Activity and occupational-therapy resources often organize craft suggestions around these movements.
However, the available activity descriptions do not establish that completing a Christmas craft guarantees improved fine-motor ability. Participation, repetition, tool fit, individual needs, and broader development all matter. A craft should not be presented as treatment or as a substitute for individualized professional guidance.
Choose one activity that fits the materials already available, the supervision you can provide, and your tolerance for paint, glue, scraps, and drying artwork. Successful preschool art is not measured by whether every tree or ornament looks alike. The strongest projects give children manageable tools, meaningful choices, and a safe way to explore while adults handle only the preparation and hazards the children cannot yet manage.