
10 Easy Preschool Valentine Crafts for Ages 3–5
Make 10 low-prep preschool Valentine crafts with paper, paint and glue, plus skill targets, simpler options, extensions and practical safety checks.
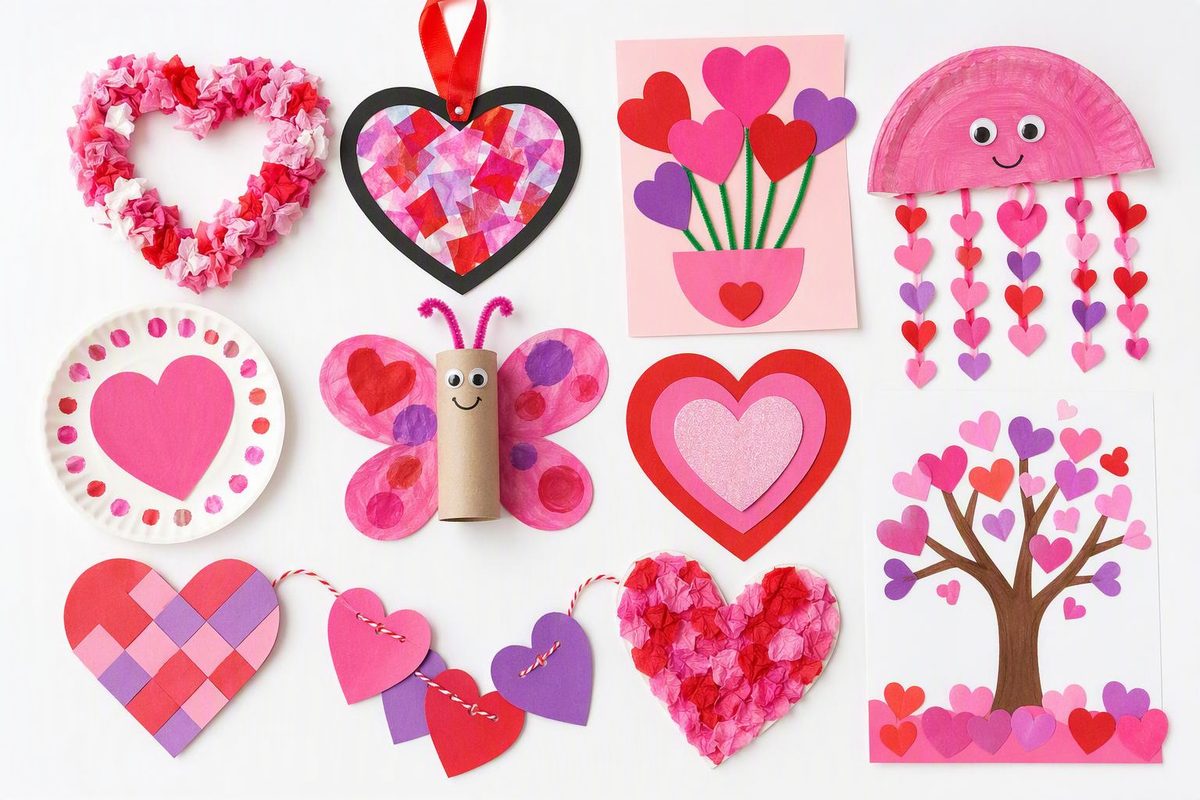
These easy preschool Valentine crafts use familiar supplies and leave room for children to make their own choices. Pick one project for a short art center, or set out two materials—such as paper hearts and paint—and let children decide how to combine them.
A finished craft does not need to match an adult model. NAEYC describes process-focused art as exploration without one “right” result and recommends experiences such as painting, stamping and collage. These activities also give children opportunities to use small-motor skills (NAEYC).
Quick craft chooser
| Craft | Main skill opportunity | Prep | Mess |
|---|---|---|---|
| Torn-paper heart | Tearing and gluing | Low | Low |
| Cardboard-tube heart prints | Pressing and printmaking | Low | Medium |
| Fold-and-open heart painting | Cause and effect | Low | Medium |
| Tape-resist heart | Peeling and painting | Medium | Medium |
| Paper-loop heart chain | Sequencing and two-hand work | Low | Low |
| Heart pocket | Positioning and pretend writing | Medium | Low |
| Name-heart card | Name awareness and mark-making | Low | Low |
| Sticker heart patterns | Sorting and patterning | Low | Low |
| Class friendship quilt | Individual expression and group assembly | Low | Low |
| Tissue-paper window heart | Collage and color layering | Medium | Low |
1. Torn-paper heart collage
Materials: Cardstock, red/pink/purple paper, glue stick or school glue intended for children
- Draw and cut out a large cardstock heart.
- Invite the child to tear colored paper into pieces.
- Glue the pieces anywhere on the heart—overlapping is fine.
Skill opportunity: Tearing uses both hands together; picking up and placing scraps adds fine-motor practice.
Simplify: Start with wide paper strips, which are easier to grasp and tear. An adult can add a few glue lines.
Extend: Sort scraps by color first, or challenge the child to leave some of the background showing.
2. Cardboard-tube heart prints
Materials: Clean cardboard craft tube, washable tempera paint, shallow tray, plain paper
- Press one side of the tube inward to make the top notch of a heart. Pinch the opposite side into a point.
- Dip the shaped end lightly in paint.
- Press, lift and repeat to make heart outlines.
Skill opportunity: Children experiment with pressure, spacing and repeated prints.
Simplify: Use a short tube that fits comfortably in the child’s hand.
Extend: Offer two paint colors and ask, “What happens when the prints overlap?” Children interested in mixing can also try this preschool color-mixing activity.
3. Fold-and-open heart painting
Materials: Paper hearts, washable paint, spoon or craft stick
- Fold a paper heart in half and reopen it.
- Place a few small drops or short streaks of paint on one side.
- Fold the heart, rub across it gently and open it again.
Skill opportunity: Folding, pressing and opening create a simple cause-and-effect investigation.
Simplify: An adult can hold the bottom layer still while the child folds.
Extend: Before opening, ask what the other side might look like. Compare the two sides afterward without requiring them to be perfectly identical.
4. Tape-resist heart painting
Materials: Cardstock, painter’s tape, washable paint, brush or sponge
- Before the activity, place strips of painter’s tape across a large paper heart.
- Let the child paint over the heart and tape.
- Allow the paint to dry, then help peel away the tape.
Skill opportunity: Broad painting movements and tape peeling give children two different hand actions in one project.
Simplify: Fold over the end of each tape strip to make an easy-to-find pull tab.
Extend: Arrange the tape to make lines, a letter or a simple shape. Ask the child what appeared when the tape came off.
5. Paper-loop heart chain
Materials: Wide paper strips, glue sticks or tape; optional crayons
- Decorate several paper strips.
- Curve the ends of one strip together and fasten them to make a loop. If using glue, pinch the ends together briefly so they set.
- Thread the next strip through the first before closing it.
- Continue for as long as the child remains interested.
Skill opportunity: Holding a loop while joining its ends calls for two-hand coordination. Adding links also invites informal counting.
Simplify: Make the first loop in advance and use short, wide strips.
Extend: Create an AB color pattern or count how many links are needed to span a shelf.
6. Heart message pocket
Materials: Two large paper hearts, glue, crayons, small paper rectangles
- Cut one heart in half horizontally.
- Glue the curved half over the bottom of the whole heart, leaving the straight top edge open.
- Children draw pictures or make marks on paper “messages” and tuck them into the pocket.
Skill opportunity: Filling and emptying the pocket supports positioning and pretend play. Dictating a message gives children a way to participate without needing to write conventionally.
Simplify: Assemble the pocket before the activity and provide sturdy message cards.
Extend: Invite the child to choose a recipient and tell you the words they want written. Do not require every message to use “love”; “Thank you for playing with me” or a drawing is just as suitable.
7. Name-heart card
Materials: Folded cardstock, paper hearts, crayons or markers, glue
- Write the recipient’s name in clear print on a separate card for reference.
- Let the child glue hearts to the folded card.
- Invite them to add their own marks, name attempt or dictated message.
Skill opportunity: Looking between a name model and a card connects a meaningful word with print. Decorating remains the main activity; accurate copying is not required.
Simplify: The child can select the recipient’s name from two cards, point to it and decorate around an adult-written name.
Extend: Provide separate letter cards so the child can arrange the letters of their own name before writing or gluing them.
8. Large-sticker heart patterns
Materials: Large paper heart, large round or heart-shaped paper stickers in two or three colors
- Place the heart and stickers on a tray.
- Let the child cover the heart freely, sort stickers by color or make a repeating pattern.
- Count a small group if the child is interested.
Skill opportunity: Peeling and placing stickers gives precise finger work; sorting and patterns add optional math play.
Simplify: Peel away the sticker sheet’s surrounding background so each sticker edge is easier to reach.
Extend: Begin a red-pink-red-pink pattern and let the child decide what comes next.
Use large stickers, and closely supervise any child who still mouths materials. CPSC rules ban products intended for children under 3 when small parts create choking, aspiration or ingestion hazards; that is also a useful reminder to keep tiny craft pieces away from younger siblings and children likely to put them in their mouths (CPSC).
9. Class friendship quilt
Materials: Equal-size paper squares, crayons, paper scraps, glue, large backing paper
- Give each child one square to decorate in any way.
- Ask an open prompt such as, “What colors or shapes would you like on your square?”
- Arrange the finished squares together on backing paper. An adult can glue or tape them in place.
Skill opportunity: Each child makes individual choices while contributing to one shared display.
Simplify: Offer crayons only, or provide a few large pre-cut paper shapes.
Extend: Children can help plan the arrangement by sorting squares by dominant color, turning them in different directions or describing similarities they notice.
10. Tissue-paper window heart
Materials: Clear self-adhesive paper, large tissue-paper pieces, scissors for adult setup
- An adult cuts two matching pieces of clear self-adhesive paper and removes the backing from one.
- Place it sticky-side up and invite the child to arrange tissue pieces on it.
- Seal with the second piece, sticky-side down.
- The adult trims the collage into a large heart and secures it to a window.
Skill opportunity: Lightweight tissue encourages careful grasping, placing and color layering.
Simplify: Use larger tissue squares and keep only a small area of adhesive uncovered at a time.
Extend: Overlap two colors and compare the layered area with each color alone.
Set up the supplies safely
Choose art materials intended for children and read the label before use. The CPSC’s Art and Craft Safety Guide recommends products marked “Conforms to ASTM D-4236” that do not carry cautionary warnings. It also advises close supervision, using only small amounts and washing hands after art (CPSC).
- Use washable paint, glue intended for children and blunt-tip scissors suited to the child’s current ability.
- Keep adult scissors, staplers and hot-glue tools in the adult setup area.
- Skip loose glitter, beads, buttons and other tiny decorations, especially when younger siblings share the space or a child mouths materials.
- Stop if materials go toward the mouth, and wash hands after art.
- Check adhesive and paint labels for relevant allergy or skin-sensitivity warnings.
For a mixed-readiness group, change the entry point rather than changing the whole craft: one child can place pre-cut pieces, another can tear or cut, and another can add a pattern, name or dictated message. The useful checkpoint is whether each child can take part and make visible choices—not whether every Valentine looks alike.