
Choose a Valentine Craft That Fits the Skill
Find 12 preschool Valentine’s crafts organized by skill and prep, with simple steps, adaptations, material lists, and practical safety checks.
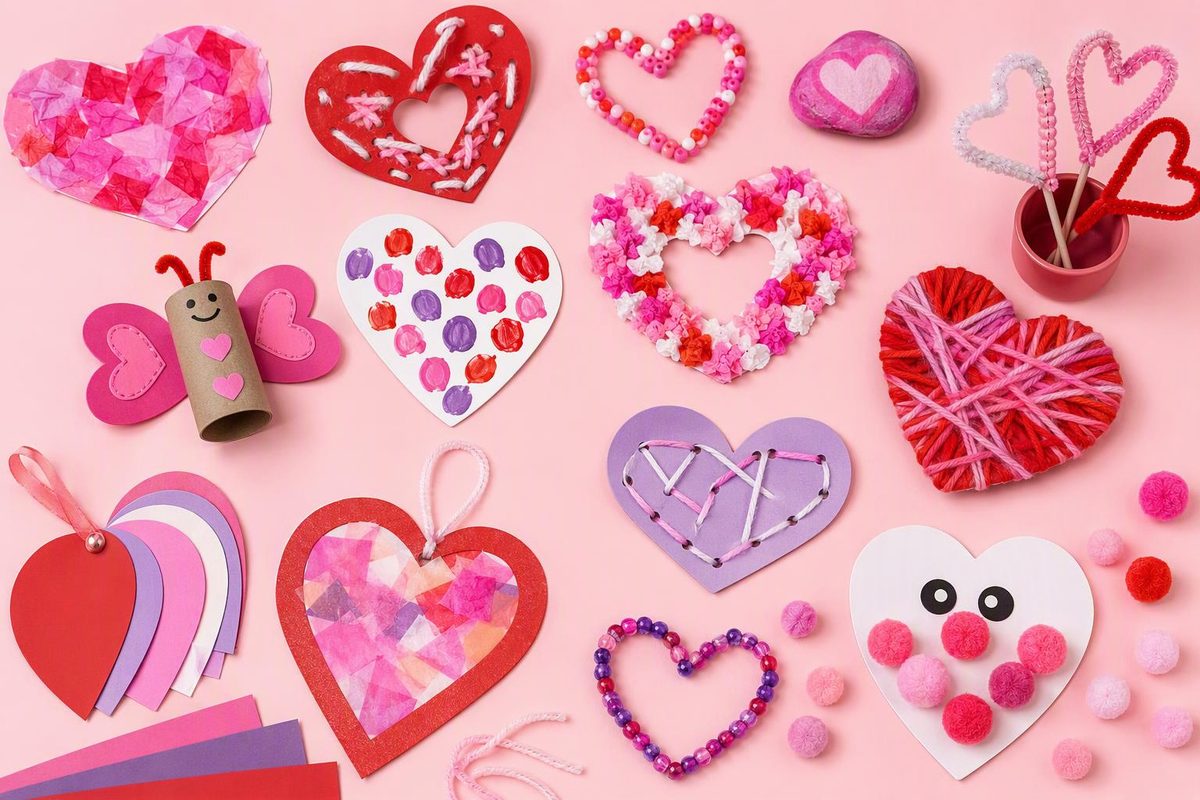
The best preschool Valentine’s crafts give children a manageable technique—tearing, stamping, folding, weaving or building—without requiring everyone to copy one model. These 12 options cover fine-motor work, color exploration, early literacy and friendship, with both low- and medium-preparation choices. NAEYC describes process art as choice-driven and open-ended while noting that a directed project can also build fine-motor and executive-function skills; both approaches belong in preschool (NAEYC).
Choose a skill and preparation level; the matching crafts appear below.
Valentine Craft Picker
Filter the 12 projects by their main practice opportunity and preparation level.
| Craft | Main practice | Prep |
|---|---|---|
| Torn-paper heart | Pinching, tearing and gluing | Low |
| Cardboard-tube prints | Pressure and cause and effect | Low |
| Coffee-filter hearts | Color mixing and observation | Medium |
| Fold-and-press hearts | Symmetry and prediction | Low |
| Paper heart weaving | Over-under movement | Medium |
| Friendship quilt | Group planning and expression | Low |
| Valentine mailbag | Drawing and name recognition | Low |
| Play-dough sculpture | Squeezing and 3D design | Low |
| Cardboard love bug | Construction and spatial planning | Medium |
| Kindness paper chain | Dictation and sequencing | Low |
| Sticky heart collage | Selecting and arranging | Medium |
| Name-heart mosaic | Letter recognition and placement | Medium |
No craft matches both choices. Change one filter.
Source: preparation levels and skill opportunities from the 12 activities in this guide.
Choose Materials Intended for Children
Use washable paint, markers and glue intended for children. The U.S. Consumer Product Safety Commission recommends buying art materials marked “Conforms to ASTM D-4236” and without cautionary warnings for this age group. It also advises close supervision, offering small amounts, keeping food and drinks out of the art area, and washing hands afterward (CPSC Art and Craft Safety Guide).
Use blunt-tip preschool scissors and stay close while children cut. Skip loose sequins, beads, buttons, pom-poms and other small decorations for any child who may put materials in their mouth. Small parts can present choking, aspiration and ingestion hazards. The CPSC’s federal small-parts ban specifically covers products intended for children under 3 (CPSC).
Tape paper to the table if it slides. Offer either a glue stick or a shallow cup of liquid glue with a short brush rather than a large bottle children must control.
Low-Preparation Valentine Crafts
1. Torn-Paper Heart Collage
Materials: Cardstock, colored paper or tissue paper, glue, crayons
Draw a large heart on cardstock, or let the child draw one. Invite them to tear paper into pieces, spread glue inside or around the outline, and arrange the pieces however they choose.
This works on pinching, two-handed coordination and spatial planning. For an easier setup, provide larger paper strips and a glue stick. Children ready for an extension can sort scraps by color, make a repeating pattern or dictate a message for an adult to write.
2. Cardboard-Tube Heart Prints
Materials: Cardboard tube, tape, washable paint, shallow tray, paper
Press one side of the tube inward to form the top notch of a heart. Pinch the opposite side into a point and secure the shape with tape. Dip the end lightly in paint and stamp.
Children can overlap prints, rotate the stamp or combine colors. The result does not need to become a card. For another low-pressure mark-making setup, adapt these dot marker activities with heart outlines.
Stamping provides practice with grasp strength, pressure control and cause and effect. A short, wide tube is easier to hold. To extend the activity, count the prints or test what changes when the stamp carries more or less paint.
3. Fold-and-Press Paint Hearts
Materials: Paper, washable tempera paint, spoon or craft stick
Fold the paper in half and open it. Add a few small dabs of paint to one side, fold it again, and rub across the closed paper. Open it to reveal the mirrored design. After it dries, an adult—or a child who is ready—can cut out a heart.
The process combines bilateral coordination, prediction and an introduction to symmetry. Pre-fold the paper and offer only one or two colors when a child needs fewer steps. To extend the observation, ask which marks appeared on both sides and what stayed different.
4. Friendship Quilt
Materials: Square paper pieces, crayons, markers, glue or tape, large backing paper
Give each child a square to decorate with colors, shapes, people or things they care about. Join the squares on one large sheet. Ask before writing a child’s words beneath the design.
The shared composition supports self-expression, conversation and group planning. Chunky crayons and a few large collage scraps make the invitation easier to manage. Children can also decide how to arrange the finished squares and look for colors or shapes that appear in several designs.
A child may make a square about a friend, family member, pet or favorite place. That keeps the invitation broad instead of prescribing whom the child should love.
5. Valentine Mailbag
Materials: Paper lunch bag, crayons, stickers, paper scraps, glue
Fold the top edge down once to strengthen the bag. Children decorate it, then add their name or a name card. Use the finished bag for classroom notes, drawings or pretend mail.
This activity connects drawing with name recognition and purposeful writing. Attach a printed name card for a child to match if forming or copying the name is not yet comfortable. For an extension, children can address a drawing by copying a classmate’s name from a card.
Do not require every preschooler to produce a card for every classmate in one sitting. The bag can remain available in the writing center for several days.
6. Play-Dough Heart Sculpture
Materials: Child-intended modeling dough, heart cookie cutters, craft sticks, rolling pin
Children flatten, pinch, roll, cut and combine dough to make hearts or any Valentine-inspired sculpture. Craft sticks can create lines, letters and textures.
The activity develops hand strength, shape composition and three-dimensional planning. Begin with soft dough and a thick cutter for easier handling. Children ready for more can build a standing sculpture or make hearts in three sizes and place them in order.
Check the product label or recipe ingredients when allergies or skin sensitivities are a concern. Some commercial and homemade doughs contain wheat, and modeling dough is not intended to be eaten. Supervise the activity and store the dough out of reach afterward (Poison Control).
7. Kindness Paper Chain
Materials: Wide paper strips, crayons or markers, glue stick or tape
Ask each child for an example of a caring action, such as inviting someone to play, helping with cleanup or checking on a friend. Record one idea on each decorated strip. Loop and join the strips to make a chain.
The process combines oral language, sequencing and the connection between ideas and actions. Children can draw while an adult records their words. Later, revisit one link at circle time and brainstorm different ways to carry out that action.
Keep prompts open. Avoid praising one “correct” answer or asking children to name a best friend publicly.
Medium-Preparation Valentine Crafts
8. Coffee-Filter Watercolor Hearts
Materials: White basket-style coffee filters, washable markers, droppers or spray bottle, water, tray
An adult can cut the filters into hearts before the activity. Children draw on them with washable markers, place them on a tray and add a little water. Watch the colors spread, then leave the hearts flat to dry.
This setup combines hand control, color observation and prediction. Offer one large filter and help with the spray bottle if squeezing is difficult. For an extension, place two colors near each other and predict what will appear where they meet. The questions in this preschool paint-mixing activity also work here.
Protect the table because color can pass through a wet filter.
9. Paper Heart Weaving
Materials: Large cardstock heart, paper strips, scissors, tape
An adult cuts several wide horizontal slits across the center of the heart, stopping before the edges. Children move strips over and under the openings. Tape loose ends to the back.
Weaving builds visual tracking, sequencing and coordinated use of both hands. For a simpler version, make only three long, wide slots and start the first strip. Children ready for another challenge can alternate two colors or explain the over-under pattern as they work.
10. Cardboard Love Bug
Materials: Small cardboard tube or folded cardstock, paper, crayons, glue, short paper strips
Decorate the cardboard body. Fold paper strips back and forth for legs or antennae, then glue them on. Draw facial features rather than attaching small googly eyes.
The construction practices folding, joining pieces and using spatial vocabulary. Supply pre-cut wide strips and let the child decide where they go when cutting would distract from the building. To extend the idea, count the legs, compare strip lengths, or invent a name and story for the creature.
11. Sticky Heart Collage
Materials: Clear contact paper, painter’s tape, tissue-paper squares, short yarn pieces, translucent paper
An adult cuts a large heart-shaped frame from cardstock. Tape contact paper behind the opening with the sticky side facing the child. Children press lightweight collage materials onto it. Seal it with a second sheet of contact paper if the piece will hang in a window.
Pressing and positioning materials provides practice with finger isolation, selecting and arranging. Use large tissue pieces and place the heart flat on a table for an easier version. Children can also investigate empty and filled spaces or create a color pattern.
Head Start recommends stabilizing art materials, offering pieces in different sizes, and providing adapted cutting or gluing tools when needed so more children can participate (Head Start). Discard the contact-paper backing promptly so it does not become a slipping hazard.
12. Name-Heart Mosaic
Materials: Large paper heart, marker, paper squares, glue
Write the child’s name in large letters across the heart. The child glues paper squares along, inside or around the letters. Keep a plain name card nearby so the model remains visible if glue covers part of a letter.
The mosaic connects placement practice with recognizing letters in a meaningful word. Work on the first letter only and use larger pieces when the full name is too much. For an extension, find repeated letters, count the letters or make another heart for a familiar name.
Present the Technique Without Prescribing the Result
Set out one base, one adhesive and two or three decorative choices at first. Add materials when children ask for them. Instead of displaying an adult-made sample to copy, briefly demonstrate the tool: “I press the stamp down and lift it up,” or “The strip goes over, then under.”
During the work, describe specific choices you notice: “You placed three blue pieces near the edge.” Ask occasional questions tied to the child’s process, such as “What would you like to add?” or “How did you make that texture?” The Valentine theme remains visible, but the planning, decisions and finished work stay with the child.