
A Practical Spring Art Studio for Ages 3–5
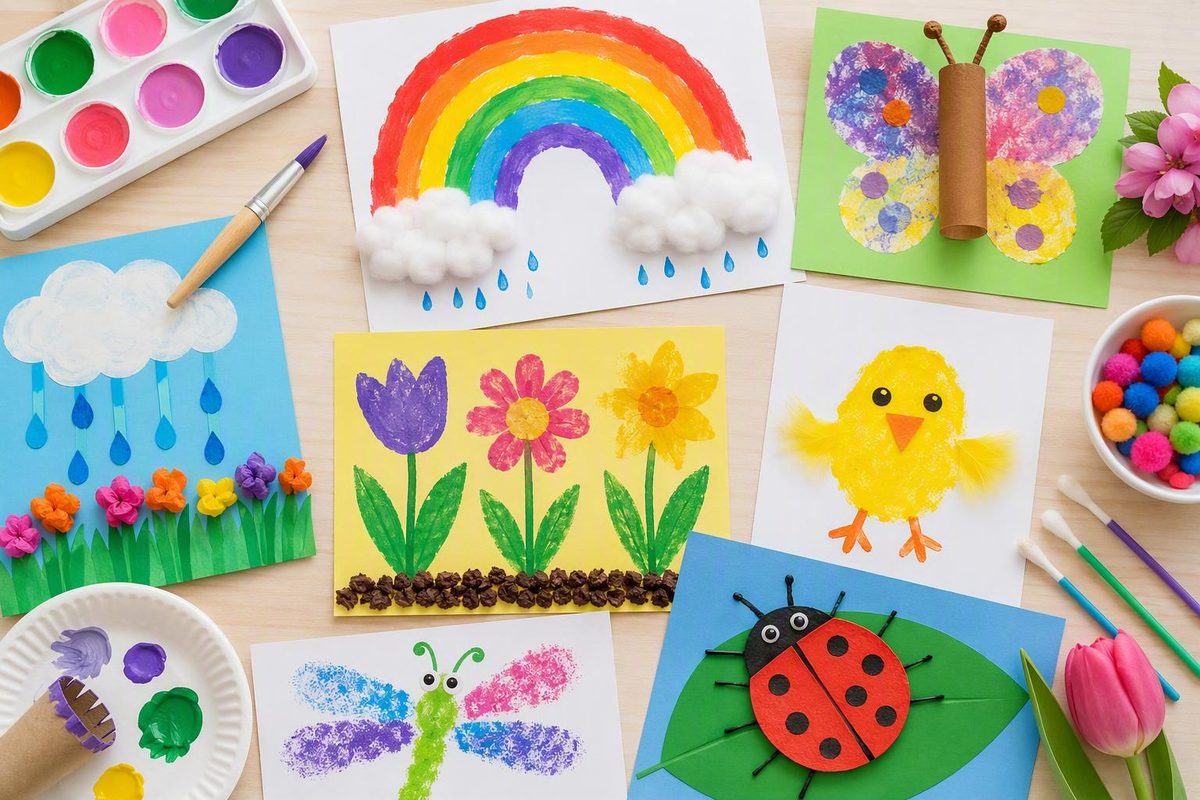
- A practical spring art studio for ages 3–5 *
Preschool spring art activities often draw on flowers, gardens, rain, rainbows, butterflies, birds, insects, weather, and seasonal nature. The subject, however, is only one part of the invitation. Children can explore spring through painting, printing, collage, sculpture, color mixing, observation, and temporary outdoor art.
This guide offers 18 activities for children ages three to five. Each includes materials, adult setup, child-facing directions, a substitution, drying guidance, and an open-ended prompt.
The activities use two format labels:
- Fully open-ended process art: Children explore tools and materials without being asked to produce a particular image.
- Guided process art: An adult introduces a spring subject or question, but children decide what their work looks like.
A third category—directed craft—is explained for comparison, but none of the 18 activities requires every child to reproduce the same model.
Children’s tool control, sensory preferences, communication, attention, and willingness to participate vary substantially between ages three and five. Choose and adapt each invitation for the children present rather than treating “preschool” as a guarantee of suitability.
Editorial scope: These activities adapt techniques described in published spring-art and process-art collections. The setup notes, substitutions, and troubleshooting suggestions are planning options rather than tested performance guarantees. Adults should test materials in their own setting and follow product labels and local program requirements.
How to Choose a Spring Art Activity for Your Group
Start with the technique, available space, drying capacity, and amount of adult help you can provide. Published spring-art collections commonly combine flowers, rainbows, insects, birds, gardens, and seasonal nature with painting, collage, printing, sculpture, and color mixing (Fun-A-Day).
| Activity | Spring theme | Technique | Setting | Format | Main materials | Drying space? | Adult preparation | Supervision focus |
|---|---|---|---|---|---|---|---|---|
| 1. Coffee-filter color mixing | Rainbows, rain, flowers | Dropper painting | Indoor or sheltered outdoor | Fully open-ended | Absorbent paper, watercolor, droppers | Yes; flat | Protect trays and portion color | Dropper use and liquid quantity |
| 2. Crayon-resist drawing | Flowers, rain, gardens | Resist drawing | Indoor | Guided | Crayons, paper, watercolor | Yes | Test crayon and paper | Product use and spills |
| 3. Butterfly fold print | Butterflies, symmetry | Fold printing | Indoor | Open-ended or guided | Paper, washable paint | Yes | Pre-fold paper if useful | Paint quantity and pressing |
| 4. Rain-and-wind painting | Rain, wind, weather | Dropper painting and tilting | Indoor or outdoor | Guided | Paper, watercolor, tray | Yes | Secure paper in trays | Moving trays and wet surfaces |
| 5. Vertical spring painting | Weather, flowers, abstract spring | Brush painting | Indoor or outdoor | Guided | Large paper, brushes, paint | Yes | Secure paper and surface | Easel stability and drips |
| 6. Flower printing | Flowers, greenery | Nature-tool printing | Indoor or outdoor | Guided | Artificial or approved flowers, paint | Yes | Inspect and prepare tools | Plant and component selection |
| 7. Sponge garden printing | Flowers, leaves, gardens | Sponge printing | Indoor or outdoor | Guided | Large sponges, paint, paper | Yes | Cut sponges in advance | Adult cutting and wet paint |
| 8. Bubble-wrap texture prints | Rain, gardens, insects | Texture printing | Indoor | Fully open-ended | Secured bubble wrap, paint | Yes | Secure one large piece | Loose material and paint use |
| 9. Vegetable and recycled-tool printing | Gardens, abstract spring | Repeated printing | Indoor | Fully open-ended | Vegetables, cardboard tools, paint | Yes | Cut and inspect tools | Food suitability and sharp edges |
| 10. Flower-observation print | Flowers | Printing and drawing | Indoor or outdoor | Guided | Broad printing tool, paint, flower image | Yes if painted | Prepare tool and display subject | Material selection |
| 11. Tissue-paper garden collage | Gardens, rain, insects | Collage | Indoor | Guided | Paper, tissue paper, glue | Usually | Prepare paper and glue | Scissors, glue, loose pieces |
| 12. Nature collage | Seasonal nature | Collage | Indoor or outdoor | Guided | Cardstock, approved materials, glue | Usually | Approve all materials | Collection and handling choices |
| 13. Playdough garden | Gardens, landscapes | Modeling | Indoor or outdoor | Guided | Playdough, large components | No | Inspect and portion materials | Loose-component suitability |
| 14. Egg-carton spring sculpture | Flowers, insects, nests | Construction | Indoor | Guided | Carton pieces, paint, glue | Yes | Adult cuts and inspects cartons | Cut edges and attachment |
| 15. Collaborative garden mural | Plants, animals, weather | Group painting and collage | Indoor or outdoor | Guided | Large paper, paint, collage materials | Yes | Secure paper and divide tools | Shared space and materials |
| 16. Shadow drawing | Plants, animals, light | Tracing and drawing | Outdoor or sunny indoor area | Guided | Paper, crayons, plant or toy | No | Find and stabilize a shadow | Outdoor location and objects |
| 17. Water-painted rocks | Rain, water, nature | Temporary water painting | Outdoor | Fully open-ended | Water, large brushes, stone surface | No | Review the location | Water placement and surfaces |
| 18. Nature weaving | Leaves, branches, gardens | Weaving | Indoor or outdoor | Guided | Stick or cardboard loom, yarn, strips | Usually no | Prepare the loom | Yarn, sticks, and collected items |
A versatile core kit includes:
- Paper and heavier cardstock
- Washable paint or liquid watercolor selected for the setting
- Crayons
- Thick and standard brushes
- Droppers
- Glue
- Tissue paper and construction paper
- Large sponges
- Recycled cardboard
- Soft playdough
- Trays, table covers, and absorbent paper
Coffee filters, artificial flowers, bubble wrap, yarn, and natural materials are optional. Spring-art collections use supplies ranging from cartons and tissue paper to sponges, clay, and nature trimmings, but a smaller reusable kit can support several techniques (Toddler Approved).
Natural objects are optional too. Paper leaves, handmade cardboard tools, artificial blooms, and photographs preserve the seasonal subject when outdoor collection is unavailable, prohibited, or unsuitable for the group.
For a quick choice:
- Choose collage, printing, or crayon resist for work that can dry and be displayed.
- Choose the collaborative garden mural when several children will contribute to one piece.
- Choose playdough for construction without wet paint.
- Choose vertical painting when you have a stable upright surface.
- Choose tray-based color mixing when you want wet media contained within a defined area.
Process Art, Guided Art, and Directed Crafts
Process art centers exploration of materials, techniques, and individual choices rather than reproduction of a predetermined result. Product-focused or directed art instead uses instructions, a model, or a template to move participants toward an expected design (Pocket of Preschool).
This guide recognizes three formats:
- Fully open-ended process art: The child selects colors, tools, marks, arrangement, and stopping point without being asked to represent something specific.
- Guided process art: The adult provides a subject or question—perhaps a garden, rainstorm, butterfly, or flower—but does not prescribe the exact appearance.
- Directed craft: The adult supplies a model, template, or sequence intended to produce a recognizable form.
Free color mixing is fully open-ended. Asking, “What kind of garden would you like to create?” is guided process art because the garden theme frames the work. Asking everyone to place six identical petals around a pre-cut circle is a directed flower craft.
A flower, rainbow, or butterfly prompt does not become fully open-ended merely because children use paint. A butterfly-shaped page narrows the interpretation; plain folded paper provides more room to interpret the resulting print. Similarly, following a fixed rainbow sequence is more directed than investigating what happens when several colors meet.
Exploratory and directed projects are different formats, and neither needs to be presented as universally superior. Both can involve meaningful use of paper, paint, scissors, glue, and construction materials. The important practice is to describe the amount of adult direction honestly.
Useful prompts invite observation and choice:
- “What changed?”
- “Which tool would you like next?”
- “What textures do you notice?”
- “Where would you like to place this?”
- “What happened when you pressed?”
- “Would you like to add something or leave it as it is?”
- “How are these marks alike or different?”
Avoid interpreting children’s marks for them. “Tell me about this part” leaves more room than “Is that the sun?”
Spring Painting and Color Experiments
These five activities use watercolor, washable paint, crayons, droppers, and brushes. The directions describe observable actions—squeezing, tilting, drawing, pressing, and handling tools—without promising developmental outcomes.
1. Coffee-filter color mixing
Format: Fully open-ended process art Supplies: Coffee filter or other absorbent paper, protected tray, washable liquid watercolor, droppers, table covering Adult setup: Put one filter or sheet in each tray. Offer small portions of color and test the droppers.
Child-facing steps:
- Choose a color.
- Squeeze the dropper top and release it while the tip is in the color.
- Move the dropper over the paper.
- Add one or two drops.
- Add another color if you wish.
- Watch the colors spread and meet.
- Decide whether to add more or stop.
Drying: Leave the work flat in the tray or transfer it carefully to a flat drying surface.
Substitution: Use a tested paper towel, blotting paper, or another absorbent paper.
Open-ended prompt: “What changed when the colors met?”
Coffee filters and paper towels are among the absorbent surfaces used for dropper art and color exploration. Begin with limited liquid as an editorial setup choice, then adjust after seeing how the selected paper responds.
2. Crayon-resist spring drawing
Format: Guided process art Supplies: White or light wax crayon, sturdy pale paper, washable watercolor, brushes, water containers Adult setup: Stabilize the paper if needed. Test the crayon, paint, and paper together before the session.
Child-facing steps:
- Make lines, circles, spirals, or a spring-inspired drawing with the crayon.
- Try different kinds of marks.
- Choose a watercolor.
- Brush color across the crayon marks.
- Look for lines that become more visible.
- Add more marks or color if you choose.
Drying: Keep the paper flat until dry.
Substitution: Use a darker crayon if white-on-white drawing is frustrating. The marks will be visible before painting, but the same resist technique can still be explored.
Open-ended prompt: “Which lines became easiest to see?”
Crayon resist uses wax-crayon marks beneath watercolor. Spring versions can include flowers, rain, wind, insects, or nonrepresentational marks without requiring identical pictures (Golden Road Arts).
3. Butterfly fold print
Format: Fully open-ended on plain paper; guided process art on butterfly-shaped paper Supplies: Foldable paper, washable paint, brush or spoon, tray or mat Adult setup: Fold and reopen each sheet so the center line is visible. If using butterfly-shaped paper, cut it beforehand. Offer shallow portions of paint.
Child-facing steps:
- Open the folded paper.
- Put a few small spots or lines of paint on one side.
- Fold the empty side over the paint.
- Press with a flat hand.
- Open the paper carefully.
- Compare the two sides.
- Repeat with another small amount of paint if you wish.
Drying: Open the paper fully and dry it flat.
Substitution: Use rectangular paper instead of a butterfly shape for a less directed invitation.
Open-ended prompt: “What do you notice about the two sides?”
Fold printing creates mirrored marks when painted halves are pressed together and reopened. The result may suggest butterfly wings, but children do not need to turn every print into a butterfly.
4. Rain-and-wind painting
Format: Guided process art Supplies: Absorbent paper, rimmed tray, washable liquid watercolor, droppers Adult setup: Put paper inside the tray and stabilize it if necessary. Leave room for children to move their trays without bumping one another.
Child-facing steps:
- Place one or two drops on the paper.
- Hold two sides of the tray.
- Tilt the tray slowly.
- Watch the color travel.
- Tilt it in another direction.
- Add another color if you wish.
- Decide when the rain or wind marks are finished.
Drying: Return the tray to a level surface and leave the paper flat.
Substitution: Rotate the paper or pull the color with a brush instead of tilting the tray.
Open-ended prompt: “Which way did the color travel when you moved the tray?”
This adaptation uses gravity rather than making straw blowing part of the activity.
5. Vertical spring painting
Format: Guided process art Supplies: Large paper, washable paint, brushes, stable easel or suitable vertical surface, floor covering Adult setup: Secure the paper at several points. Check that the surface is stable and place paint within reach. Vertical painting can also be arranged by attaching paper to a suitable wall or door (The Art of Education).
Child-facing steps:
- Choose a brush and color.
- Make a mark high, low, or in the middle.
- Try a long mark, short mark, or dot.
- Change tools or colors if you want.
- Decide whether the marks remind you of rain, flowers, wind, or something else.
- Tell an adult when you are finished.
Drying: Leave the work attached if appropriate or move it to a designated drying surface.
Substitution: Attach paper inside a large washable cardboard box if a suitable easel is unavailable.
Open-ended prompt: “How do your marks change when you move the brush up, down, or across?”
Spring Printmaking with Flowers, Sponges, and Recycled Tools
For the following activities, offer paint in shallow containers or brush it onto the printing surface. Treat this as a setup option to test with the selected paint and tool; different materials may require different amounts.
Keep tool types in separate trays and establish a place for used tools. Prepare a flat surface for wet prints before starting.
6. Flower printing
Format: Guided process art Supplies: Sturdy artificial flowers, handmade paper tools, or locally approved blooms and greenery; washable paint; brushes; paper Adult setup: Use artificial flowers or handmade tools when identification or collection permission is uncertain. Inspect each tool and brush on a light layer of paint.
Child-facing steps:
- Choose a printing tool.
- Brush paint onto its surface.
- Place it on the paper.
- Press gently.
- Lift it straight up.
- Turn it, overlap it, or choose another tool.
- Continue until the print feels complete.
Drying: Place the print flat.
Substitution: Crumple sturdy paper into a broad flower-like printing tool.
Open-ended prompt: “What kind of mark did this tool leave?”
Flowers and greenery can be coated with washable paint and pressed onto paper, while artificial blooms provide an alternative when natural-material use is not appropriate (St. Louis Mom).
7. Sponge garden printing
Format: Guided process art Supplies: Large sponge pieces in flower, leaf, or abstract forms; washable paint; shallow trays; paper Adult setup: Adults cut the shapes in advance. If necessary, dampen and wring out a stiff sponge before adding paint.
Child-facing steps:
- Choose a sponge.
- Touch it to the paint or brush paint onto it.
- Press it on the paper.
- Lift it to reveal the mark.
- Turn the sponge and print again.
- Add stems, weather, insects, or abstract marks if you wish.
Drying: Dry flat.
Substitution: Use folded cardboard, a broad adult-selected cork, or a rolled cardboard strip.
Open-ended prompt: “How does the print change when you turn the sponge?”
Demonstrate pressing and lifting without providing a finished garden that everyone is expected to copy.
8. Bubble-wrap texture prints
Format: Fully open-ended process art Supplies: One large piece of bubble wrap, washable paint, broad brush or roller, paper, tray Adult setup: Secure the bubble wrap to a tray, cardboard backing, or roller so it remains one large component.
Child-facing steps:
- Look at or touch the bumpy surface.
- Brush paint across the bumps.
- Press paper onto the surface, or press the tool onto paper.
- Pat gently.
- Lift the paper or tool.
- Repeat with another color or direction if you want.
Drying: Lay prints flat.
Substitution: Use corrugated cardboard or another broad, adult-inspected texture.
Open-ended prompt: “Where can you see the tool’s texture in your print?”
Bubble-wrap printing is commonly described as pressing painted bubble wrap onto paper to create a repeated texture (Procare).
9. Vegetable and recycled-object printing
Format: Fully open-ended process art Supplies: Adult-prepared celery ends or cut potatoes, cardboard rolls, broad cardboard shapes, washable paint, paper Adult setup: Adults prepare vegetables and heavy cardboard. Inspect recycled tools before offering them and place different tool types on separate trays.
Child-facing steps:
- Choose one printing tool.
- Brush on paint or touch it to a shallow paint tray.
- Press it onto the paper.
- Lift it and examine the shape.
- Make a row, cluster, overlap, or scattered group.
- Try another tool if you wish.
Drying: Dry flat.
Substitution: Use only cardboard rolls and folded cardboard if food materials are not being used.
Open-ended prompt: “Which tool made the most surprising mark?”
Treat the objects as tools rather than templates for a required flower or caterpillar. Repeated celery marks may resemble petals, but children can decide whether the marks represent anything.
10. Flower-observation print
Format: Guided process art Supplies: Paper, washable paint, broad sponge or cardboard printing tool, crayons, artificial flower or clear flower photograph Adult setup: Display the flower or photograph where children can see it. Prepare one broad printing tool and a small paint portion. No earlier activity is required.
Child-facing steps:
- Press the painted tool onto the paper several times.
- Lift the tool and look at the printed shapes.
- Look closely at the flower or photograph.
- Find a line, color, edge, or shape that interests you.
- Add lines or colors based on what you noticed.
- Look again before deciding whether to add more.
Drying: Required if paint remains wet; otherwise, the finished drawing can be stored once the base print is dry.
Substitution: Use a leaf photograph, artificial plant, or spring landscape image.
Open-ended prompt: “What did you notice after looking a second time?”
The aim is observation, not exact copying. A child might respond to one curved edge, a color change, the spaces between petals, or the direction of a stem.
Collage, Sculpture, and Collaborative Spring Art
These projects move from flat arrangement to three-dimensional construction and shared work. Adults prepare resistant cardboard, portion glue, and select components before the invitation begins.
11. Tissue-paper garden collage
Format: Guided process art Supplies: Cardstock, tissue or construction paper, glue, crayons, suitable scissors where appropriate Adult setup: Provide larger pre-cut pieces as well as paper that can be torn. Begin with small portions of glue and add more when needed.
Child-facing steps:
- Choose paper for flowers, stems, leaves, rain, insects, or abstract additions.
- Tear, cut, fold, or crumple pieces as appropriate.
- Arrange the pieces without glue.
- Move them until you like their positions.
- Add glue.
- Press the pieces into place.
- Add drawn marks if you want.
Drying: Keep flat until the glue has set.
Substitution: Use recycled wrapping paper, magazine pages, fabric scraps, or construction paper.
Open-ended prompt: “Where would you like this piece to go?”
Arranging first allows children to revise the composition before attaching the pieces. If the selected glue makes thin paper hard to handle, test a smaller amount or switch to sturdier paper.
12. Nature collage
Format: Guided process art Supplies: Cardstock, approved leaves, petals, and twigs; glue; paper scraps, fabric, or artificial alternatives Adult setup: Obtain any required collection permission and review each natural item before use. Offer paper and artificial materials as equivalent choices.
Child-facing steps:
- Choose several materials.
- Place them on the cardstock without glue.
- Turn, overlap, or rearrange them.
- Decide which pieces you want to attach.
- Add glue.
- Press the materials gently.
- Add paper, fabric, or drawn marks if desired.
Drying: Keep flat. Absorbent paper may be placed beneath the cardstock as an editorial cleanup option.
Substitution: Use cut-paper leaves, fabric, artificial petals, or printed photographs.
Open-ended prompt: “What textures do you notice in the materials you chose?”
Nature collages may use leaves, sticks, and flowers, but the arranging and attaching process can also be explored with paper, fabric, and recycled materials.
13. Playdough garden
Format: Guided process art Supplies: Soft playdough, large craft sticks, broad cardboard pieces, adult-selected artificial flowers or other oversized components, tray Adult setup: Inspect the loose components and offer only those selected for the children and setting. If the dough resists the intended pressing and rolling actions, test another batch or material.
Child-facing steps:
- Press, roll, flatten, or coil the dough.
- Place it on the tray.
- Add a large stick, flower, or cardboard piece if you wish.
- Build a garden, landscape, or invented arrangement.
- Change the construction by moving or removing pieces.
- Leave it assembled or take it apart for reuse.
Drying: None for reusable playdough. Follow the product directions if using material intended to harden.
Substitution: Use dough with broad cardboard shapes and omit artificial flowers.
Open-ended prompt: “What would you like to change in your construction?”
14. Egg-carton spring sculpture
Format: Guided process art Supplies: Adult-prepared carton sections, washable paint, brushes, glue, cardstock or cardboard base Adult setup: Adults cut and inspect carton sections before the activity. Offer broad pieces rather than requiring children to handle tiny components.
Child-facing steps:
- Choose one or more carton pieces.
- Turn them in different directions.
- Paint the surfaces you want to change.
- Arrange, stack, or combine the pieces.
- Ask for help attaching unstable sections.
- Decide whether the sculpture suggests flowers, insects, nests, or an invented form.
Drying: Place painted or glued sculptures on a stable shelf.
Substitution: Use folded cardboard, selected paper cups, or wide cardboard tubes.
Open-ended prompt: “What happens when you turn that piece another way?”
This remains guided process art while children determine the arrangement. If everyone receives identical pieces and follows a fixed flower model, the activity becomes a directed craft.
15. Collaborative garden mural
Format: Guided process art Supplies: Large roll paper, crayons, washable paint, brushes, large sponges, glue, collage paper, trays Adult setup: Secure the paper to an appropriate table, floor, fence, or wall. Divide duplicate tools among several trays rather than creating one central pile.
Child-facing steps:
- Choose a place where you can work without covering another person’s hands or tools.
- Add a plant, animal, weather mark, color area, or abstract shape.
- Choose another tool if space permits.
- Look at what other children have added.
- Ask before covering another person’s contribution.
- Add to a new section or connect areas when the participants agree.
- Step back and look at the shared work.
Drying: Leave the mural flat or securely attached until its paint and glue are dry.
Substitution: Join several smaller sheets before the activity or assemble dry individual prints into one mural later.
Open-ended prompt: “Where could your contribution join the shared garden?”
One tray might hold painting tools, another large paper pieces, and another crayons. Children can contribute different kinds of marks; they do not need assigned or identical products.
Outdoor and Nature-Observation Art
Outdoor art can use weather, light, water, rocks, and observation without requiring children to collect or preserve anything. A temporary experience can be complete without becoming a take-home object.
16. Shadow drawing
Format: Guided process art Supplies: Paper, crayons or suitable pencils, an approved plant, branch, toy, or classroom object, tape or paper weights Adult setup: Find a place where the object casts a visible shadow. Stabilize the paper and object.
Child-facing steps:
- Look at the shadow on the paper.
- Trace all or part of its edge.
- Move or remove the object.
- Look at the outline that remains.
- Turn the paper if you wish.
- Transform the outline with lines, colors, or shapes.
Drying: None unless wet media are added.
Substitution: Use a toy animal or artificial plant near a sunny window.
Open-ended prompt: “What could this outline become?”
Shadow drawing can begin with the outline of a natural object and continue as an original drawing rather than ending with a literal copy.
17. Water-painted rocks
Format: Fully open-ended temporary process art Supplies: Plain water, stable containers, large brushes, an approved rock or stone surface Adult setup: Review the location and decide where water containers can be placed. Use plain water.
Child-facing steps:
- Dip the brush in water.
- Brush a line, patch, or shape onto the surface.
- Look at how the wet area changes.
- Add another mark.
- Watch an earlier mark begin to disappear.
- Paint again or move to another approved area.
Drying: No drying rack is needed. The marks disappear as the water evaporates.
Substitution: Paint with water on an approved outdoor chalkboard or dark paving surface.
Open-ended prompt: “What do you notice as the wet mark dries?”
Water-painted rocks produce temporary darkened marks rather than a permanent object. A photograph can document the work if desired, but documentation is optional.
18. Nature weaving
Format: Guided process art Supplies: Adult-selected Y-shaped stick, yarn, large approved leaves or long paper strips Adult setup: Inspect the stick and decide whether it is suitable for the group. Wrap yarn across the fork to make a simple loom and secure the ends. Select the weaving materials in advance.
Child-facing steps:
- Choose one large leaf or paper strip.
- Slide it over one strand and under the next where possible.
- Pull it through gently.
- Add another piece.
- Remove or replace pieces if you want to change the design.
- Stop when the loom looks complete to you.
Drying: Usually none. Natural materials may change as they dry.
Substitution: Use a cardboard frame with broad slots and paper or fabric strips.
Open-ended prompt: “Which material would you like to weave next, and where will you place it?”
Nature-weaving examples use yarn wrapped across a Y-shaped stick, with leaves or other found materials woven through it (St. Louis Mom). Obtain permission before collecting, take only what the location allows, and use paper strips and a cardboard loom whenever natural-material identification or handling is uncertain.
An optional extension for any outdoor activity is observational flower drawing. Display a locally approved flower, artificial flower, or photograph. Invite children to represent a color, line, pattern, or shape they notice rather than copying an adult drawing.
Adaptations for Different Abilities and Preferences
Adapt by observing what a child can comfortably do now. Do not assume that every three-year-old needs one version or every five-year-old another.
When independent cutting is not appropriate:
- Offer pre-cut pieces.
- Provide paper that can be torn.
- Stabilize the paper before cutting.
- Offer suitable adaptive scissors with close adult support when available.
- Invite children with relevant experience to cut strips or fringe rather than complex outlines.
- Let the child direct an adult: “Cut here,” “Make it longer,” or “I want two pieces.”
When small objects are not being used:
- Replace seeds, beads, mini pom-poms, marbles, and tiny collage pieces with large paper shapes.
- Use broad cardboard components and oversized artificial flowers.
- Attach an appropriate component to a larger backing or handle.
- Paint or draw a detail instead of adding a loose decoration.
Published spring activity collections sometimes use beads, mini pom-poms, seeds, and other small manipulatives. None is necessary for the art activities in this guide; broad paper, cardboard, paint, and playdough provide alternatives (Natalie Lynn Kindergarten).
When controlling a small tool is difficult:
- Offer thick-handled brushes.
- Use larger sponge pieces.
- Stabilize paper with tape or a nonslip mat.
- Provide large collage pieces.
- Try soft playdough.
- Place paint in a broad tray that does not slide.
- Allow two-handed use of a tray, roller, or printing tool.
These are options to assess individually, not claims that one tool size will work for every child.
When a child avoids direct contact with wet or sticky media:
- Use brushes, sponges, rollers, or handled printing tools.
- Fold paper over paint for a no-touch fold print.
- Let an adult apply glue before the child positions paper.
- Offer dry crayons alongside watercolor.
- Allow observation without pressure to touch.
- Do not make finger painting a required step.
When mouth-blowing is not part of the activity:
- Tilt a rimmed tray.
- Rotate the paper.
- Pull color with a brush.
- Place and move liquid with a dropper.
- Select another non-mouth method appropriate to the setting.
When a child participates briefly or communicates nonverbally:
- Offer a choice between two colors or tools.
- Let the child place one large collage piece.
- Invite the child to point where an adult should attach an item.
- Let the child watch colors spread or water marks disappear.
- Provide one defined section of a shared mural.
- Accept stopping as a valid choice.
Pinching, tearing, cutting, squeezing, rolling, pressing, and tool handling are available actions within these projects. They should not be described as guaranteed therapy, proof of a developmental benchmark, or a promise of measurable outcomes.
Safety and Supervision Before the Paint Comes Out
Pre-activity check: “Preschool” is a broad audience label, not a material-safety determination. Before each activity, consider the participating children, the environment, local rules, and the instructions supplied with every product.
The following is a conservative editorial review list, not a declaration that a material is safe or unsafe in every situation:
- Scissors: Select the type under your program’s rules and decide what level of adult help is needed. Adults should prepare resistant cardboard.
- Small pieces: Decide whether loose components belong in the invitation. Replace them with broad paper or cardboard when appropriate.
- Marbles: None of the 18 activities requires them.
- Seeds and beads: These are optional and can be replaced with paper shapes, paint marks, or larger selected components.
- Mini pom-poms: Painted dots, sponge marks, and paper circles can provide the same visual role.
- Plastic bags: None of the activities requires bag-based painting.
- Yarn: Review the length, setup, and level of direct supervision for nature weaving.
- Sticks: Inspect each selected stick and use a cardboard loom when a stick is not appropriate.
- Staples: Adults should remove or fully manage staples in recycled materials.
- Droppers: Demonstrate how the tool will be used and store it with the art materials.
- Detachable components: Inspect artificial flowers, recycled tools, and handled objects before presenting them.
Published preschool activity lists include scissors, small manipulatives, bags, yarn, food, natural objects, and mixed sensory ingredients, but their activity-level safety guidance is inconsistent. That makes local material review necessary rather than optional (The OT Toolbox).
Choose art products intended for your setting and use them according to their labels. Avoid turning broad descriptions such as “paint,” “glue,” “dough,” or “washable” into universal assurances about a product’s suitability.
For natural materials, ask the relevant local questions before collection or use:
- Is collection permitted at this location?
- Has the material been identified locally?
- Does the program have allergy or plant-handling requirements?
- Could the plant or location have been treated?
- Does the product or program guidance permit this use?
- Would an artificial flower, photograph, or paper version meet the same artistic purpose?
Do not make straw blowing essential. Tray tilting, paper rotation, brush movement, and dropper placement provide alternative ways to move liquid color.
Food, shaving cream, hair gel, sand, and collected materials are not needed for this collection. If a separate activity introduces them, review that activity under the applicable product instructions, allergy procedures, hygiene rules, and local policies.
This planning checklist does not replace regulations, program policies, product labels, allergy plans, or individualized professional guidance.
A Five-Day Spring Art Sequence
This is a flexible sequence, not a tested schedule. Select one project at a time according to space, drying capacity, materials, and available supervision.
| Day | Main activity | Technique | Optional extension |
|---|---|---|---|
| 1 | Coffee-filter color mixing | Dropper painting and color observation | Display dry filters or use them as collage paper |
| 2 | Flower or sponge printing | Printmaking | Add observational lines after prints dry |
| 3 | Tissue-paper or nature collage | Arranging, tearing, cutting, and gluing | Add one piece to a shared garden |
| 4 | Playdough garden or egg-carton sculpture | Three-dimensional construction | Draw or photograph the construction |
| 5 | Shadow drawing, water-painted rocks, or mural | Observation, temporary art, or group work | Combine dry work into a shared mural |
Day one: color mixing
Offer coffee-filter color mixing with a limited initial selection of colors. Add more only if that suits the group and setup. The central observation is how liquid travels through absorbent paper and what happens where colors meet.
Prompt: “What changed when the colors met?”
Extension: Once dry, display the filters or make them available for a later collage.
Day two: printmaking
Choose flower printing when approved tools are available, or use sponge printing as a nature-free version. Demonstrate coating, pressing, and lifting without showing a required garden picture.
Prompt: “What texture did that tool make?”
Extension: Place a real, artificial, or photographed flower beside the dry print. Invite children to add a line or color based on something they notice.
Day three: collage
Offer tissue paper, construction paper, fabric, or approved natural materials. Encourage children to arrange first and glue second. Begin with limited glue and replenish it as needed.
Prompt: “Where would you like this piece to go?”
Extension: Let each child decide whether to keep an individual collage intact or contribute a separate piece to a shared garden.
Day four: sculpture
Offer playdough with large selected materials or adult-prepared carton sections. Children can press, roll, stack, paint, join, separate, and rebuild.
Prompt: “What happens if you turn that piece?”
Extension: Invite children to draw the construction, photograph temporary work if appropriate, or return reusable materials for another session.
Day five: observation or collaboration
Select shadow drawing or water-painted rocks for an outdoor experience. If outdoor work does not fit the setting, finish with a collaborative mural indoors.
Prompt: “What do you notice outside today?”
Extension: Add selected dry prints, drawings, or collage pieces to the mural. Participation remains optional; children may keep individual work intact.
Across the week, vary painting, printing, collage, three-dimensional construction, observation, and group art rather than repeating one technique beneath different spring templates.
Prepare adult-cut materials in advance, label drying spaces before beginning, and portion wet media into shallow containers. Choose one project according to the supervision and space actually available.
Label paper before painting when that will help return work. Keep wet work flat unless dripping is part of the intended technique, and reserve enough drying space to prevent pieces from overlapping.
Temporary art does not need to become permanent. Photograph a shadow drawing, water-painted rock, or playdough construction if desired. Let a collaborative mural remain shared rather than cutting it into identical take-home products.
Frequently Asked Questions About Preschool Spring Art
What supplies are most useful for preschool spring art activities?
Start with paper or cardstock, washable paint or liquid watercolor selected for your setting, crayons, brushes, droppers, glue, tissue or construction paper, large sponges, recycled cardboard, soft playdough, trays, and table protection.
Add artificial flowers, coffee filters, bubble wrap, yarn, or approved natural objects only when a particular activity calls for them. A compact core kit can support painting, printing, collage, modeling, and collaborative work.
What is the difference between process art and a spring craft?
Process art emphasizes exploring materials, techniques, and choices rather than reproducing a predetermined result. A fully open-ended color-mixing invitation does not require a particular image.
Guided process art introduces a subject—such as a garden or rainstorm—while leaving the colors, arrangement, marks, and interpretation to the child. A directed craft uses a model, template, or specific sequence to produce a recognizable form. The presence of paint alone does not determine the format; the amount of choice does.
Which spring art activities can work for younger preschoolers?
Choose according to observable readiness rather than age alone. Possible starting points include water painting, large-sponge printing, vertical painting with broad brushes, fold printing, playdough construction, and collage with broad pre-cut pieces.
Reduce the number of materials, stabilize the work surface, offer no-touch options, and provide direct help as needed. Do not assume that every younger preschooler should use scissors, droppers, yarn, collected objects, or loose components.
What can replace flowers, leaves, and other collected natural materials?
Use artificial flowers, paper leaves, fabric scraps, cardboard branches, photographs, large sponge shapes, or recycled printing tools. Children can observe a flower photograph, print with a handmade paper tool, weave paper through cardboard, or create a collage entirely from construction paper.
These options preserve spring colors, shapes, and subjects when outdoor collection is unavailable or not selected for the setting.
Which materials need especially careful adult selection and supervision?
Review scissors, loose pieces, marbles, seeds, beads, mini pom-poms, plastic bags, yarn, sticks, staples, droppers, recycled materials, and detachable craft components. For natural materials, consider identification, local collection rules, program requirements, possible treatment, allergies, and permission.
Also review the label and intended use of every paint, glue, dough, and other art product. When a material raises questions, omit it or redesign the invitation with paper, paint, cardboard, photographs, or another locally approved option.
Choose one technique and a manageable set of materials rather than attempting all 18 projects. Successful preschool spring art does not require identical finished products. It requires an appropriate invitation, room for children to make choices, careful material selection, and enough adult support for the particular group.