
Turn One Painted-Paper Setup Into Three Preschool Valentine Crafts
Paint, tear and assemble one batch of paper into Valentine cards, collages or a class garland, with simple adaptations and safety checks.
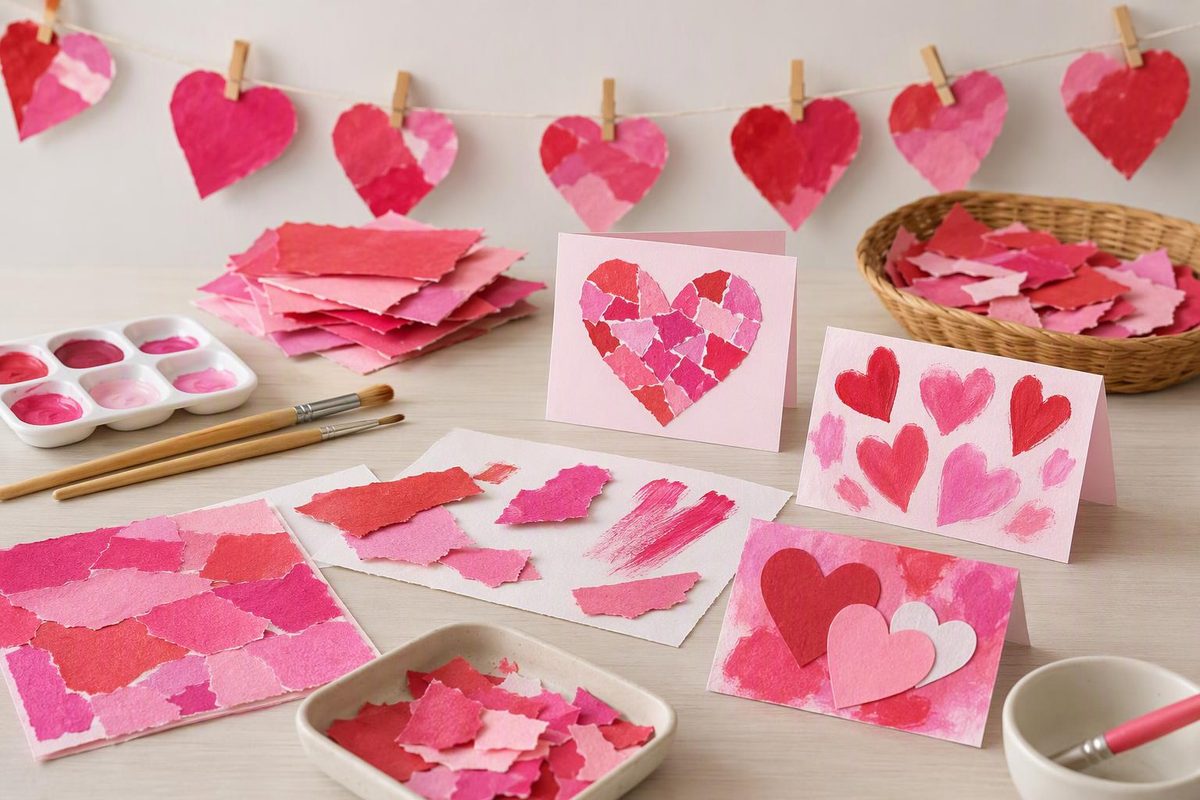
Instead of preparing a different project for each child, make painted paper together and let children turn it into cards, collages or a class garland. Spreading the work across three short sessions leaves time for paint and glue to dry, while each child chooses how the finished craft looks.
This is a Valentine theme, not a copy-the-sample task. NAEYC describes process art as choice-driven and open-ended, with adults thoughtfully providing a base, art materials and tools rather than prescribing one result (NAEYC).
Materials
- White or light-colored heavyweight paper
- Washable tempera paint intended for children
- Two or three paintbrushes, sponges or cardboard stampers
- Shallow paint trays
- Table covering or washable placemats
- Crayons or washable markers
- Glue sticks or school glue intended for children
- Construction-paper scraps
- Child-appropriate blunt-tip scissors, optional
- Yarn and a hole punch for adult garland assembly, optional
Choose art supplies labeled for children and read each package before use. The CPSC recommends art materials marked “Conforms to ASTM D-4236” and without cautionary warnings for children (CPSC Art and Craft Safety Guide).
Day 1: Paint the paper
Cover the work surface and pour a small amount of paint into shallow trays. Give each child one sheet of heavyweight paper, then offer a few ways to add color:
- Sweep paint across the page with a wide brush.
- Dab with a sponge.
- Make lines with the edge of a small cardboard rectangle.
- Press one color over another and notice what changes.
- Leave some of the original paper showing.
There is no need to draw hearts yet. The first session is about making patterned paper that can become something else later.
Use prompts that draw attention to the process without directing the design: “How did you make that mark?” “What happens when the colors touch?” or “Where would you like more paint?” Write each child’s name on the back and leave the pages flat to dry.
Skill opportunity: Broad brush movements, pressing and lifting provide varied hand and arm actions. Choosing tools and deciding where marks go adds simple planning.
Simplify: Tape the paper to the table and offer one color with one chunky sponge.
Extend: Invite the child to make two kinds of marks or compare a light press with a firm press.
Day 2: Turn the paper into heart pieces
Return the dry paintings. Children can tear, cut or combine both methods to make collage pieces.
For a child who wants recognizable hearts, fold a section of painted paper in half and draw half a heart along the fold. The child can cut on the line, or an adult can cut while the child holds and turns the paper. Other children may prefer torn shapes, strips or tiny painted scraps. All of these pieces work in the final crafts.
Place each child’s pieces in a labeled tray or envelope. Keep useful offcuts; a narrow painted strip can become a border, a message label or part of the class garland.
Skill opportunity: Tearing gives the hands different jobs as they pull in opposite directions. Cutting adds practice opening, closing and guiding scissors, but it does not need to be part of every child’s project.
Simplify: Begin with wide paper strips that are easy to grasp and tear. Provide pre-cut hearts if the child wants to focus on arranging and gluing.
Extend: Sort the pieces by size, find two with similar colors or arrange several from smallest to largest before gluing.
Day 3: Choose one Valentine craft
Set out the painted pieces, plain construction paper, crayons and glue. Offer three destinations rather than assigning one result.
1. Folded Valentine card
Fold construction paper in half. The child glues painted pieces to the front and adds marks, a drawing or a dictated message inside.
A card may be for a friend, relative, neighbor or another important person. It can also be kept as artwork. Avoid requiring children to declare a “best friend” or make the same message for everyone.
For an early-literacy connection, provide a separate name card to look at. Copying is optional; an adult can write the child’s words exactly as dictated.
2. Open-ended heart collage
Give the child one large sheet as a base. Invite them to arrange the painted pieces before gluing. Hearts may become flowers, faces, imaginary creatures or an abstract design.
Demonstrate only the tool action: a glue stick makes a short swipe on the back of a piece, while liquid glue can be applied with a small brush. There is no need to show a finished model.
3. Shared class garland
Each child decorates one sturdy paper heart with painted scraps and drawings. When the pieces are dry, an adult punches holes and threads them onto yarn.
Leave a little space between the hearts so each contribution remains visible. Children can help choose the order by color, size or a pattern before the adult strings and securely displays the garland out of reach.
Skill opportunity: Arranging and attaching pieces invites spatial planning. Cards add meaningful mark-making; the garland connects individual choices to one shared display.
Simplify: Offer a glue stick, one large base and three or four large pieces.
Extend: Add a repeated color pattern, dictate a title or explain the order chosen for the garland.
One-session shortcut
If the project must fit one art period, prepare painted paper in advance or replace Day 1 with patterned scrapbook paper. Let children tear or cut the paper, then choose a card or collage. This preserves the selecting, arranging and joining work while removing drying time.
For more standalone options, use the quick chooser in these easy preschool Valentine crafts. The Valentine crafts organized by skill can help when the main goal is weaving, stamping, name recognition or pretend play.
Safety and setup checks
- Keep adult scissors, staplers, craft knives and hot-glue tools out of the children’s work area.
- Use only a small amount of paint or glue at a time, keep food and drinks away from the table and wash hands after art. These precautions are included in the CPSC’s guidance for children using art materials (CPSC).
- Closely supervise scissors and choose whether they are a child tool, an adult tool or unnecessary based on each child’s current control—not age alone.
- Skip beads, sequins, gems and other tiny decorations when a child mouths materials or younger children can reach the project. CPSC advises keeping small objects off the floor and out of young children’s reach because they may present choking hazards (CPSC).
- Reserve yarn for adult assembly and secure the finished garland out of children’s reach.
- Offer crayons and dry paper pieces to a child who does not want to touch wet or sticky materials.
The practical checkpoint is participation: one child may paint and tear, another may cut and write, and another may arrange pre-cut pieces. Each route can produce a Valentine craft that visibly belongs to its maker.