
Autumn Art Projects Designed for Little Hands
Fit depends on current abilities, sensory preferences, mouthing behavior and comfort with directions, not age alone or how an adult-made sample looks.
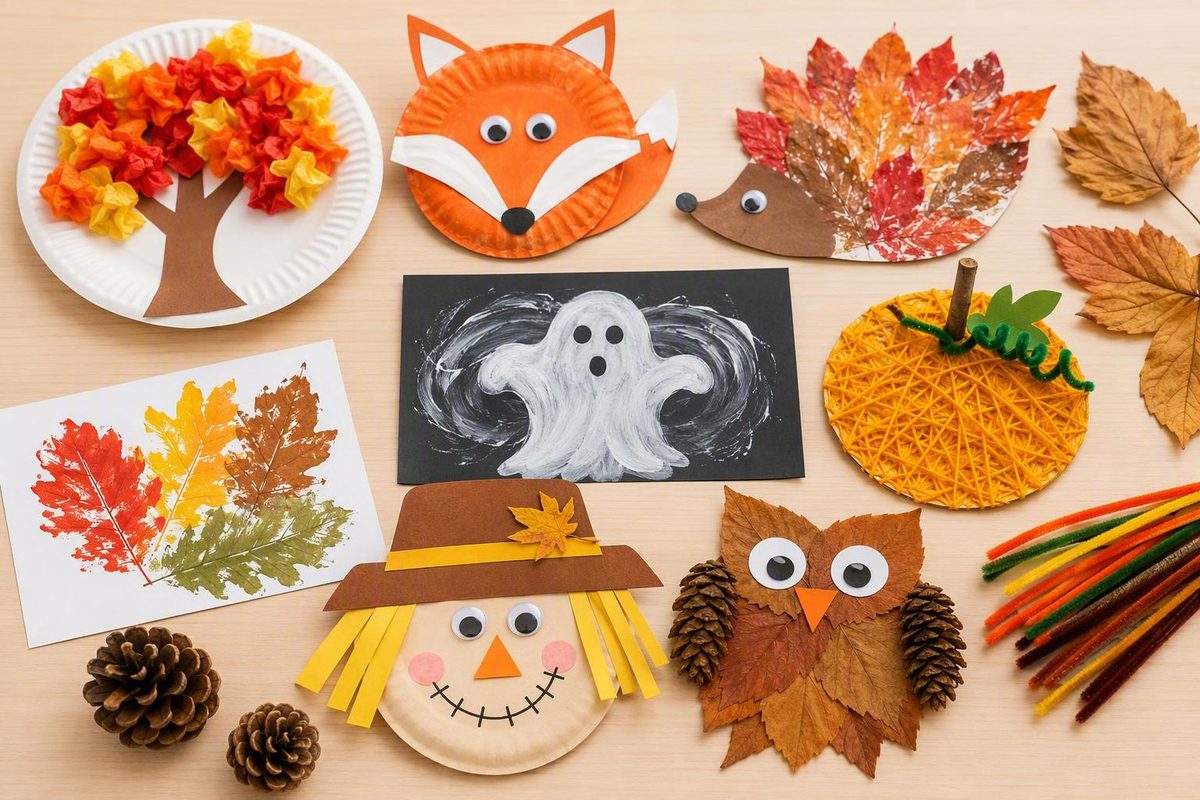
Useful fall crafts for preschoolers offer more than a seasonal decoration. They give children manageable opportunities to rub, print, paint, arrange, press, tear, draw, and tell stories while adults handle preparation involving sharp tools, thick materials, or staplers.
The 15 projects below are flexible starting points for children ages three to five. Some are open-ended process art; others lead toward a recognizable leaf, pumpkin, tree, scarecrow, crown, or turkey. Choose according to the individual child’s current abilities, sensory preferences, mouthing behavior, and comfort following directions—not age alone or the appearance of an adult-made sample.
These are sourced and editorially adapted project ideas, not individually tested age or safety ratings. The responsibility labels and substitutions are conservative planning suggestions. Adults should reassess the actual materials, tools, and detachable pieces used in their setting.
How to choose a fall craft for your preschooler
Begin by deciding what kind of experience fits the child and setting. Process art emphasizes open-ended exploration: the child experiments with materials without needing to reproduce a model. Product-oriented crafts use a sequence of directions to create a recognizable object. Neither approach is inherently better. A child might enjoy free-form leaf printing one day and carefully assembling a paper-plate pumpkin the next. This distinction is also described in Pocket of Preschool’s overview of fall process art.
| # | Project | Primary materials | Format | Paint? | Drying required? | Adult preparation | Loose small-part considerations |
|---|---|---|---|---|---|---|---|
| 1 | Leaf rubbing | Leaves, paper, crayons | Process art with visible leaf textures | No | No | Peel crayons if needed | No small decorations; remove broken crayon fragments promptly |
| 2 | Leaf printing | Large leaves, washable paint, paper | Process art or arranged collage | Yes | Yes | Inspect leaves; set out paint | No small decorations if large leaves and broad tools are used |
| 3 | Large-piece nature collage | Large leaves, broad sticks, cardboard, glue | Process art | No | Glue may need to dry | Inspect materials; cut thick backing | Conditional: use only large pieces and remove brittle fragments |
| 4 | Coffee-filter leaves | Filters, washable markers, water | Color exploration with recognizable leaves | No paint | Yes | Prepare mister; cut shapes | No small decorations in the listed setup |
| 5 | Apple-stamped pumpkins | Apple or large sponge, washable paint, paper | Recognizable pumpkin prints | Yes | Yes | Halve apple or prepare sponge | No small decorations if details are drawn or made from large paper |
| 6 | Paper-plate pumpkin | Plate, paint, large paper pieces | Recognizable pumpkin | Yes | Yes | Pre-cut stem and leaves | Paper pieces must remain large and securely attached |
| 7 | Contained color-mixing pumpkin | Paint, sturdy transparent pouch, paper frame | Process art or pumpkin display | Yes, contained | No display drying if the pouch remains sealed | Fill and seal pouch; prepare frame | Conditional on the pouch and frame remaining intact |
| 8 | Painted pumpkin | Whole pumpkin, washable paint, paper features | Recognizable decorated object | Yes | Yes | Prepare large features | Check attached paper pieces for detachment |
| 9 | Handprint fall tree | Paper, washable paint, markers | Recognizable tree | Yes | Yes | Trace or cut if needed | No small decorations in the listed setup |
| 10 | Fork-printed tree | Cardstock, washable paint, fork | Process printing with a tree theme | Yes | Yes | Draw trunk; prepare surface | The fork is a supervised tool, not a decorative part |
| 11 | Corn-cob texture painting | Corn cob or roller, paint, paper | Process art | Yes | Yes | Prepare printing tool | Remove loose cob material or damaged tool parts |
| 12 | Paper-plate scarecrow | Plate, paper, yarn or broad paper strips | Recognizable scarecrow | Optional | Glue or paint may need to dry | Pre-cut large features | Yarn and paper attachments require individual assessment |
| 13 | Paper-bag turkey | Bag, newspaper, large paper feathers | Recognizable turkey | No | Glue may need to dry | Pre-cut feathers; staple closure | Use large paper features and keep staples under adult control |
| 14 | Leaf people or animals | Large leaves, broad sticks, paper, glue | Open-ended characters | No | Glue may need to dry | Inspect materials; cut thick backing | Conditional: avoid pebbles, acorns, toy eyes, and brittle fragments |
| 15 | Autumn crown | Paper band, large leaves, glue or tape | Recognizable wearable craft | No | Optional | Cut and fasten band | Recheck natural materials and attachments before wearing |
Three responsibility labels appear throughout:
- Child-led: The child directs the arrangement, colors, marks, or story while an adult remains nearby.
- Adult-assisted: The child participates, but an adult stabilizes materials, demonstrates a tool, manages liquid, or helps with a step.
- Adult-only: The adult completes the step. In this guide, that includes cutting apples, cutting thick cardboard, operating a stapler, and using sharp preparation tools.
Before choosing, consider whether the child still puts nonfood objects in their mouth, avoids wet or sticky textures, can stop when asked, and is comfortable with a short sequence of steps. Chronological age is only one part of readiness.
Practical filters can narrow the list:
- No paint: Leaf rubbing, large-piece nature collage, paper-bag turkey, leaf characters, and autumn crown.
- Nature-based: Leaf rubbing, leaf printing, nature collage, painted pumpkin, corn-cob painting, leaf characters, and crown.
- No intentionally included small decorations: Leaf rubbing, leaf printing, coffee-filter leaves, apple stamping, color mixing, handprint trees, fork printing, and corn-cob painting can be prepared without beads, seeds, buttons, or toy eyes. Adults must still check the actual tools and materials for breakage or detachable pieces.
- Optional prompts: Leaf projects can include color sorting and observation; pumpkins can include counting or color mixing; trees can hold name letters; characters can invite storytelling.
Four leaf crafts: rub, print, collage, and blend colors
These projects use leaves as textures, printing tools, collage materials, or shapes. None requires a downloadable template.
1. Leaf rubbing
Materials: Dry, fairly flat leaves; plain paper; whole crayons with the wrappers peeled away.
Responsibilities: Rubbing is child-led. Peeling stubborn wrappers is adult-assisted or adult-only if a tool is needed.
Place a leaf vein-side up on the table and cover it with paper. Hold the paper steady, then rub the long side of a crayon across it. The outline, veins, and raised texture will gradually appear. If the paper shifts, an adult can hold one edge while the child rubs. The long-side crayon technique appears in Macaroni KID’s leaf-rubbing directions.
This is primarily process art, although the result visibly resembles a leaf. Let the child overlap rubbings, use unexpected colors, or cover only part of the page.
Check crayons during use and remove broken fragments, particularly when the child mouths materials. Crayons and pencils are among the objects identified as possible choking risks for young children in Raising Children Network’s choking guidance.
Optional prompt: Compare two leaf edges. Are they smooth, pointed, wavy, or uneven? Treat the question as an invitation rather than a test.
2. Leaf printing
Materials: Large leaves, washable paint, broad brushes, and paper.
Responsibilities: Painting and pressing can be child-led. Holding a curling leaf or helping lift it is adult-assisted.
Brush a thin layer of paint onto one side of a leaf. Place the painted side against the paper, press across the surface, and lift from one edge. Repeat with other colors or leaves. The basic paint-press-lift method is documented in Kiddi Kollege’s leaf-printing instructions.
This can remain open-ended process art, especially when the child chooses the placement and colors. Deliberately arranging the prints as a wreath, tree, or border makes the result more product-oriented.
Optional prompt: After the prints dry, sort a few by color or count a small group of clearly separated prints. Do not interrupt a child who is absorbed in experimenting with pressure and paint.
3. Large-piece nature collage
Materials: Large leaves, broad or blunt sticks, sturdy paper or cardboard, and child-appropriate glue.
Responsibilities: Arranging is child-led. Applying glue may be child-led or adult-assisted. Cutting thick cardboard is adult-only.
Let the child arrange the materials before introducing glue. Leaves can overlap, point outward, form a path, or cover the surface. When the arrangement is ready, lift one item at a time, add glue, and return it to the page.
This is open-ended process art unless the child decides to make a particular scene or object. There is no need to outline a shape or show a finished model.
For this guide, use a conservative material-selection rule: discard collected pieces with insects, dirt that cannot be brushed away, mold-like growth, irritating residue, brittle sections, or sharp edges. This is a screening precaution, not a validated cleaning or sanitizing method. When a child mouths materials, omit acorns, seeds, pebbles, and other small objects.
Optional prompt: Compare two large leaves by size or texture. The child can answer, point, or continue arranging without responding.
4. Coffee-filter leaves
Materials: Plain coffee filters, washable markers, a water mister, a protected drying surface, and scissors.
Responsibilities: Coloring is child-led. Misting is adult-assisted because the adult controls the amount of water. Cutting is adult-only or closely assisted according to the child’s current scissor readiness.
Color broad patches or lines across a coffee filter. Mist it lightly so neighboring colors begin to spread. Leave the filter flat until completely dry. An adult can then draw and cut freehand leaf shapes, avoiding the need for a downloadable template. This color-mist-dry-cut sequence is documented in ABCDee Learning’s fall craft collection.
The coloring and blending stage is process-oriented. Cutting the dry filter into leaf shapes creates a recognizable result. Preserve the child’s choices by cutting around colored areas rather than trying to make every leaf identical.
Optional prompt: Before misting, ask what might happen where two colors meet. After drying, compare the prediction with the result.
Four apple and pumpkin projects without carving
These projects focus on stamping, painting, pressing, and arranging rather than carving. Adults still need to assess the actual paints, tools, adhesives, surfaces, and detachable decorations used.
5. Apple-stamped pumpkins
Materials: An apple, orange washable paint, paper, a shallow paint tray, and markers or large paper features. A large sponge can replace the apple.
Responsibilities: Halving the apple is adult-only. Dipping and stamping are child-led or adult-assisted. Drawing details is child-led.
An adult cuts the apple in half and places the cut side into a shallow layer of orange paint. The child presses it onto paper, lifts it, and repeats. Once the prints dry, add stems or faces with a marker or large paper pieces. Halved apples are among the fall printing tools described in Pre-K Printable Fun’s fall art collection.
This is usually a recognizable finished-product craft, although repeated or overlapping stamps can turn it into process art.
If food-based art tools do not suit the home or classroom, prepare a large pumpkin shape from a reusable sponge. Apples and other food materials introduce allergy, hygiene, and food-waste considerations, so group leaders should provide a nonfood alternative.
6. Paper-plate pumpkin
Materials: Paper plate, orange washable paint, brush or sponge, large green-paper stem and leaf pieces, and child-appropriate glue.
Responsibilities: Painting and attaching pieces can be child-led. Pre-cutting the stem and leaves is adult-only for children not ready to cut.
Paint the plate orange and leave it to dry. Arrange a large stem and one or more leaves along the top, then glue them down. Paper-plate pumpkin versions using orange paint and green-paper features appear in published fall craft collections.
This is a recognizable pumpkin craft. Make it more open-ended by offering different stem shapes, two shades of orange, or room for drawn lines and facial details.
A child who avoids paint can cover the plate with broad strips or large torn pieces of orange paper instead. Check the finished plate for lifting or detached pieces before displaying or handling it.
7. Contained color-mixing pumpkin
Materials: Red and yellow washable paint, a sturdy transparent pouch, strong tape suitable for the surface, and an optional paper frame.
Responsibilities: Filling, removing excess air, sealing, checking the closure, and mounting the pouch are adult-only. Pressing the pouch is child-led with an adult immediately present.
Place small amounts of red and yellow paint inside the pouch, remove excess air, and seal it. Reinforce the closure, then let the child press and push the colors through the plastic. An adult can mount the pouch behind a paper frame with a large pumpkin-shaped opening.
The underlying red-and-yellow mixing idea is adapted from a documented activity in which children squish paint between two paper plates. The pouch version is an untested editorial variation intended to contain direct contact with the paint; it is not documented as leakproof, lower-risk, or suitable for every child. Adults who cannot verify the pouch construction and maintain direct oversight should choose a different color-mixing setup.
The mixing stage is process art. Adding a pumpkin frame produces a more recognizable display.
8. Painted pumpkin
Materials: A whole pumpkin, washable paint selected for the intended age and use, broad brushes or sponges, and optional large paper features.
Responsibilities: Painting and arranging can be child-led. Cutting specialty materials and preparing complex attachments are adult-only.
Set the pumpkin on a stable, protected surface. Let the child paint broad areas, dots, lines, or overlapping colors. After the paint dries, add large paper leaves, a drawn face, or other large details.
This is a recognizable decorated object, but the painting can remain open-ended. A face or prescribed color scheme is optional.
Painting instead of carving changes the tools involved, but it should not be described as categorically safe, cleaner, or appropriate for every preschooler. Suitability still depends on the pumpkin’s stability and the specific paint, glue, tools, and attachments used.
Five fall trees and harvest crafts
These five projects move from tree printing to late-fall harvest themes. Children can practice the physical actions involved—pressing, crumpling, cutting, gluing, and arranging—without treating those actions as guaranteed developmental outcomes.
9. Handprint fall tree
Materials: Large paper, pencil or washable marker, brown crayon or paint, and red, orange, yellow, or brown washable paint.
Responsibilities: Fingerprint leaves are child-led. Tracing is adult-assisted. Cutting out the tree, if desired, is adult-only or closely assisted according to readiness.
Place the child’s hand and lower arm on the paper. Trace around them to create branches and a trunk, then color or paint the traced area brown. Add fingerprint leaves around the branches and along the ground.
The project produces a recognizable tree, but children can choose the number, placement, and colors of the leaves. The result does not need to match real foliage.
10. Fork-printed tree
Materials: Cardstock, washable marker, washable fall-colored paint, forks, shallow paint trays, and a protected work surface.
Responsibilities: Printing is child-led with close adult attention. Preparing the trunk and paint area is adult-assisted or adult-only.
Draw a trunk and several branches. Apply paint to the back of a fork or dip it lightly into a shallow tray, then press it around the branches. Add prints near the bottom to suggest fallen leaves.
This is process printing within a recognizable tree setup. Children can overlap colors, create dense areas, or leave open spaces. Keep the fork within the activity area and collect it when printing ends.
11. Corn-cob texture painting
Materials: Corn cob, washable paint, shallow tray, and a large sheet of paper. Textured cardboard or a reusable patterned roller can replace the cob.
Responsibilities: Rolling is child-led or adult-assisted. Preparing and managing a paint-covered tool is adult-assisted.
Roll the cob through a shallow layer of paint, then move it across the paper. Change direction, overlap tracks, or introduce another color. Corn-cob rolling is a documented fall painting format.
This is open-ended process art. The finished marks do not need to resemble corn or another harvest object.
Use textured cardboard or a reusable roller when a food-based tool does not fit the setting. This preserves the rolling action while addressing food-waste or food-contact concerns.
12. Paper-plate scarecrow
Materials: Paper plate, crayons or markers, large construction-paper pieces, substantial lengths of yarn or broad paper strips, and child-appropriate glue.
Responsibilities: Drawing and arranging are child-led. Cutting paper or yarn is adult-only or closely assisted according to readiness.
Draw the face directly on the plate. Arrange a large paper hat, nose, patches, and broad strips of paper or substantial lengths of yarn for hair. Glue the pieces down.
This is a recognizable scarecrow craft with room for individual choices. The face can show any expression, the hat can tilt, and the colors do not need to follow a model.
Use drawn or large paper eyes rather than loose toy eyes. If the child tends to mouth fibers or pull apart attachments, replace yarn with broad paper strips or drawn hair.
13. Paper-bag turkey
Materials: Paper lunch bag, crumpled newspaper, large paper feathers, crayons or markers, glue, and a stapler reserved for adult use.
Responsibilities: Crumpling, stuffing, drawing, and gluing are child-led. Stapling is adult-only.
Crumple newspaper and place it inside the bag. Fold the opening and have an adult secure it. The child can draw the face and attach large feathers.
For a simpler version, provide pre-cut feathers. Children ready for more steps can trace or make selected cuts with suitable scissors and assistance. The adult-stapled paper-bag turkey and this age-flexible feather approach are described in Total Preschool’s Thanksgiving activity guidance.
This is a recognizable product-oriented craft. Treat it as an optional late-fall or Thanksgiving project, not as a universal symbol of autumn. A leaf bird, owl, or imaginary woodland creature can use the same bag-and-paper construction when a turkey theme does not fit the family or classroom.
Two nature crafts for imaginative play and display
Natural materials can support seasonal observation, but being found outdoors does not automatically make an item suitable for preschool use.
For this guide, adults should inspect every collected item and discard pieces with insects, mold-like growth, irritating residue, brittle areas, or sharp edges. This is a conservative selection rule rather than a tested cleaning protocol. Do not rely on an unverified washing or sanitizing method to make a questionable object suitable.
14. Leaf people or animals
Materials: Large leaves, broad sticks, sturdy paper or cardboard, child-appropriate glue, and crayons or markers.
Responsibilities: Arranging and drawing are child-led. Inspecting materials and cutting thick backing are adult-only.
Place leaves and sticks on the paper before adding glue. A leaf might become a body, hair, wings, a tail, or a large hat. Once the child likes the arrangement, glue each piece in place. Draw the eyes, mouth, paws, or other details directly on the paper.
This can be open-ended process art or a recognizable character craft, depending on the child’s idea. Published nature-character activities similarly use leaves and sticks on sturdy paper.
Avoid relying on acorns, stones, pebbles, seeds, or loose toy eyes. Large leaves and drawn details preserve the character-making idea without intentionally adding miniature facial pieces.
Storytelling extension: Ask, “What is your character’s name?”, “Where does it live?”, or “What happened just before this picture?” If the child wants, write down one dictated sentence without correcting or redirecting the story.
15. Autumn crown
Materials: Wide paper or cardstock band, large leaves, glue or tape, crayons, and an optional stapler for adult use.
Responsibilities: Choosing and attaching leaves is child-led or adult-assisted. Cutting and fastening the band are adult-only.
Lay the band flat before fastening it. The child can arrange large leaves across it while leaving room at both ends. Glue or tape the leaves in place. Once the attachments are secure, an adult fits and fastens the band. Tape can replace a stapler when it holds adequately.
This is a recognizable wearable craft with open-ended decoration. Before the crown is worn, check for brittle points, loose pieces, or exposed fasteners.
Observation extension: Compare selected leaves by color, size, edge, and texture. Keep the discussion conversational: “I notice this one has a wavy edge—what do you notice?” works better than turning the crown into a quiz.
Add letters, counting, colors, and conversation without taking over the art
A seasonal craft can include an optional name, alphabet, counting, color, observation, or storytelling prompt. Present these as invitations—not as proof that a project improves literacy, mathematics, cognition, or creativity.
The simplest approach is to finish the art first and offer an extension only if the child remains interested.
Name practice: Draw or paint a tree, then prepare one large paper apple for each letter in the child’s name. Write one letter on each apple and invite the child to arrange them in order before gluing. Children who do not want to sequence the letters can simply decorate the tree with apples.
Alphabet matching: Place several large paper pumpkins on the table, each marked with a letter. Name one letter and invite the child to locate the matching pumpkin. Published versions use a pom-pom held by a clothespin as a paint applicator; when those pieces are unsuitable, the child can point, dab with a large sponge, or use another broad handled tool.
Counting: Write a numeral on a large paper pumpkin. Offer large paper circles and invite the child to attach the corresponding number. This conservatively adapts a pumpkin-seed counting setup by replacing loose seeds with large paper pieces.
Color and observation: Sort large leaves or dry leaf prints by color. Compare edges, shapes, sizes, or textures. Before a red-and-yellow painting activity, ask what color might appear where the paints meet.
Storytelling: Invite the child to dictate a caption for a leaf character, scarecrow, tree, turkey, or pumpkin. An adult can write the child’s exact words without revising the grammar or steering the plot.
Gratitude over time: Place a branch in a stable, nonbreakable container and add large paper leaves carrying dictated comments about family, harvest, kindness, or something that made the child smile. Total Preschool describes adding dictated leaves over time and recommends keeping the seasonal focus on family, harvest, and thankfulness rather than historically misleading imagery in its Thanksgiving activity guidance.
Stop an extension when it begins to displace the child’s interest in painting, arranging, or telling a story. The prompt can wait for another day.
Preschool craft safety, substitutions, and adult preparation
Suitability depends on the individual child, especially whether the child still puts materials in their mouth. Children under four have a higher choking risk, but age alone does not determine readiness; individual risk can also vary with chewing ability, disability, or chronic illness. Beads, buttons, marker caps, plastic shapes, stickers, pebbles, balloons, crayons, pencils, and loose toy eyes are among the objects identified as choking risks for young children.
For fall crafts, conservative substitutions include:
- Large paper circles instead of seeds, beans, beads, buttons, or pom-poms
- Drawn eyes instead of googly eyes
- Broad paper or tissue-paper strips instead of confetti-sized pieces
- Large inspected leaves instead of acorns or pebbles
- Drawn stems and faces instead of plastic decorations
- A large sponge or roller instead of miniature stamping tools
These substitutions reduce reliance on intentionally included small decorations; they do not guarantee that the setup is free of risk. Paper can tear, crayons can break, attachments can detach, and natural materials can crumble. Reassess the actual materials during the activity.
Keep unused small materials out of reach. Count detachable tools and pieces before and after crafting, and inspect the surrounding area for dropped objects. Texas Children’s advises checking places such as under furniture and between cushions for small items a child could mouth.
This guide assigns staplers, box cutters, hot glue, glass, real candles, and thick-material cutting to adults as a conservative editorial policy. Where feasible, replace them with tape, child-appropriate glue, nonbreakable containers, pre-cut paper, and drawn details. Adults should also halve apples and prepare rigid or specialty stamping shapes.
Close supervision is necessary, but it does not make an unsuitable object appropriate or eliminate choking, ingestion, allergy, cutting, or material-specific concerns. Select and use paint, glue, markers, scissors, and other products according to their own age and use directions. Do not assume that acrylic paint, shaving cream, glitter, sealant, decoupage medium, or a specialty adhesive is appropriate merely because it appears in a craft tutorial.
In a group setting, screen for known food restrictions and provide an equivalent nonfood option. Do not use a peanut-butter activity in a group without allergy screening and an alternative.
Before children sit down, use this checklist:
- Inspect the floor and work area for small objects.
- Remove materials that do not fit the child’s mouthing behavior.
- Complete adult-only cutting and preparation.
- Count tools and detachable pieces.
- Protect the table and nearby floor as needed.
- Separate wet materials from dry materials.
- Plan a stable place where painted work can dry.
- Review the directions for the actual art products.
- Store remaining materials and adult tools out of reach.
- Decide which steps are child-led, adult-assisted, and adult-only.
Adapting the projects for age three, ages four to five, and groups
These adaptations are practical editorial options rather than verified age ratings for every project. Children of the same age can differ substantially in tool use, sensory preferences, communication, attention, mouthing behavior, and comfort with sequences.
For younger preschoolers or children who need more support:
- Pre-cut large paper pieces.
- Offer one or two paint colors rather than a full palette.
- Use broad paper that does not require precise placement.
- Draw facial details instead of attaching separate eyes or mouths.
- Reduce the craft to one main action, such as rubbing, stamping, or arranging.
- Hold the paper steady or help lift a printing tool.
- Present the next material only when it is needed.
For children ready for added complexity:
- Invite them to trace a large leaf, feather, or pumpkin.
- Offer suitable scissors for selected straight cuts with direct supervision.
- Let them arrange name letters on an apple tree.
- Count a manageable group of large paper pieces.
- Mix two paint colors and describe what changes.
- Plan a repeating color pattern if that interests them.
- Dictate a title, caption, or short story about the work.
For children who avoid sticky, wet, or unpredictable textures, offer crayons, dry paper collage pieces, a sponge, or a handled printing tool. An adult can hold the backing paper while the child points to, chooses, and places materials. A child does not need to finger-paint or touch glue to participate meaningfully.
For groups, complete adult cutting before children arrive. Pre-portion only large materials, and create separate wet and dry stations so children do not have to reach across paint to obtain paper. Avoid designs that create a bottleneck around one stapler, specialty cutter, or adult-controlled tool. A paper-bag turkey, for example, can remain at a dry drawing-and-gluing station while an adult secures completed bags separately.
Do not add complexity merely because a child is four or five. Choose the project whose materials and actions fit the child and setting, simplify the sequence, and then add letters, counting, extra colors, cutting, or decorative details only when they support the experience.
Frequently asked questions
What are the simplest fall crafts for a three-year-old?
Leaf rubbing, large-paper leaf printing, a collage made from pre-cut pieces, and a handprint tree are reasonable starting points because each can focus on one repeated action. An adult can peel crayons, stabilize the paper, prepare paint, trace the hand, and handle cutting.
“Simplest” still depends on the child. A child who avoids paint may prefer rubbing or dry collage, while a child who enjoys broad physical movement may prefer stamping on a large sheet. Use large materials, offer few sequential steps, and omit loose decorative pieces.
Which fall crafts avoid loose small parts?
Leaf printing, coffee-filter leaves, apple stamping, contained color mixing, painted pumpkins, handprint trees, fork-printed trees, and corn-cob painting can be prepared without intentionally adding beads, seeds, buttons, pebbles, or toy eyes.
Leaf rubbing can also fit when adults monitor the crayons and remove broken fragments. Nature collages, scarecrows, turkeys, leaf characters, and crowns require closer attention to detachable paper, yarn, and natural materials. No project should be treated as automatically free of small-part concerns simply because it begins with large supplies.
What is the difference between a fall craft and fall process art?
A product-oriented fall craft follows directions toward a recognizable result, such as a paper-plate pumpkin or scarecrow. Fall process art emphasizes exploration of materials, such as overlapping leaf prints or rolling textured paint across paper.
A project can include both. Coffee-filter color blending is process-oriented, while cutting the filter into a leaf creates a recognizable product. Fork printing allows open-ended marks within a prepared tree scene.
Can I add counting or letter practice to a fall craft?
Yes, as an optional extension. Put one letter of the child’s name on each large paper apple, match letters on large paper pumpkins, or pair a numeral with the same number of large paper circles. Leaves and prints can also be sorted by color or counted after the artwork dries.
Offer the prompt without requiring it. If the child wants to continue painting, arranging, or telling a story, the counting or letter activity can wait.
What should I do if my preschooler still puts craft materials in their mouth?
Remove loose small parts and use large paper shapes, broad strips, drawn features, and large inspected leaves. Keep marker caps, buttons, beads, seeds, pebbles, balloons, toy eyes, miniature stickers, and similar objects out of reach.
Stay close and stop the activity if unsuitable materials are repeatedly brought to the mouth. Supervision does not make a choking-risk object appropriate for a child who mouths materials.
Begin with one project chosen for the child’s present abilities, mouthing behavior, sensory preferences, and the adult help available—not for the attractiveness of a finished sample. Large materials, pre-cut pieces, washable art supplies used according to their directions, and clearly assigned adult-only steps can make planning more manageable.
A leaf rubbing, leaf print, large-piece collage, or handprint tree is a practical place to start. Add counting, colors, letters, or storytelling only when the prompt supports rather than overtakes the child’s creative process.