
A Playful Path From Finding a Name to Writing It
Tracing keeps the path visible; copying requires looking between a model and the work; writing from memory adds letter recall and sequencing.
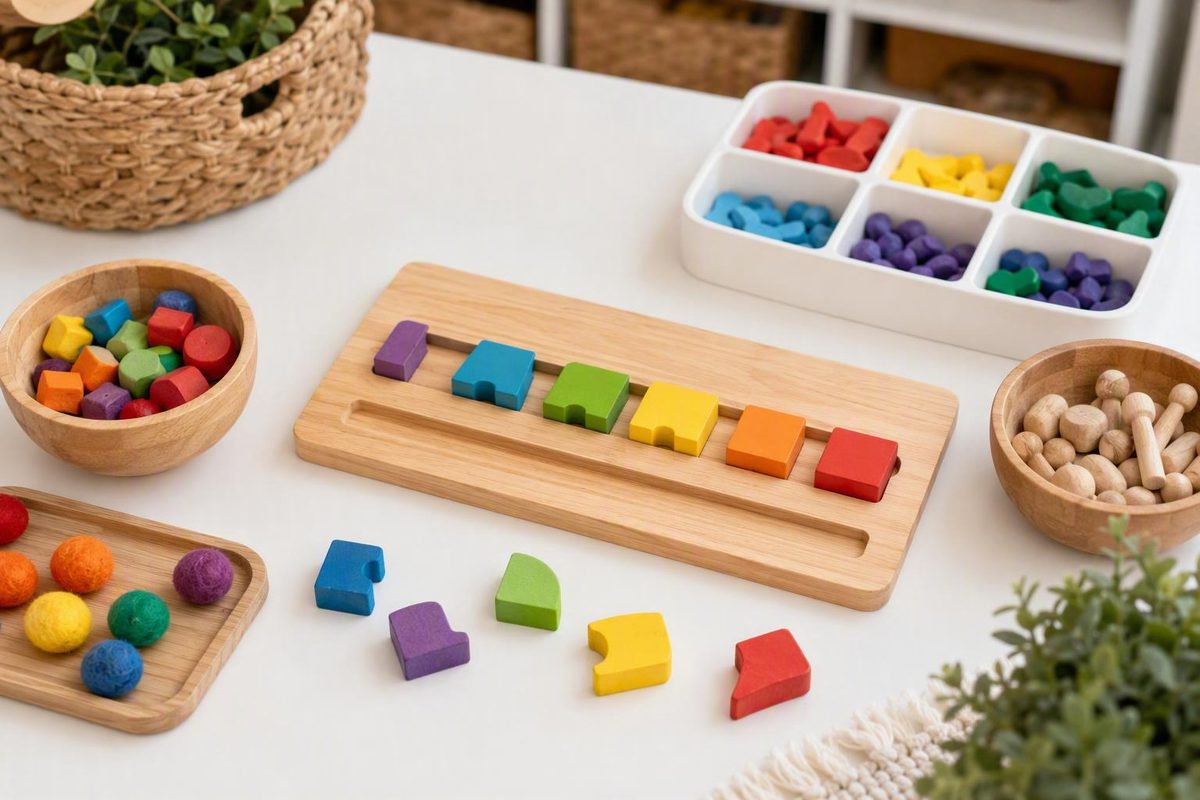
Name activities for preschool can be organized around the skill a child is currently practicing. Finding a printed name, rebuilding it with movable letters, tracing it, and writing it from memory are related—but they are not the same task.
Begin with what the child can do now. Use the child’s correctly written preferred name, provide enough visual or physical support for a successful attempt, and reduce that support gradually. The activities below use inexpensive materials and can be adapted for classrooms, centers, small groups, arrival routines, or home.
Material suitability and developmental readiness always depend on the individual child, the exact materials, the setting, and the available adult support.
Start With the Skill the Child Is Practicing
Before choosing an activity, identify the target skill:
- Finding the whole printed name: Selecting the name from two or more printed choices.
- Matching individual letters: Placing identical letters on or beside a complete model.
- Putting letters in order: Arranging separate letters in the sequence shown.
- Forming letters with hands-on materials: Making letter shapes with dough, a finger, a brush, yarn, or another medium.
- Copying from a model: Writing while looking at a separate printed name.
- Writing from memory: Attempting the name without a visible model.
Success at one stage does not establish mastery of the next.
Use this quick decision path:
- Cannot find the name among a few choices: Begin with a photograph beside the printed name.
- Finds the name but cannot rebuild it: Use direct letter matching and simple sequencing.
- Builds the name while viewing a model: Move the model beside the work, provide a partial cue, or add a small number of distractors.
- Shows interest in writing and can control the chosen tool: Offer optional tracing or copying.
- Copies comfortably: Invite—but do not require—an attempt from memory.
Readiness, experience, communication preferences, and interest vary. Practitioner guidance does not establish one universal age for independent name writing. My Pre-K Box, a commercial preschool resource, likewise states that there is no fixed age at which every child should confidently write a name, while presenting its age observations as approximate rather than as deadlines (My Pre-K Box’s name-writing guidance).
Use the same support ladder throughout the guide:
- Photograph plus printed name
- Full model with direct matching
- Full model beside the work
- First-letter or partial cue
- Required letters mixed with a few distractors
- No model
Do not remove a cue because the child completed an activity once. Change one variable at a time and restore support if confusion or frustration appears.
The supervision labels below are conservative planning prompts, not guarantees that an activity is safe or independent. Magnets, scissors, small pieces, and gel-filled bags are among the materials practitioner guidance identifies as requiring preparation or supervision; adults must still evaluate the actual child, object, and setting (My Pre-K Box’s activity cautions).
| Activity | Main target | Basic materials | Setting | Planning prompt | Reusable | Printer needed |
|---|---|---|---|---|---|---|
| Photo-and-name arrival match | Whole-name recognition | Photo, cards, pocket | Arrival | Routine oversight | Yes | No |
| Room name hunt | Recognition and matching | Cards or sticky notes | Movement | Active oversight | Sometimes | No |
| Initial sticker cover | Initial recognition | Paper, stickers | Table | Check sticker size | No | No |
| White-crayon reveal | Recognition | Crayon, paint, paper | Art | Help with paint | No | No |
| Reusable card exploration | Letter familiarity | Card, marker, paper scraps | Center | Check loose materials | Yes | No |
| Letters in a cup | Matching and sequencing | Cup, large letter pieces | Center | Check piece size | Yes | No |
| Two-copy puzzle | Matching and sequencing | Two cards, scissors | Table | Adult preparation | Yes | No |
| Craft-stick puzzle | Sequencing | Sticks or cardboard strips | Center | Inspect pieces | Yes | No |
| Block or cube name | Sequencing | Blocks, removable labels | Floor or table | Routine oversight | Yes | No |
| Magnetic-letter mat | Matching and sequencing | Card, letters | Center | Check magnets closely | Yes | No |
| Clothespin strip | Sequencing | Strip, lettered clips | Table | Check clips and access | Yes | No |
| Playdough name | Formation | Dough, model, tools | Table | Check ingredients and tools | Usually | No |
| Writing tray | Formation | Tray, filler, tool | Center | Check filler | Yes | No |
| Dry-erase card | Tracing or copying | Protected card, marker | Center | Routine oversight | Yes | No |
| Sealed gel bag | Tracing | Secure bag, gel, model | Table | Close supervision | Limited | No |
| Wet-brush or chalk name | Formation or copying | Water, brush, chalk | Outdoors or board | Routine oversight | Yes | No |
| Pencil, glue, and yarn | Tracing and formation | Paper, glue, yarn | Small group | Close help | No | No |
| Name-ball roll | Recognition | Large ball or cards | Group | Active oversight | Yes | No |
| Cookie Jar name draw | Recognition and counting | Cards, container | Circle | Routine oversight | Yes | No |
| Bingo-tune name song | Oral sequence | Name card, voice | Circle | Routine oversight | Yes | No |
| Classmate name hunt | Peer-name matching | Cards, optional photos | Movement | Active oversight | Yes | No |
| Name chain | Listening and recall | Optional photos | Circle | Routine oversight | Yes | No |
| Movement relay | Sequencing | Large letters, model | Movement area | Active oversight | Yes | No |
| Functional name use | Recognition, copying, or recall | Cards, labels, art | Daily routines | Setting-specific | Yes | No |
Make a Reusable Name Model Before You Begin
One well-made name card can support most activities in this guide.
Use paper, a file folder, a cereal-box panel, or another clean piece of cardboard. Write the child’s preferred name in large, clear letters with generous spacing. Avoid decorative lettering that makes familiar letters difficult to distinguish.
Confirm:
- The name the child currently uses
- Correct spelling and pronunciation
- Preferred capitalization
- Spaces between name components
- Hyphens and apostrophes
- Accents and other diacritics
Do not shorten, simplify, respell, anglicize, or remove meaningful marks to make an activity easier. Adapt the materials to the name.
For beginning recognition, place a clear photograph beside the name. Once the child finds that card reliably, make a second version without the photograph while keeping the original available.
Lamination, contact paper, or a reusable sleeve allows dry-erase use. For a no-lamination version, attach a replaceable paper model to sturdy cardboard with removable tape or slide it beneath a transparent folder cover. Large, clearly spaced name cards are used in practitioner examples for drawing, tracing, loose-parts placement, and sensory exploration (Picklebums’ hands-on name-card activities).
The same card can support:
- Direct letter matching
- Movable-letter construction
- Dough or tray-based formation
- Copying on paper or a board
- Optional artwork labeling
- Sign-in routines
- Independent center reference
Store cards in individual folders, a pocket chart, a bucket, or on a ring. Before displaying names or photographs publicly, consider family preferences and the setting. A private attendance station, individual folder, or teacher-held card set may be more appropriate than an open wall display.
Activities for Recognizing the Whole Name
These activities focus on recognizing the complete printed name. A child does not need to identify every letter first.
1. Photo-and-name arrival match
- Materials: Photograph, matching name card, one or two alternatives, and a pocket, tray, or attendance board.
- Setup: Place the photograph beside the correct card. Begin with alternatives that look noticeably different.
- Play: Invite the child to find the card and place it in a personal pocket or private sign-in space.
- Beginner support: Point to the photograph and compare the first letters or overall word lengths.
- Extension: Remove the photograph, add more choices, or include a name with a similar initial.
Keep this a welcoming routine rather than a morning test. If the child guesses, return to two choices and compare them together.
2. Room name hunt
- Materials: Cards or large sticky notes, plus matching photographs, folders, cubbies, or personal containers.
- Setup: Place cards in visible, reachable locations that do not invite climbing or searching through private belongings.
- Play: The child returns each card to the matching person, photograph, folder, or cubby.
- Beginner support: Use the child’s name and only one alternative.
- Extension: Add several names or compare two that begin with the same letter.
If public labels create a privacy concern, use the cards only during the activity and return them to a closed folder afterward.
3. Initial-letter sticker cover
- Materials: Paper or cardboard, marker, and suitably sized paper stickers.
- Setup: Draw the child’s initial as a large outline.
- Play: Let the child cover the outline with stickers in any comfortable direction.
- Beginner support: Offer larger stickers or lift one edge for easier removal.
- Extension: Place the decorated initial beside the full name and find every instance of that letter.
The target is noticing the initial, not producing a perfect outline. Check sticker size and likely use before offering them.
4. White-crayon name reveal
- Materials: Heavy paper, white crayon, watercolor paint, water, and brush.
- Setup: Press firmly while writing the name in white crayon.
- Play: The child brushes watercolor over the paper to reveal the name.
- Beginner support: Reveal only the initial or keep the reusable model nearby.
- Extension: Match the revealed word to one of two cards, locate its first letter, or compare its length with another name.
Crayon resist is an art format, not proof that a literacy skill has been mastered. Use the finished image to prompt looking, matching, and conversation.
5. Large reusable name-card exploration
- Materials: Protected name card, dry-erase markers, paper scraps, foam shapes, or other suitably sized pieces.
- Setup: Place the card on a stable surface with a limited selection of materials.
- Play: Draw over or around the letters, place paper pieces along their shapes, or uncover the card from beneath a thin layer of suitable tray material.
- Beginner support: Explore only the initial or demonstrate one short line.
- Extension: Find a repeated letter or match one movable letter to the card.
Small beads, gems, and similar loose parts may be unsuitable because of mouthing or insertion risks. Picklebums specifically recommends paper scraps when small pieces are a concern (Picklebums’ material-safety discussion).
After several experiences, observe naturally:
- Can the child find the card from two choices?
- Can they find it without a photograph?
- Can they identify or match the initial?
- Can they distinguish it from a similar-looking name?
- Do they notice when two names begin with the same letter?
Activities for Matching and Sequencing Name Letters
Once a child recognizes the complete name, movable pieces can make its internal structure visible. Begin with the full model, then reduce support only when the child is comfortable.
1. Letters in a cup
Write one name letter on each large cardboard tile, block, or other suitable piece. Put exactly the needed letters in a cup labeled with the complete name.
The child pours out the pieces and places them over or beneath the model. Include the correct number of duplicates when letters repeat. Later, move the model beside the work or add one or two distractors.
Practitioner examples use cups with tiles, magnets, blocks, clothespins, and cubes, although large cardboard pieces can provide the same sequencing task without specialized materials (PreKinders’ name-spelling activities).
2. Two-copy name puzzle
Make two identical name strips. Keep one complete and cut the second into letters or visible name segments.
First, match each cut piece directly to the complete copy. Next, build the name beneath it. Later, turn the model over or leave only the first letter visible.
For a long name, begin with a few larger chunks before separating every letter. This lets the child practice matching before relying on memory.
3. Self-checking craft-stick puzzle
Line up wide craft sticks and place one letter on each. Draw a simple picture across the assembled sticks or attach sections of one child-approved image. When the letters are ordered correctly, the picture also comes together.
Keep the full name card nearby at first. Later, offer only the sticks. This picture-across-sticks arrangement has been used as a visual check for name order (Frugal Fun for Boys and Girls’ craft-stick example).
Inspect sticks for splinters or sharp edges. Broad cardboard strips are an alternative.
4. Block or linking-cube name
Place one letter on each large block, Duplo-style brick, or linking cube. Removable labels preserve shared materials.
Build horizontally or vertically. When possible, orient the printed model in the same direction as the construction so rotation does not add an unrelated challenge.
Later, add one distractor or invite the child to build without the model and check the result afterward.
5. Magnetic-letter name mat
Place a complete name card on a magnetic board or tray. Match letters directly to the card, then build beneath it, and finally try with a partial cue or no model.
Magnets require a setting-specific check for size, condition, loose components, and likely use. If they are unsuitable, replace them with large paper, foam, or cardboard letters.
6. Clothespin name strip
Write the complete name on a sturdy strip. Add one letter to each clothespin and clip the letters in sequence below the model.
Pinching should not be required to participate. Offer easy-open clips, flat cards, pointing, eye-gaze choices, or partner placement. The literacy target may be letter order; operating a clothespin is a separate demand.
When letters are out of order:
- Compare the construction with the model.
- Point to the first unmatched position.
- Ask, “What do you notice here?”
- Move only the relevant pieces.
- Reduce the number of pieces if needed.
- Restore direct matching.
The purpose is to make sequence visible, not to catch mistakes.
Sensory and Art Activities for Exploring Letter Formation
These optional activities allow children to explore letter shapes and movement before or alongside pencil work. They are not proven substitutes for handwriting instruction and do not guarantee fine-motor improvement.
1. Playdough building or stamping
Place a protected name model on the table. Roll dough into lines and curves over the letters or stamp the name with alphabet tools.
Begin with the initial or one section of a long name. Later, form letters beside the model. Review dough ingredients, preparation surfaces, tools, and the needs of the children involved; neither homemade nor commercial dough should be treated as universally allergy-safe.
Children who avoid dough can use broad paper strips or other setting-approved shape pieces.
2. Sand or writing tray
Add a shallow layer of suitable material to a stable tray and place the name card beside it. Form one letter at a time with a finger, brush, capped tool, or another appropriate implement.
If texture, cleanup, allergy, or ingestion concerns make sand or food-based fillers unsuitable, use a dry-erase surface, drawing board, or other dry alternative.
3. Dry-erase name card
Use one card for three distinct tasks:
- Trace: Follow letters printed on the card.
- Copy: Write beneath a separate visible model.
- Recall: Turn over the model and attempt the name from memory.
If copying becomes difficult, return to tracing or movable letters rather than requiring more repetitions.
4. Sealed gel tracing bag
Place a securely closed bag containing a small amount of gel over the printed model. Reinforce the closure, put the bag in a shallow tray, inspect it before use, and supervise for leaks or damage.
The child traces across the outside of the bag. A sealed bag is not automatically safe because its contents are enclosed. Use a drawing tablet or dry-erase sleeve when the bag or filling is unsuitable.
5. Wet-brush or chalk name
Write one large letter on a chalkboard, pavement, or approved washable surface. Invite the child to copy it with a wet brush or chalk.
This option reduces paper use and permits larger movements. Keep the model visible, work one letter at a time when needed, and leave speed out of the task.
6. Pencil, glue, and yarn tracing
Write the name in highlighter. The child may trace it with a pencil, add a line of school glue, and place yarn over the wet path. An adult may need to control the glue, hold the yarn, or handle cutting.
In one personal activity account, the child enjoyed the pencil and glue stages but found the sticky yarn difficult to position; the adult helped by holding it above the page (Hands On As We Grow’s yarn-tracing account). Treat difficulty as planning information, not something the child must push through. Torn paper or an adult-prepared dried-glue outline can replace yarn.
Across these activities:
- Tracing follows an existing path.
- Copying uses a separate visible model.
- Writing from memory removes the model.
Adults may demonstrate simple movements such as “down,” “across,” or “around.” Starting dots, arrows, specific fonts, and formal stroke-language systems appear in some classrooms, but the supplied practitioner guidance does not establish one universally required system. Coordinate formal formation practice with the child’s educational setting.
Name Games for Circle Time, Movement, and Classroom Routines
Name practice can also fit arrival, transitions, circle time, movement, and small groups.
1. Name-ball roll
Write first names on a large ball or keep separate cards beside it. Roll rather than toss when that better fits the group.
The recipient can identify the nearest name, match it to a photograph, or locate its initial. A child who does not want to speak can point or carry the card to the named person.
2. Cookie Jar name draw
Put name cards in a container and draw one while the group sings a familiar Cookie Jar verse.
The group can identify the child, count the printed letters, find the initial, or clap once per letter. Do not require every participant to read every name.
3. Name to the tune of “Bingo”
Sing the child’s name, then say or clap its letters in place of the familiar B-I-N-G-O sequence. Keep the printed card visible for anyone who wants to follow along.
The activity can remain entirely oral, and children may listen without performing alone.
4. Classmate name hunt
Match cards to photographs or classmates. Model the correct pronunciation and accept responses through speech, pointing, card carrying, a communication device, or an adult partner.
Do not turn unfamiliar pronunciation into comedy. If the child or family corrects the pronunciation, update the model.
5. Name chain
The first participant says their name. The next repeats it and adds their own.
Because the memory demand grows quickly, simplify by using photographs, repeating only the immediately preceding name, or having an adult display the relevant cards.
6. Movement relay
Place large name letters at one end of an open area and a full model at the other. Participants carry one letter at a time to assemble the name.
Allow walking, wheeling, or another inclusive movement mode.
7. Functional name use
Keep name models where they serve a real purpose:
- In the art area for optional labeling
- At a private sign-in station
- In a classroom-job area
- Beside personal folders
- At a transition point
- In a small-group attendance basket
Rhyming and initial-sound substitution games may be enjoyable, but they should remain optional. Practitioner guidance specifically notes that rhyming can be difficult for some children, including multilingual learners; performance in English wordplay does not determine whether a child recognizes their name (Pencils to Pigtails’ name-game guidance).
Adapt the Same Activities for Different Names and Needs
Adjust support within a familiar activity rather than creating a new task for every readiness level:
- Photograph plus complete name
- Full model with direct matching
- Model beside the work
- First-letter or partial cue
- Required letters with a few distractors
- No model
A child may need less support in a familiar puzzle and more in a new movement game.
For long or multiple-word names: Use a longer strip, larger surface, or folded card. Divide the work into visible chunks without changing the name. Offer a few pieces at a time or practice name components separately before combining them.
For repeated letters: Prepare the correct number of duplicates and identify their positions. Do not ask a child to use one piece as though it occupies two positions simultaneously.
For punctuation, spaces, and diacritics: Preserve hyphens, apostrophes, spaces, accents, and family-confirmed capitalization.
For limited grip or hand control: Offer oversized cards, lightweight pieces, large stampers, easy-release tools, pointing, eye-gaze choices, or partner placement. Do not make clothespin use or pencil control the price of participating in a recognition task.
For visual access: Try strong contrast, larger type, generous spacing, uncluttered layouts, tactile outlines, and fewer choices. These are general access options, not replacements for individualized guidance related to a diagnosed need.
For sensory preferences: Provide alternatives to gel, sand, glitter, sticky glue, scented materials, or direct hand contact. A brush, scoop, stylus, drawing board, dry tray, or flat card may preserve the literacy task.
For multilingual learners and multiple writing systems: Ask families how the name is written, capitalized, and pronounced in each relevant language or script. If more than one form is used, prepare separate family-confirmed models rather than blending them inaccurately.
For capitalization: Practitioner approaches differ. Pocket of Preschool describes using uppercase name cards first and introducing lowercase versions later in the school year (Pocket of Preschool’s name-card guidance).
Early Learning Ideas instead favors a capital initial followed by lowercase letters, while presenting that choice as the author’s preference rather than a universal rule (Early Learning Ideas’ name-writing guidance). Use the child’s correctly written preferred name on recognition cards and align formal formation practice with the educational setting when possible.
Plan, Supervise, and Observe Without Turning Play Into a Test
Conduct a setting-specific check before every activity. Review:
- Small beads, gems, tiles, caps, and loose letters
- Magnets and magnetic components
- Push pins or poking tools
- Scissors
- Hot-glue equipment and hardened glue edges
- Yarn and other long fibers
- Sand, rice, flour, salt, or other fillers
- Shaving cream, paint, glitter, and gel
- Plastic bags used for tracing
- Dough ingredients and preparation surfaces
Use large cardboard letters instead of small pieces or magnets when appropriate. Paper scraps can replace gems. Children can tear paper instead of cutting it. A drawing board or dry-erase card can replace messy sensory media.
Hot-glue preparation should remain an adult task, with the material cooled before children handle it; Pre-K Printable Fun explicitly assigns glue-gun preparation to adults in its raised-name activity (Pre-K Printable Fun’s name-recognition guidance).
Cutting yarn and positioning it over glue may also require direct help, as documented in the personal yarn-tracing activity account cited earlier. Inspect scissors, glue, yarn, and the finished piece for the actual setting and child.
Activities commonly warranting close adult review include those involving:
- Cutting
- Magnets
- Small loose pieces
- Yarn and wet glue
- Sealed sensory bags
- Fillers that may spill or be mouthed
- Unfamiliar paint, dough, gel, or cosmetic products
Do not call an activity independent merely because it is used that way elsewhere.
A sample five-day rotation can provide variety without prescribing an ideal frequency:
- Day one: Photo-supported recognition routine
- Day two: Movable-letter construction
- Day three: Movement or peer-name game
- Day four: Optional sensory or art formation
- Day five: Optional copying or recall attempt
Keep participation brief, responsive, and low pressure. The supplied guidance does not establish one ideal session length or number of repetitions.
Use this non-diagnostic observation checklist to choose the next support:
- [ ] Finds the preferred printed name among choices
- [ ] Finds it without a photograph
- [ ] Identifies or matches the initial
- [ ] Matches individual letters to a model
- [ ] Orders letters while viewing a model
- [ ] Orders letters without a model
- [ ] Forms or copies selected name letters
- [ ] Attempts part or all of the name from memory
These observations can guide activity selection, but a craft, puzzle, center, or game is not a validated assessment.
If frustration appears:
- Restore the photograph or full model.
- Reduce the number of choices.
- Enlarge the materials.
- Replace pinching or writing with pointing.
- Return to direct matching.
- Work with only the initial or one name section.
- Let a partner place the pieces.
- Stop and revisit the activity later.
Finally, review how names and photographs are stored and displayed. Depending on the setting and family preferences, use private sign-in stations, individual folders, teacher-held card rings, or first names only.
Frequently Asked Questions
When is a preschooler ready to trace or write their name?
There is no universal age or deadline. Practical signs to consider include interest in making marks, some control of the chosen tool, familiarity with the printed name, and the ability to participate without excessive frustration. These are observations, not diagnostic criteria.
Tracing, copying, and recall place different demands on the child. Tracing keeps the path visible; copying requires looking between a model and the work; writing from memory adds letter recall and sequencing.
A child who recognizes or builds a name but does not want to use a pencil can continue with stamps, chalk, large markers, movable letters, or optional sensory formation. Occupational therapist Victoria Wood also emphasizes individual variation in ability, prior experience, developmental rate, and interest, although her article focuses on kindergarten rather than preschool (The OT Toolbox’s name-practice discussion).
Should preschoolers write their names in all capitals or use a capital followed by lowercase letters?
Practitioner guidance differs. Some classrooms introduce all-capital models first and add lowercase letters later; others use a capital initial followed by lowercase letters from the beginning.
Use the child’s correctly written preferred name on recognition cards, including family-confirmed capitalization. For formation instruction, coordinate with the child’s educational setting when possible. The available practitioner evidence does not establish either sequence as universally best.
What should I do if a child recognizes their name but cannot put the letters in order?
Return to a complete model and direct matching. Provide only the letters needed, including the correct number of repeated letters, and let the child place each one over its match.
Next, build beneath the model. When that becomes comfortable, move the model beside the work, leave only the first letter visible, or remove the card briefly. If the sequence becomes confusing, point to the first unmatched position rather than correcting the entire name.
A two-copy puzzle is especially useful because one copy remains intact while the second is divided into pieces. This separates visual matching from memory.
How often should preschoolers practice their names?
There is no supported universal frequency or session length in the supplied guidance. Favor useful opportunities within ordinary routines over forced repetition.
A child might find a card at arrival, use a model to label artwork, build the name in a center, and join an occasional song. Another child may repeat one puzzle several times and then lose interest.
Watch participation rather than the clock. Stop when attention or willingness fades.
Which name activities need close adult supervision?
Give particular attention to activities involving scissors, yarn cutting, magnets, small loose parts, glue, sensory fillers, dough ingredients, shaving cream, glitter, paint, or gel-filled bags. Adult preparation is appropriate for hot glue, difficult cutting, and securely sealing sensory bags.
Supervision depends on the individual child and the exact material. Check condition, size, ingredients, sensitivities, likely use, and the possibility of spills, leaks, mouthing, or unsafe handling before each activity. Substitute large paper or cardboard pieces whenever the original materials are unsuitable.
Begin With the Skill, Not a Deadline
The most useful path is not tied to a fixed age. Begin with the skill the child is showing now: finding the complete name, matching letters, sequencing them, exploring formation, copying, or recalling.
Use the correctly written preferred name, provide only as much support as needed, and reduce that support gradually. To start, choose one recognition activity, one construction activity, and one optional formation activity using materials already available. A photo card, a hand-cut cardboard puzzle, and a dry-erase or chalk surface are enough.
Interest, safety, access, and respectful participation matter more than producing a perfect written name.