
Turn a Stack of Plates Into Art Preschoolers Can Actually Help Make
All 10 have a no-paint route. When needed, adults handle structural cuts and fasteners while children choose colors, patterns, parts and arrangements.
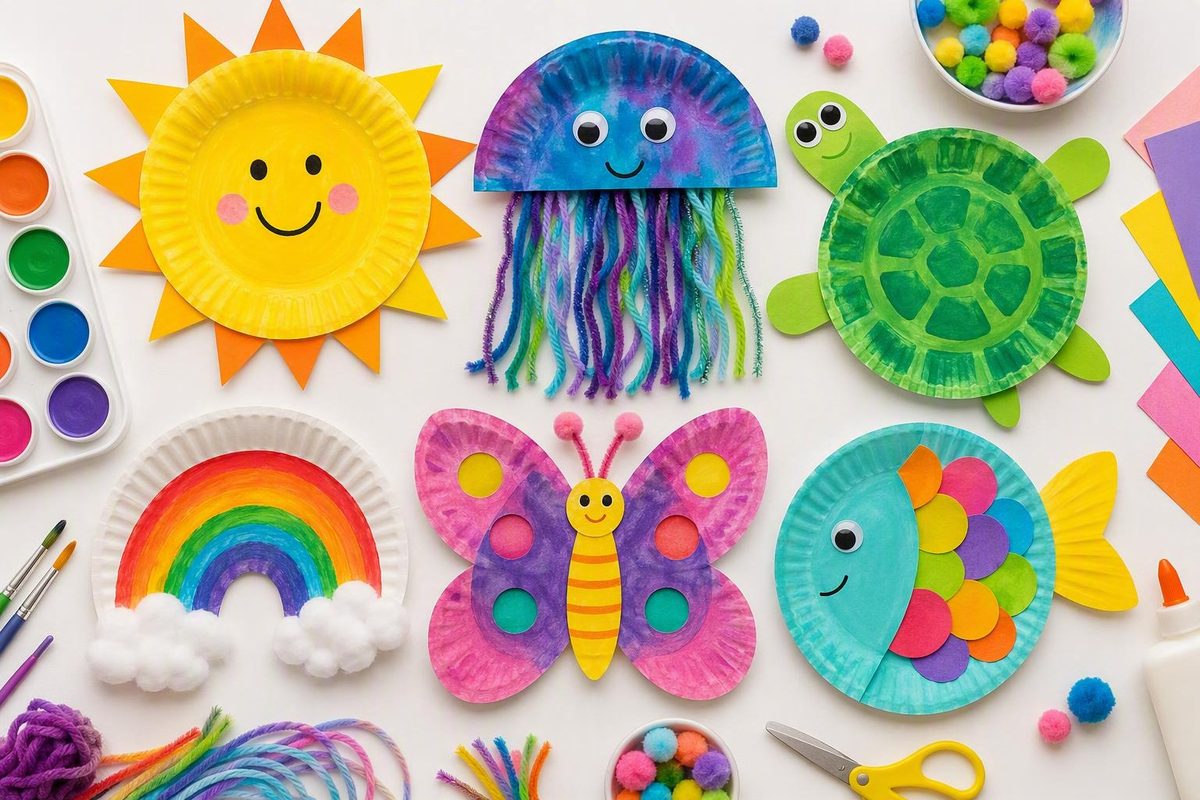
Paper plate art projects for preschoolers work best when the plate is a starting point, not a test of whether a child can copy an adult’s example. A useful project gives the adult a clear preparation role while preserving real choices for the child: which colors to use, where pieces belong, what expression a creature has, or when the artwork feels finished.
The 10 projects below include collages, creatures, pretend play, interactive displays, and a reusable seasonal structure. Each one identifies what to gather, what an adult should prepare, and what the child can meaningfully do. Actions such as coloring, gluing, sorting, arranging, cutting, and adding numbers are presented as opportunities for practice—not promises of a particular developmental result.
Choose a project that fits your materials and level of adult help
Start with the supplies you already have and the amount of preparation you can realistically provide. A collage may need only a plate, paper scraps, and glue. A mask, clock, weather chart, or wreath requires an adult to alter the plate or install a component before the child can use it.
| Project | Project type and theme | Core materials | Is paint required? | What children can do | Adult preparation or management |
|---|---|---|---|---|---|
| 1. Earth collage | Collage or shape-placement choice; Earth and nature | Plate, blue and green tissue or scrap paper, school glue | No | Crinkle paper, choose placement, apply glue, arrange colors | Prepare tissue or paper pieces; make them larger if useful |
| 2. Color-wheel collage | Collage or shape-placement choice; colors and sorting | Plate, crayons or markers, colored tissue, magazine pieces or paper scraps, glue | No | Sort colors, place pieces in sections, tear or make supervised cuts | Divide the plate into sections; prepare a manageable selection of pieces |
| 3. Pretend pizza | Collage or shape-placement choice; food and pretend play | Plate, coloring materials, large paper or felt “toppings,” glue | No | Choose toppings, arrange shapes, decorate the base, glue pieces | Cut large toppings when needed; reduce the number of choices if useful |
| 4. Fish | Creature project; ocean or pond | Plate, crayons, markers or paint, glue, paper for a fin and eye | No | Color, add patterns, arrange and glue parts, draw a face | Adult plate cutting: remove a triangular wedge for the mouth |
| 5. Caterpillar | Creature project; insects or garden | Plate, cardstock or colored paper, coloring materials, glue | No | Color the body, make patterns, add a face, attach prepared parts | Adult plate cutting: halve the plate; prepare a head and antennae as needed |
| 6. Jellyfish | Creature project; ocean | Half plate, crayons, markers or paint, broad paper or tissue strips, glue | No | Decorate the body, choose tentacle colors, arrange and glue strips | Adult plate cutting: prepare the half plate and broad strips as needed |
| 7. Animal mask | Pretend play; animals or invented creatures | Plate, coloring materials, paper features, glue, craft stick | No | Choose a creature, color markings, select and attach features | Adult eye-hole cutting: cut and check the openings; attach the handle |
| 8. Clock | Interactive display; numbers and daily routines | Plate, marker, construction paper, two paper hands, brad | No | Add or place numbers, decorate the face, move the finished hands | Adult hole and fastener work: make the hole and install the brad |
| 9. Weather chart | Interactive display; weather and classroom routines | Plate, paper, coloring materials, arrow, movable fastener | No | Draw or color symbols, place categories, point to observed conditions | Adult cutting and fastener work: prepare the arrow, make the hole and install the fastener |
| 10. Wreath | Seasonal or classroom display; nature, seasons or child-selected colors | Plate, tissue or colored paper, glue, optional stickers | No | Crumple or arrange paper, choose colors, cover the ring, add drawn details | Adult center removal: cut out the middle of the plate |
“Preschool-ready” is not a single fixed level. One child may enjoy tearing tissue paper but avoid scissors. Another may want to cut broad paper shapes while needing help with glue. A third may participate for only part of the sequence.
Treat pre-cut pieces, larger components, fewer options, and shorter directions as adaptations—not rules tied to a particular birthday. Do not assume that an older preschooler should manage plate cutting, eye holes, hole punches, brads, or other fasteners. Those construction tasks can remain with the adult while the child makes the visible artistic decisions.
Set up a reusable paper plate art kit
A compact kit makes it easier to choose a project without buying a separate collection of decorations for every theme.
Core supplies
- Plain paper plates
- Washable crayons or markers
- Washable child-appropriate paint, if you want a paint option
- School glue and glue sticks
- Child-safe scissors
- Colored construction paper
- Scrap paper, old wrapping paper, or magazine pages
- A pencil and dark marker for adult preparation
- A washable table covering or reused paper for the work surface
Paint is optional throughout this collection. Crayons, markers, stickers, colored paper, and collage scraps can provide color without requiring drying space. A white plate can also remain visible as part of the finished background.
Optional materials used by particular projects
- Tissue paper for the Earth, color wheel, jellyfish, or wreath
- Felt for pizza toppings
- Cotton for a weather symbol, if the adult considers it suitable for the child and setting
- Pipe cleaners for optional caterpillar antennae
- Craft sticks for mask handles
- Paper fasteners for the clock and weather chart, installed by an adult
Keep optional supplies optional. A project should not fail because you do not have a particular decoration. Blue scrap paper can replace blue tissue. Construction-paper pizza toppings can replace felt. Paper antennae can replace pipe cleaners.
Drawn eyes and large paper eyes are practical alternatives to googly eyes. Paper circles, stickers, or marker dots can also replace sequins and gems. These substitutions reduce reliance on loose plastic decorations, but they do not guarantee that an activity is risk-free. Adults still need to assess the materials, tools, and behavior of the individual child. Craft guidance that includes glitter, gems, sequins, string, and googly eyes also recommends simplifying designs and having adults manage cutting for younger participants; Craft Warehouse describes those preparation choices.
Keep adult tools separate
Do not place every tool on the child’s supply tray. Set aside the items used for:
- Difficult plate cutting
- Removing a plate center
- Cutting eye holes
- Making holes for fasteners
- Hole punching
- Stapling
- Hot-glue assembly
- Installing brads or other movable fasteners
Published project instructions assign selected cutting and hole-making tasks to adults, particularly when a structure must be pierced or cut before the child can decorate it. Gathered notes adult help for cutting and for making holes in paper-plate projects.
For this collection, hot glue, staplers, difficult cutting tools, and movable-fastener installation remain part of the adult work stage. If a heavier component does not hold immediately with school glue, let it dry or reinforce it during that adult-managed stage rather than adding the tool to the child’s tray.
Before inviting children to the table, prepare the largest pieces first. Put out a limited range of colors when too many choices could make it hard to begin. Portion glue, protect the work surface, and reserve a shelf or tray for wet pieces. These steps are especially useful when several children will share materials.
Three collage projects with room for independent choices
Collage projects allow children to arrange colors and shapes without requiring a precise result. The adult prepares a workable base and suitable pieces; the child decides what goes where.
Project 1: Earth collage
Materials
- One paper plate
- Green tissue paper
- Light-blue tissue paper
- School glue
- Scissors
Adult preparation
Cut or tear the tissue into loose pieces. They do not have to be even. For a child who avoids cutting, has difficulty handling thin tissue, or would benefit from fewer pieces, prepare larger sections in advance.
Directions
- Place the green and blue tissue in separate piles or mix the colors in one shallow tray.
- Invite the child to pick up and lightly crinkle the pieces.
- Add small areas of school glue to the plate, or help the child apply glue to one section at a time.
- Press the tissue onto the plate.
- Continue until the child decides the Earth is complete.
The documented version uses one plate, green and light-blue tissue, school glue, and scissors, with children attaching crinkled tissue pieces. Toddler at Play provides the underlying Earth-collage materials and method.
A reference image of Earth can be available, but it does not need to become a placement template. Blue does not have to surround exact green continent shapes. The child can create clusters, stripes, mixed areas, or an entirely personal interpretation.
If tissue paper is unavailable, use blue and green scrap paper. Magazine pages, leftover construction paper, or colored wrapping paper can work if the pieces are light enough for school glue.
Project 2: Color-wheel collage
Materials
- One plate
- Marker, crayon, or pencil
- Colored tissue, construction paper, or magazine pieces
- School glue or a glue stick
Adult preparation
Draw lines from the center toward the rim to divide the plate into color sections. Add a small color mark in each section so the child has a visual match. Prepare pieces in corresponding colors.
Directions
- Look at the available pieces together and compare their colors if that fits the activity.
- Invite the child to choose one piece.
- Ask where it might go, or allow the child to compare it with the section marks.
- Glue the piece into the selected area.
- Continue sorting and attaching pieces while the child remains interested.
This construction follows a documented paper plate color-wheel activity in which tissue or magazine pieces are sorted into marked color sections. The activity offers an opportunity to compare and sort colors; it does not prove that a child has mastered a color concept.
To simplify the project, divide the plate into three or four broad areas and offer clearly different colors. To extend it, invite a child who is ready to find colors in magazine pages, tear paper, or make short supervised cuts. The extension should increase the child’s role rather than merely adding decorations.
Project 3: Pretend pizza
Materials
- One paper plate
- Crayons, markers, paint, or colored paper for the base
- Large toppings cut from construction paper, tissue, felt, foam, magazine pictures, or other scraps
- School glue or a glue stick
Adult preparation
Prepare broad, easy-to-handle topping shapes. Possible pieces include red circles, green strips, paper rings, leaf shapes, or invented ingredients. There is no need to reproduce realistic food exactly.
Directions
- Let the child decorate the plate as the pizza base. It can be colored, painted, collaged, or left plain.
- Set out a manageable selection of toppings.
- Invite the child to arrange pieces without gluing immediately.
- Allow the arrangement to change.
- Attach the chosen pieces when the child is ready.
- After the glue dries, use the pizza in a pretend café, kitchen, picnic, or delivery game if the child wants to continue.
Paper, felt, tissue, foam, magazine pictures, and assorted scraps are all documented topping choices for this type of paper plate pizza.
This is a paint-optional and intentionally open-ended project. One pizza may have two large toppings; another may be covered in overlapping scraps. Avoid using a finished model in a way that suggests there is only one correct arrangement.
Three paper plate creatures: fish, caterpillar, and jellyfish
A recognizable creature does not require the adult to decorate every part. The adult can make the structural cut, then turn the color, pattern, expression, and arrangement decisions over to the child.
Project 4: Fish
Materials
- One paper plate
- Crayons, markers, or washable paint
- School glue or tape
- Colored paper for an optional fin
- Marker or a large paper circle for the eye
Adult preparation and directions
- Invite the child to color or paint the plate. The ribbed edge can become scales, stripes, dots, or a repeating pattern.
- When the plate is ready—and dry, if painted—an adult cuts a triangular wedge from one edge.
- Keep the wedge. The opening becomes the fish’s mouth.
- Attach the same triangle to the opposite edge as the tail.
- Let the child add a paper fin and draw an eye or glue on a large paper eye.
- Add bubbles, sea plants, or a background only if the child wants another step.
The mouth-and-tail construction appears in multiple craft collections: a wedge is removed from the plate and reused on the opposite side. Mama, Can I Lick the Spoon? documents this fish construction with crayons, markers, glue, and a fin. Reusing the removed wedge means the adult does not need to prepare a separate tail.
The fish can be any color and does not need matching sides or uniform scales. If a child wants to make an expressive face rather than a realistic fish, that choice still belongs within the project.
Project 5: Caterpillar
Materials
- One paper plate
- Crayons, markers, or washable paint
- Cardstock or construction paper
- School glue
- Marker
Adult preparation and directions
- An adult cuts the plate in half. Use one half so the ribbed outer edge forms the caterpillar’s rounded body.
- The child colors or paints the body.
- Encourage any pattern the child chooses: dots, stripes, color blocks, scribbles, or one solid color.
- Prepare a large cardstock circle or rounded shape for the head.
- Let the child draw the facial features and attach the head.
- Add two large paper antennae. An adult can prepare them, or a child who is ready can make short supervised cuts from broad paper strips.
- Add paper feet only if the child is still interested.
The half-plate body, cardstock head, and antennae follow the caterpillar construction published by Toddler at Play. Paper antennae and a drawn face keep pipe cleaners and googly eyes from becoming requirements.
If pipe cleaners are used, the adult can prepare and attach them during the assembly stage rather than expecting the child to pierce the plate.
Project 6: Jellyfish
Materials
- Half a paper plate
- Crayons, markers, or washable paint
- Broad strips of tissue or colored paper
- School glue
- Marker or large paper shapes for facial features
Adult preparation and directions
- An adult cuts the plate in half.
- The child colors or paints the curved half. The straight edge will become the lower edge of the jellyfish body.
- Prepare broad tissue or paper strips. They can vary in length and color.
- Turn the plate over and help the child attach the strips along the back of the straight edge.
- When the glue has set, turn the plate face up.
- Let the child draw a face or attach large paper features.
- Add dots, waves, or other patterns if desired.
Toddler at Play’s published jellyfish version uses a painted half plate with tissue strips glued to the back. Broad strips are the default here because narrow string is not necessary to create the hanging-tentacle effect.
Across all three creature projects, preserve choices that remain visible in the finished work. Children can select colors, make patterns, arrange parts, and invent expressions. They can color, glue, and handle prepared pieces; a child who is ready can also attempt suitable paper cuts under direct adult supervision. None of those actions requires the child to perform the difficult structural cut.
Three interactive projects for play and classroom routines
These projects require more adult preparation than a basic collage. In return, they produce objects children can hold, move, use in pretend play, or revisit during classroom routines.
The clock and weather-chart constructions below use adult-installed movable fasteners. Both formats are documented in NY Baby Steps’ collection of paper plate projects.
Project 7: Animal mask
Materials
- One paper plate
- Crayons, markers, or washable paint
- Construction paper
- School glue
- One craft stick
- Strong tape or adult-managed glue for the handle
Adult preparation and directions
- Decide where the eye openings should sit.
- An adult cuts the eye holes and checks their position and edges before the plate is used as a mask.
- The child colors the plate and chooses an animal or invented creature.
- Offer large paper ears, noses, patches, horns, whiskers, or other features.
- Let the child arrange and glue those pieces.
- After the plate is dry, an adult secures a craft stick to the back or lower edge so the child can hold the mask in front of the face.
The craft-stick version is a practical option when an adult does not want to tie elastic or string around a child’s head.
That choice does not make the mask universally suitable. The adult still needs to judge the construction, materials, visibility, and way the mask will be used. Craft Warehouse’s mask directions similarly place eye-hole cutting and handle or string preparation within the project setup.
Keep the design open-ended. Large triangular ears might become a cat, fox, mouse, or imaginary animal. A child can also stop after coloring the plate and use it as a face without adding every prepared feature.
Project 8: Paper plate clock
Materials
- One plate
- Marker or number cards
- Construction paper
- Scissors
- One paper fastener or brad
Adult preparation and directions
- Mark positions for the numbers around the edge.
- Let the child add, trace, copy, or place the numbers 1 through 12, depending on the kind of participation that is manageable.
- Cut two broad construction-paper hands, with one shorter than the other.
- An adult makes holes in the hands and the center of the plate.
- The adult installs the brad so the hands can move while remaining attached.
- Invite the child to turn the hands and talk about familiar points in the day, such as arrival, lunch, rest, or going home.
The numbers 1 through 12 and two movable paper hands attached with a brad are part of the documented paper plate clock construction described by NY Baby Steps. For this version, the hole and fastener installation remain adult tasks.
Making the clock does not by itself teach a child to tell time. The finished object can instead support informal number recognition, comparison between the short and long hands, or conversation about daily routines.
If writing all the numbers would take over the art session, prepare large number cards for the child to place. The child can also decorate the plate before the adult completes the moving assembly.
Project 9: Weather chart
Materials
- One paper plate
- Crayons, markers, colored paper, or paint
- Paper for an arrow and weather symbols
- School glue
- One adult-installed movable fastener
Adult preparation and directions
- Divide the plate into broad weather categories. Examples might include sunny, cloudy, rainy, windy, or snowy, depending on conditions children actually observe.
- Invite the child to draw, color, or collage a picture for each section.
- An adult cuts a broad arrow from sturdy paper.
- The adult makes the required holes and installs the movable fastener at the center.
- Look outside together and move the arrow toward the child’s chosen category.
- Revisit the chart on later days if it remains sturdy and useful.
The divided plate, weather symbols, and movable arrow follow the weather-chart construction in the same NY Baby Steps collection.
Children do not have to produce detailed symbols. A yellow circle can represent sun; gray scribbles can represent clouds; blue lines can represent rain. The adult creates the functional base while the child contributes the pictures and uses the finished pointer.
Both the clock and weather chart depend on a small fastener for movement. In this guide, the adult installs that component and checks the assembled project before making it available for repeated use.
Make a paper plate wreath for any season
Project 10: Paper plate wreath
The wreath is a reusable display structure because the same adult-prepared ring can support many color palettes and classroom topics.
Materials
- One paper plate
- Tissue paper, construction paper, or other lightweight paper
- School glue or a glue stick
- Optional stickers
- Crayons or markers
Adult preparation and directions
- An adult removes the center of the plate, leaving the outer ring.
- Prepare large tissue or paper pieces. The child can crumple tissue, place flat paper shapes, or combine both.
- Put glue on a small part of the ring rather than coating the entire surface at once.
- Let the child choose colors and place the pieces.
- Turn the ring as needed until the child has decorated as much of it as desired.
- Add stickers or drawn details if wanted.
- Allow the wreath to dry flat before displaying it.
Removing the center and covering the remaining ring with crumpled tissue is the wreath construction documented in NY Baby Steps’ paper plate project instructions.
Possible adaptations include:
- Green paper for a general nature wreath
- Warm-colored paper or broad leaf shapes for autumn
- Spring colors with large paper flowers
- A single classroom color palette
- Fully child-selected colors for an all-purpose display
- Stickers and drawn lines instead of loose decorative pieces
Use large paper pieces, stickers, or drawings when you want to avoid glitter and small plastic decorations. The ring does not need to be densely covered; visible plate sections can remain part of the composition.
Seasonal color changes do not make cultural and religious observances interchangeable. If a wreath or another project is connected to a particular tradition, provide accurate context rather than treating the observance as a generic decoration prompt. For a neutral display, use nature, local seasons, classroom colors, or a theme chosen by the children.
Adapt the process without assigning rigid age levels
Adaptations should respond to what an individual child can and wants to do during that session. They should not be used to divide all three-, four-, and five-year-olds into fixed craft levels.
When a child needs more support
- Pre-cut plate halves, wedges, rings, and eye holes.
- Offer large paper components that are easier to pick up and position.
- Put out two or three decoration choices rather than a full tray.
- Break the activity into a short sequence: decorate, choose pieces, glue.
- Draw eyes and facial details instead of adding loose embellishments.
- Apply glue to a limited area so the child can concentrate on placement.
- Complete the project across two sessions if paint needs to dry.
- Skip optional feet, fins, antennae, numbers, or background details.
When a child is ready for more participation
- Invite supervised tearing or cutting of collage pieces.
- Offer broad strips for short, straight cuts.
- Ask whether the child wants to make a repeating color or shape pattern.
- Let the child sort collage materials before gluing.
- Invite the child to add clock numbers or original weather pictures.
- Provide blank paper so the child can draw and cut an original fin, topping, ear, or flower.
- Let the child decide the assembly order when the structure allows it.
Published craft guidance recommends preparing difficult cuts, limiting choices, and allowing children to skip steps when interest fades. It also identifies crayons, markers, colored paper, and stickers as alternatives to paint. The Diary of Dad describes these process-focused adaptations.
Distinguish adult-prepared construction from child-led decisions. An adult can cut a plate ring without deciding that the wreath must be green. An adult can make eye holes without choosing the animal. An adult can install a clock fastener without controlling the child’s marks and decorations.
A child may also stop before the planned final step. An Earth collage with five tissue pieces is still the child’s collage. A fish without a fin can still be used in a story. A pizza whose toppings were arranged but not glued may have served its purpose as shape placement and pretend play.
Prioritize participation and exploration over matching a model. Do not assume that every child of one age needs pre-cut pieces or that every older preschooler can manage advanced cutting, threading, holes, or fasteners.
Prepare safely for one child or a preschool group
Preparation becomes more important as the group grows. Before children arrive, make a project-specific checklist rather than relying only on the general supply list.
Preparation checklist
- Count one plate or prepared plate base per child.
- Decide how many extra bases make sense for your setting.
- Cut required plate halves, wedges, and centers.
- Make eye holes and holes for movable fasteners.
- Prepare large paper eyes, ears, heads, arrows, hands, and collage pieces.
- Put adult tools in a separate work area.
- Portion glue and collage materials into shallow trays.
- Protect tables and identify a drying area.
- Decide which assembly happens before, during, or after child participation.
- Check the assembled object before returning it for play or display.
Advance preparation can preserve more of a group session for child participation. In one kindergarten fishbowl example, the adult prepared plates and pre-cut fish for a class of more than 20 children because the session was limited to about one hour. That is a classroom planning example, not a universal duration or a formula for preschool groups. Fine Art Mom explains the preparation used in that particular fishbowl lesson.
Keep staplers, hot glue, craft knives, difficult plate cutting, hole punches, and fastener installation in the adult work area. Published paper plate collections explicitly assign some hot-glue work and cutting to adults, while other instructions reserve stapling or hole-making for a teacher or assisting adult.
When a project includes loose small items, assess those components for the individual child and maintain active supervision. A material’s appearance in a craft tutorial does not establish that it is suitable for every preschool setting.
School glue is the default child-accessible adhesive in these projects. A practical workflow is to decorate first, set wet pieces aside, and complete reinforcement or adult-managed assembly afterward. This is planning guidance, not a universal drying-time claim.
For groups, avoid rigid quantity formulas. Begin with one project base per child, then estimate extras according to attendance, the likelihood of torn or oversaturated plates, and whether children may make more than one version. Table arrangement, plate size, material choices, and group routines can all affect glue and collage-piece use.
Most importantly, no collection-wide word such as “easy” replaces judgment about an individual child, tool, loose component, or finished object. Review the exact project each time—even if the same child has used paper plates before.
Frequently asked questions
Which paper plate projects can be made without paint?
All 10 projects have a non-paint route. Crayons and markers work for the fish, caterpillar, jellyfish, mask, clock, and weather chart. Colored tissue or scrap paper supplies the color for the Earth, color wheel, and wreath. The pizza can use a plain or crayon-colored plate with paper, felt, or magazine-picture toppings.
Stickers and collage scraps are additional options. If you are avoiding paint because of drying time or sensory preferences, choose materials the individual child is comfortable handling rather than replacing paint with another unwanted texture.
What parts of a paper plate craft should an adult prepare?
Adults should prepare the difficult structural cuts in these projects, including plate halves, triangular fish mouths, removed wreath centers, and mask eye holes. They should also make holes, manage hot glue or staplers, and install brads or other movable fasteners.
An adult may also pre-cut large paper components, portion glue, reduce the number of choices, and prepare a drying area. The goal is not to complete the visible artwork for the child. It is to create a usable base so the child can color, arrange, sort, glue, draw, and make meaningful design choices.
What can I use instead of googly eyes, sequins, or other small decorations?
Draw eyes directly on the plate, or cut large eye shapes from white and dark paper. Replace sequins and gems with paper circles, stickers, marker dots, tissue squares, or drawn patterns. Use broad paper antennae instead of pipe cleaners and large paper flowers or leaves instead of small plastic wreath decorations.
These are practical substitutions, not guarantees that a project has no risk. The adult still needs to assess loose pieces, adhesives, tools, and the way the child uses the finished object.
How can I adapt the same project for different preschoolers?
Keep the project theme but change the number and type of actions required. One child might decorate a pre-cut fish and attach a prepared tail. Another might make supervised cuts for a fin and design a scale pattern. Both children are participating in the same project.
Use larger pieces, fewer choices, pre-cut structures, and shorter sequences when more support is useful. Add supervised tearing or paper cutting, sorting, pattern making, number placement, or original drawings when a child wants more involvement. Non-paint versions can use crayons, markers, stickers, colored paper, or magazine scraps.
The child can also stop early, return later, or leave out an optional part. Adaptation is about access and participation, not producing ranked versions of the same craft.
How long do paper plate art projects take?
There is no reliable universal duration. Mama, Can I Lick the Spoon? says most projects in its collection can fit into an approximately 30-minute session, while excluding paint-drying time from that estimate. That qualification appears in its paper plate craft guidance.
The Diary of Dad separately estimates that many activities can be started in roughly 10–15 minutes and likewise treats drying time as variable. Its timing estimate appears in the accompanying paper plate craft guidance. These are source-specific estimates, not dependable rules for every preschooler or project.
Plan separately for adult preparation, child participation, drying, final assembly, and cleanup. A collage with prepared pieces may be completed in one sitting, while a painted clock or mask may work better in two stages. Group size, glue use, material choices, and a child’s interest can all change the schedule.
Choose one project that matches the materials already in the cupboard and the preparation you can provide today. The strongest preschool art session is not the one with the most polished result. It is the one in which the adult handles unsuitable tools, the child makes visible choices, and the process remains flexible enough to stop, simplify, or continue another day.