
5 Preschool Crafts for St. Patrick’s Day With Simple Supplies
Make five St. Patrick’s Day preschool crafts with paper, paint and glue, plus clear steps, skill opportunities, easy adaptations and safety checks.
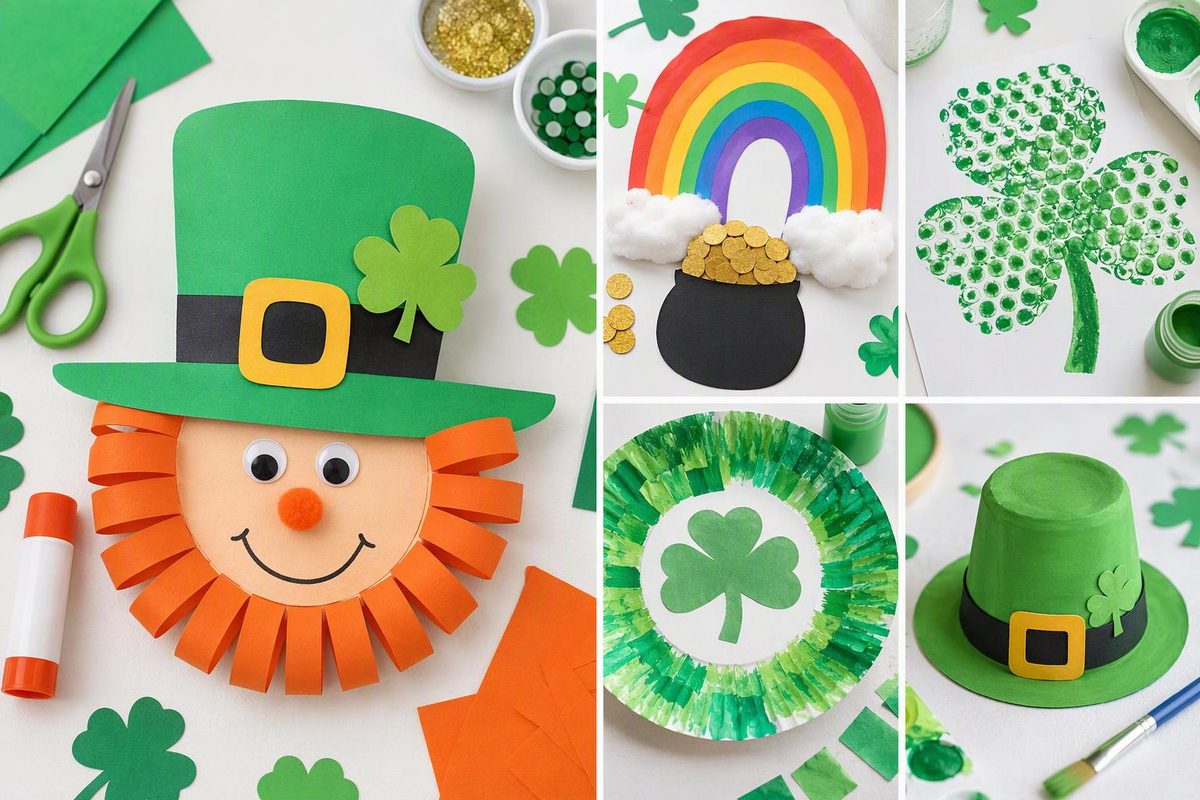
Start with the action you want to offer: tearing, arranging, painting, counting or drawing. These preschool crafts for St. Patrick’s Day use everyday art supplies, with easier routes for children who need help and extensions for those ready to try more. Choose the tools and steps by each child’s current abilities and comfort, rather than age alone.
| Craft | Main learning opportunity | Preparation |
|---|---|---|
| Torn-paper shamrock | Using both hands to tear and place paper | Draw a large outline |
| Paper-strip rainbow | Arranging and comparing lengths | Cut broad paper strips |
| Green print garden | Exploring color mixing and making marks | Set out paint and tools |
| Pot-of-gold collage | Counting objects one at a time | Cut a pot and large circles |
| Shamrock message card | Drawing and dictating a message | Fold paper and cut shapes |
Gather supplies and set up
Keep white paper or cardstock, green and other colored construction paper, crayons, child-appropriate glue sticks and blunt-tip children’s scissors together. For painting, add washable paint intended for children, broad brushes, sturdy paint trays, smocks and a table covering. Reserve adult scissors for preparation.
Read supply labels and follow their age and use directions. The CPSC’s Art and Craft Safety Guide recommends children’s materials without cautionary warnings, close supervision, keeping food away from the art area and washing hands afterward. “Non-toxic” does not mean edible.
For these projects, skip real coins, beads, sequins and loose glitter. Use large paper shapes or drawn marks instead. If a child mouths materials, offer closely supervised drawing rather than loose collage pieces. Supervise scissors directly; children can tear paper or use adult-cut pieces instead.
Show a tool action on scrap paper, not a finished craft everyone must copy. Although several activities below have a planned shape, leave color, placement and decoration to the child. NAEYC’s guidance on art experiences emphasizes children’s choices, exploration and adults noticing what children make rather than fixing their work.
1. Torn-paper shamrock
Materials: White paper, green paper, crayon and glue stick.
Adult setup: Draw a large shamrock with three rounded leaf sections and a stem. No printer is needed. A shamrock has three leaflets—not four—as explained by University of Missouri Extension. Three broad heart-like shapes make a simple craft outline, rather than a botanical drawing.
Steps
- Offer strips of green paper. Invite the child to hold a strip with both hands and pull in opposite directions to tear it.
- Let them arrange their pieces before gluing. Pieces may overlap, leave gaps or extend beyond the outline.
- Show how to rub glue on one small area of the page, place a piece and press it flat. Repeat wherever the child chooses.
- Draw a stem, grass or other details if wanted.
Skill opportunity: Tearing uses both hands together; placing pieces offers practice controlling small hand movements.
Simplify: Start a tear at the edge, or provide large pre-torn pieces. The child can focus on placing and pressing.
Extend: Offer light and dark green paper. Invite the child to describe how they arranged the shades, without requiring a pattern.
2. Paper-strip rainbow
Materials: A paper background, broad strips of colored paper, glue stick and crayons.
Adult setup: Cut several strips of different lengths. Keep them wide enough to pick up easily. Use whatever colors are available; this is an arrangement activity, not a rainbow-order test.
Steps
- Spread out the strips and invite the child to choose some for a rainbow.
- Arrange them flat across the page in rows, a fan or another chosen design.
- Lift one strip at a time, rub glue beneath it and press it back down.
- Add drawn clouds or large torn-paper clouds at the ends.
Skill opportunity: Children can compare long and short strips and plan where pieces will fit.
Simplify: Offer three strips and a large background. Help apply glue while the child chooses the positions.
Extend: Ask, “Which strip reaches farthest?” A child comfortable with scissors can trim strips with supervision. Straight strips do not need to form a perfect arch.
3. Green print garden
Materials: White paper, yellow and blue washable children’s paint, broad brushes and a large sponge.
Adult setup: Put small amounts of yellow and blue paint in separate areas of a sturdy tray. Keep the sponge large and intact; do not cut it into tiny stamps.
Steps
- Invite the child to move a little of each paint color into an empty space on the tray and mix them with a brush.
- Let them brush the new color onto paper or press the sponge lightly into the paint and stamp it.
- Offer more yellow or blue in small amounts so they can explore different greens.
- Once the paint is dry, offer crayons for stems, paths or other garden details. An abstract page is welcome too.
Skill opportunity: This offers a chance to notice color changes and explore the difference between brushing, pressing and lifting.
Simplify: Provide ready-mixed green paint and one broad brush. A child who dislikes paint can make a green crayon garden instead.
Extend: Ask, “What do you think will happen if you add more yellow?” Let the child try their prediction rather than aiming for a particular shade.
4. Pot-of-gold counting collage
Materials: A paper background, one large black paper pot, large yellow paper circles, glue stick and crayon.
Adult setup: Cut a simple bowl-shaped pot and several palm-sized yellow circles. These are pretend gold pieces, not real coins.
Steps
- Let the child choose where to glue the pot.
- Offer a small group of yellow circles to arrange above or inside it.
- If the child is interested, count together: touch each circle once while saying one number for each piece.
- Glue the pieces down. Add a rainbow or other drawn details if wanted.
Skill opportunity: Touching each piece while counting offers practice connecting one spoken number to one object.
Simplify: Begin with one to three circles, or leave counting out and focus on the collage.
Extend: Before gluing, add or remove a circle and count the group again. Write the total only if the child wants a label; there is no required number of gold pieces.
5. Shamrock message card
Materials: Folded cardstock or paper, three large green paper hearts, a green stem strip, glue stick and crayons.
Adult setup: Fold the card and cut the hearts and stem. Offer it as a card for anyone the child chooses, or as a picture to keep.
Steps
- Invite the child to arrange the three hearts with their points meeting near the center to suggest a shamrock.
- Glue them down, then add the stem below.
- Let the child draw inside the card.
- Ask, “Is there something you want me to write?” Record their words as spoken, or leave the drawing without a message.
Skill opportunity: Drawing and optional dictation offer ways to communicate an idea and connect spoken words with print.
Simplify: Draw a shamrock on the front for the child to color. They can point to a recipient or choose to keep the card.
Extend: Invite the child to add their name, a letter they know or their own writing marks. Do not require copied handwriting.
For more activities using the same paper-and-glue supplies after the holiday, browse these spring ideas for preschool learning through play.