
5 Dino Crafts for Preschool With Simple Supplies
Try five preschool dinosaur crafts using paper, glue and paint, with clear steps, skill opportunities, easier options and practical safety checks.
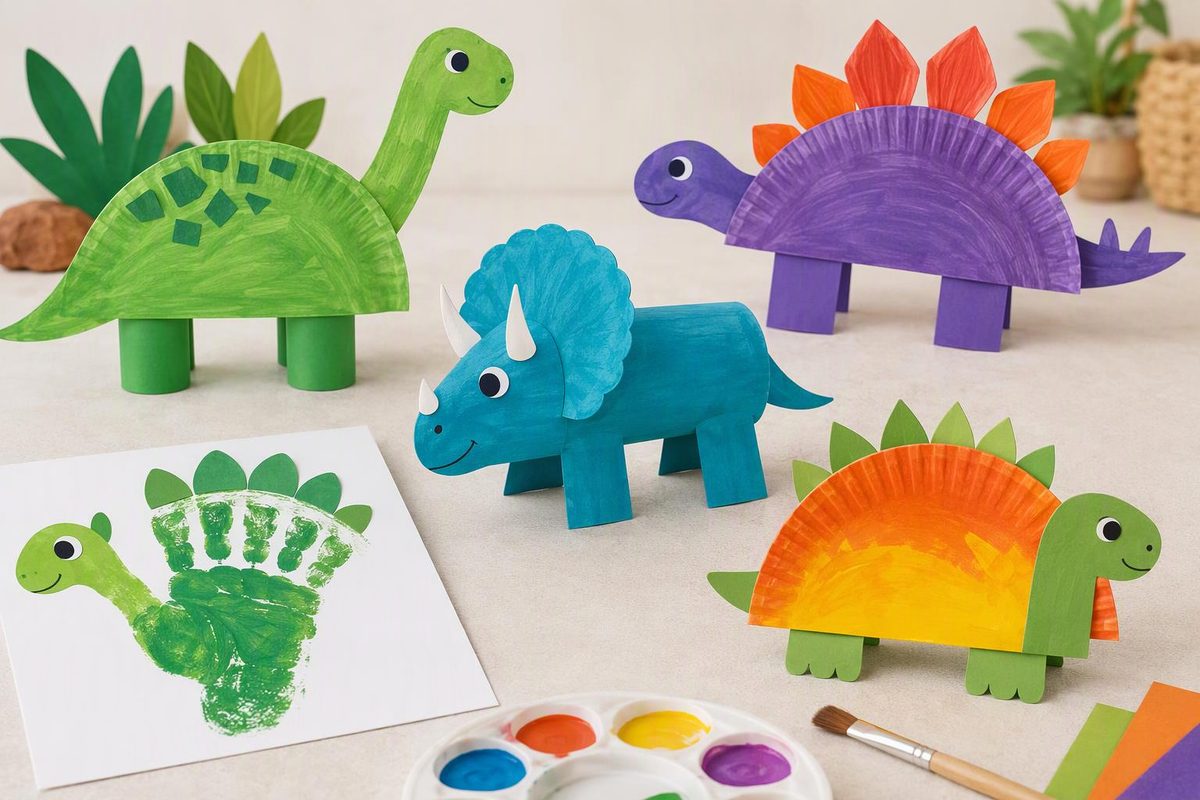
Start with the materials you have and the kind of making a child wants to try. These dino crafts for preschool offer tearing, arranging, painting and storytelling without a printer or a matching set of finished dinosaurs.
Choose one: - Torn-paper dinosaur: tearing and pressing; no paint needed. - Paper-plate Stegosaurus: arranging body parts and optional counting. - Hatching dinosaur card: drawing and telling a short story. - Paper-bag puppet: assembling, then pretend play. - Dinosaur-track painting: stamping and comparing marks; needs drying space.
The directions give adults a way to set up each invitation. Children can choose colors, change the arrangement or stop before adding every detail. Although these are guided crafts, leave room for exploration rather than asking children to copy a sample. NAEYC’s guidance on process-focused art emphasizes children’s choices, exploration and ownership.
Set out supplies and check safety
Gather construction paper, drawing paper, crayons, child-appropriate glue sticks and blunt-tip children’s scissors. Individual projects also use a paper plate, paper bag, tape or washable children’s paint.
Choose art materials labeled for children and appropriate to their age; avoid products with hazard warnings. Supervise closely, keep food and drinks away from the art area, and wash hands afterward. “Non-toxic” does not mean a material is safe to eat or use in unintended ways, as the CPSC’s Art and Craft Safety Guide explains.
For these projects, draw eyes instead of adding googly eyes, buttons or beads. Keep caps and loose scraps out of mouths. If a child is mouthing materials, offer a way to participate by pointing or dictating while an adult handles the supplies; pause the craft if materials cannot be kept out of their mouth. Adults should handle stiff cardboard cutting; children can tear paper or use scissors with close supervision when ready.
1. Torn-paper dinosaur collage
Materials: Construction-paper scraps, one sheet of backing paper, glue stick and crayons.
Adult setup: Offer wide paper strips that are easy to grasp. If a child wants a starting shape, lightly draw a large oval body on the backing sheet; otherwise leave it blank.
Make it: 1. Invite the child to tear several paper pieces. They can be different sizes and colors. 2. Arrange pieces into a body, head and tail before using glue. Ask, “Where will your dinosaur’s head go?” 3. Glue the pieces down, pressing each with a fingertip or palm. 4. Draw legs, an eye and any other details the child wants.
Skill opportunity: Tearing and gluing give children practice using their hands; arranging loose pieces offers a chance to plan and revise.
Simplify: Start a small tear at the edge of each strip, or provide large ready-torn pieces. A child can point while an adult helps with glue.
Extend: Invite the child to make a second dinosaur with a longer tail or smaller body and describe the difference.
2. Paper-plate Stegosaurus
Materials: Half a plain paper plate, backing paper, colored paper, glue, tape and crayons.
Adult setup: Cut the plate in half. Prepare a small head, a tapered tail, four broad legs and several large paper triangles to represent the bony plates on the dinosaur’s back.
Make it: 1. Color the half plate, then set it on the backing paper with its straight edge at the bottom. Help secure it with tape along the straight edge. 2. Arrange and glue the head at one end and the tail at the other. 3. Add the legs below the body. 4. Arrange the paper triangles along the curved back, then glue them to the backing paper. Finish with a drawn eye.
Skill opportunity: Position words such as above, below and beside fit naturally as children arrange the parts. If interested, they can touch each back plate while counting it once.
Simplify: Attach the body first and offer just the head, tail and a few back plates.
Extend: Let children cut broad paper shapes themselves or alternate two colors along the back.
A dinosaur detail: Stegosaurus had upright bony plates along its back and a spiked tail. Scientists are not certain what its back plates were used for, according to the Natural History Museum. This flat craft is a simplified picture, not an anatomy model; children can draw tail spikes if they wish.
3. Hatching dinosaur card
Materials: One sheet of paper, crayons and scissors.
Adult setup: Fold the paper in half like a book. Draw a large egg outline with one side touching the fold. Cut through both layers around the outline, leaving a section of the fold uncut so the card stays joined.
Make it: 1. Let the child decorate the closed paper egg with dots, lines or patches of color. 2. Open it and draw a pretend baby dinosaur inside. 3. Close the card, then open it to reveal the hatchling. 4. Ask, “What happens next?” Write the child’s words inside if they want you to.
Skill opportunity: Drawing, opening the card and dictating a story offer practice with marks, hand movements and spoken language.
Simplify: Use an ordinary folded rectangular card with an egg drawn on the front; no shaped cutting is necessary. The child can choose colors or dictate while an adult draws.
Extend: Add a second scene on a separate sheet showing where the dinosaur goes after hatching.
4. Paper-bag dinosaur puppet
Materials: A small paper bag, colored paper, glue and crayons.
Adult setup: Lay the bag flat with its folded bottom facing up and its open end toward the child. The folded bottom will become the puppet’s face.
Make it: 1. Draw eyes and nostrils on the folded bottom. 2. Draw the upper lip along the flap’s lower edge and a lower jaw on the bag just beneath it. Lift the flap to draw inside the mouth. 3. Glue broad paper arms or back plates to the sides. Keep glue away from the opening and moving flap. 4. Let the glue dry, then slide a hand into the bag and try a dinosaur conversation.
Skill opportunity: Moving the flap while speaking combines hand movement with pretend dialogue.
Simplify: Skip glued pieces and use crayons only. A child who does not want to wear the puppet can direct an adult’s puppet instead.
Extend: Make two puppets and act out a small problem: “Both dinosaurs want the same shady spot. What could they do?”
5. Dinosaur-track painting
Materials: Thick paper, washable children’s paint, a shallow tray, stiff cardboard and tape.
Adult setup: Cut a large pretend footprint stamp from cardboard, with a broad heel and three rounded toes. Tape a folded cardboard strip securely to the back as a handle. Use a thin layer of paint in the tray and cover the work surface. These are invented dinosaur tracks, not fossil replicas.
Make it: 1. Show how to hold the handle, touch the stamp to the paint, press it onto paper and lift it straight up. 2. Let the child make a trail, overlapping tracks or scattered prints. 3. Try turning the stamp or using less paint. Ask, “What changed in that print?” 4. Leave the picture flat to dry. Replace the cardboard stamp if it becomes soggy or its handle loosens.
Skill opportunity: Pressing and lifting offer hand-control practice; comparing prints invites observation.
Simplify: Offer one color and a large stamp. For a paint-free version, an adult can trace footprints for the child to color.
Extend: Make a second, larger stamp and compare the two trails, or count a short row of tracks together.
For another paper-based animal invitation, try the torn-paper bee craft. Use the same tearing and gluing setup, changing the shapes rather than requiring children to match a finished example.