
5 Letter T Art Activities With Tissue, Tape and Paint
Try five letter T art activities for preschoolers, with simple materials, clear steps, letter-and-sound prompts and easy adaptations.
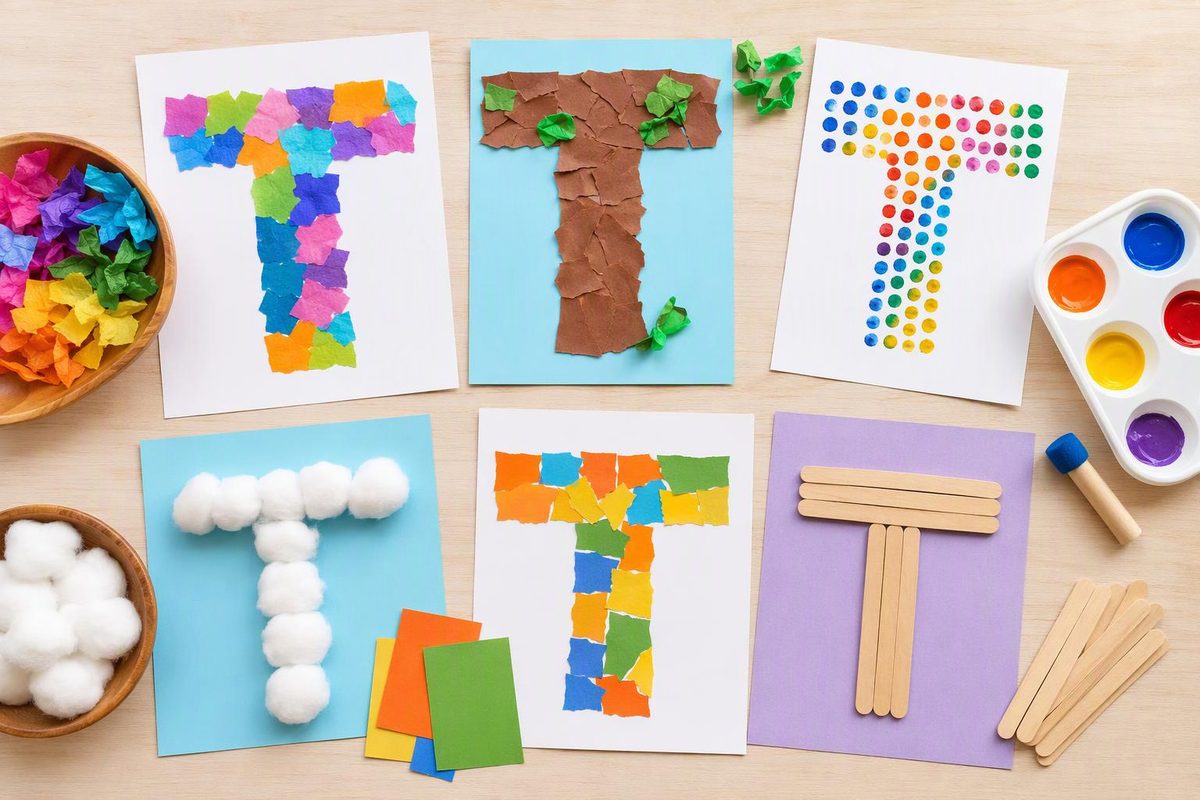
Build a tissue-paper T, reveal a painted tape T, or make art inspired by a tiger, turtle or tulip. These letter T art activities give preschoolers ages three to five different ways to join: arranging paper, brushing paint, making stripes or printing shapes.
Start with tissue-paper T for a mostly dry activity. Choose tape-resist painting for color exploration, or one of the picture projects for a beginning-sound connection. There is no need to complete all five.
Set up the materials and letter connection
Gather construction paper, sturdy white paper, crayons, glue sticks and any paint supplies needed for your chosen activity. Adults can prepare shapes; children who are ready can use age-appropriate scissors with supervision.
Use art materials labeled for children, follow their directions and avoid products with hazard warnings. Keep food and drinks away from the art area, supervise closely and wash hands afterward, as recommended in the CPSC Art and Craft Safety Guide. Use drawn eyes rather than loose googly eyes. For children who mouth materials, skip loose collage pieces and offer closely supervised drawing with age-appropriate crayons instead; keep all art supplies out of mouths.
Show a plain T and t on a separate card. Say, “This letter is T. We can hear /t/ at the beginning of tiger.” Keep /t/ brief rather than stretching it: Reading Universe identifies /t/ as a stop sound.
Let children choose colors, marks and arrangements rather than copying a finished adult sample. These are guided letter-themed projects, not fully open-ended process art. Still, leave room for the material exploration and child decision-making emphasized in NAEYC’s guidance on process-focused art.
1. Build a tissue-paper T
Materials: Two wide construction-paper strips, background paper, large tissue-paper pieces and a glue stick.
Setup and steps: 1. Prepare one long strip and one shorter strip. Put an uppercase T card nearby. 2. Invite the child to move the strips around: “Can the shorter strip go across the top of the long strip?” Help compare the arrangement with the card, then glue the strips down. 3. Tear tissue paper into manageable pieces, then glue them onto and around the T. Pieces can lie flat, overlap or be gently crumpled.
Letter connection: “Tissue starts with /t/. Can you point to the T we built?” Keep the separate letter card visible if the collage covers the shape.
Practice opportunity: Arranging two parts and using both hands to hold and tear paper.
Simplify: Glue the T down beforehand and offer pre-torn tissue. Extend: Invite the child to build another T without the model, then compare it with the card.
2. Reveal a tape-resist T
Materials: Sturdy white paper, low-tack painter’s tape, washable children’s paint, a wide brush and a shallow paint tray.
Setup and steps: 1. Check the tape on a spare piece of paper first; some papers tear during removal. 2. Make a large T with two tape strips. Press the edges down and leave a folded tab for lifting. 3. Let the child brush a thin layer of paint over and around the tape, choosing colors freely. 4. Once the paint is dry, help peel the tape back slowly to reveal the unpainted T.
Letter connection: “Tape begins with /t/. What letter appeared underneath?”
Practice opportunity: Exploring how a covered area differs from an uncovered area, with brush-control practice.
Simplify: The adult places and removes the tape. Extend: Let the child arrange the tape using the T card and predict what will remain white. Keep discarded tape out of mouths and off skin.
3. Paint tiger stripes
Materials: Paper, crayons, washable children’s paint, a brush and a large rectangular sponge suitable for stamping.
Setup and steps: 1. Invite the child to draw a large tiger body or offer a simple adult-drawn outline. 2. Add a background color with crayons or paint. Let a painted base dry before adding stripes. 3. Make stripes with brushstrokes or by pressing the sponge’s narrow edge into a thin layer of paint and onto the paper. 4. Draw a face, tail and any surroundings the child wants.
Letter connection: Write T t beside the picture and say “tiger,” briefly emphasizing its first sound.
Practice opportunity: Comparing thick and thin marks and deciding where to place them.
Simplify: Use crayons for both the body and stripes. Extend: Compare the marks made by the brush and sponge. The tiger need not have a prescribed color or stripe pattern.
4. Print a turtle shell
Materials: Paper, washable children’s paint, a large sponge, crayons and a shallow tray. An adult may cut the sponge into a broad square or rectangle before the activity.
Setup and steps: 1. Draw a large oval shell with a head, legs and tail, or invite the child to draw them. 2. Spread a thin layer of paint in the tray. 3. Press the sponge into the paint, then stamp it on the shell. Lift straight up for a print or slide it to explore a different mark. 4. Let the child add water, sand or other surroundings with crayons.
Letter connection: “Turtle begins with /t/.” Offer to write turtle and point out its first letter.
Practice opportunity: Coordinating press-and-lift movements and comparing separate and overlapping prints.
Simplify: Skip paint and fill the shell with crayon marks. Extend: Try turning the sponge between prints and describe what changes.
5. Arrange a tulip collage
Materials: Background paper, colored paper, a green paper strip, glue stick and crayons.
Setup and steps: 1. Prepare three large oval petals, a stem strip and two leaf shapes. Children can tear their own petals instead. 2. Invite the child to arrange the petals close together or overlapping above the stem, then place the leaves. 3. Glue the pieces down and add soil, sky or more flowers with crayons.
Letter connection: Write T t nearby: “Tulip begins with /t/.” Explain that this picture represents a T word; the flower itself does not have to form the letter.
Practice opportunity: Planning an arrangement before gluing and describing positions such as above, beside and overlapping.
Simplify: Offer one large flower-head shape instead of separate petals. Extend: Invite the child to make a second tulip with a different arrangement and dictate a sentence about the garden.
For a child who would rather find or match letters than make a picture, choose a playful option from letter activities organized by literacy skill.